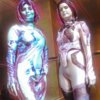
Cortana [H4/5 Build + Project extras]

Status
Not open for further replies.

BlazedStarbon

RCO
Member DIN
S009
*{*}*Believe in Yourself*{*}*​

*** Link to convention videos at the bottom of OP***

Transform that fiery procrastination and rise to the challenge!
I can’t tell you how many people have either told me that this project would be difficult or that it was impossible to do on a budget. Since Halo 5’s release and upon seeing Cortana’s new look, I knew that this was what I had wanted to do. Shoving aside all the negativity and doubt, I began like anyone else: I researched.

~
After months of analyzing in-game cutscenes and what resources were available to me, I was able to start collecting materials back in January of this year.

(Stay positive, and proactive!)

With this build, I hope to add more inspiration to the community alongside members before me, so others can gain further confidence no matter your skill level. The key: start somewhere.
This will be my first serious build and perfection won’t be achieved as such a thing does not exist.
I’ll be going back and forth between this thread and adding things to my Division Agent over the next week. The only thing I can guarantee is to show anyone sifting through this thread, what I can do at my current skill level, and hope for the best.
Needless to say, this project makes me nervous, yet motivation and feedback will become sure-fire inspiration to continue at full force.

(Practice, practice, practice!)

The renders provided by Microsoft do not do Cortana justice, although they have been a major help to differentiate between the hard-light pieces and details that can be painted on. In-game screen captures provided more details for certain pieces like the hip plates, leg armor, and even shoulder/bicep regions. One of the many perks of being a video editor is having a capture card to record necessary bits from in-game for the reason stated above. I have more liberty to zoom in for finer detailing, and actually see every position of her armor.

Cortana 3.jpg Cortana Render.jpg
Like any project, it’s important to have fun during the production stages or else you’re doing it wrong. ;)
So I hope you’ll join me on this swift journey of creating an A.I.

More work has been done on the costume than what's currently shown due to my busy work schedule...
...I’ll be getting in the nitty-gritty pieces this weekend. Expect proper pictures to follow very, very soon...
h5 cortana 11.jpg

*{*}*​

Progress to date:
- When I lose focus or can't figure out how to create a piece, I've resorted to working on boot covers so the costume will have that seamless look to it. I'll be using the aqua bodysuit for this by using iron-on fabric adhesive. I'll be spray painting the shoes to match the suit. If you look closely to the left in the background, you can see the blue bodysuit I'll be wearing.
- Craft foam is used for the shoulder/arm pieces and the shape is game accurate based off of cutscenes, as seen in the second picture below. I kept the stencil I created to show some minor details of how it'll look once I cut into the worbla for detailing.
- The wig and BoomCo. pistol are both set to go.

DSC01848.JPG DSC01849.JPG materials.JPG

-STENCILS! Oh my goodness, you do not know how difficult these were to produce. It took a little over 4 months to get the fitting just right after countless trial and errors. I waisted quite a bit of paper, duct tape, and foil on this project. ;_;
Trying to figure out how to attach everything was a pain. Hence why the stencils are in partial disarray. They're all battered up because I have the foam pieces already cut out for the front part of the chest, elbows, and the middle-back. Still working away on the leg pieces as that will be straight-up TranspArt worbla.
DSC01850.JPG

What you don't see:
- chalk stencil on the bodysuit outlining where fabric paint will be applied
- various foam pieces not yet molded with worbla and details
- wig fitting & make-up test
- hard-light pieces + glow in the dark streaks (post-primer add-on)

New camera : New toy
-Toys R Us were having a sale last week in Canada, and the RC warthog was on the list. I couldn't resist, so it'll be following me to DragonCon this year for the parade.
Other than that, I am in love with my new mirrorless camera.
xbox.JPG DSC01847.JPG

DragonCon 2016 video:


Consider this a teaser of what's to come. Thank you for stopping by, showing interest, or lurking in the shadows!

Cortana 3.jpg


Cortana Render.jpg


h5 cortana 11.jpg


materials.JPG


DSC01848.JPG


DSC01849.JPG


DSC01850.JPG


xbox.JPG


DSC01847.JPG
 
Last edited by a moderator:
WOuld love to borrow your templates for my cortana. I bought the thread last week to start modding my base morphsuit. Looks like we both interpreted the blues in similar and yet different manners. My plan for the boots is to by shoe soles and attach them to the feet of the suit.
 
IshidaRyusei, I created the templates by magnifying Microsoft's renders. Those came in handy for the general shape and hard-light pieces. :)

All weekend I've been working away on altering the stencils from paper -> foam -> worbla.
This was my very first time using worbla, and patience is everything. I managed to get the overall shape of the front done, but had to stop because I'm still figuring out a way to attach the entire thing to my body. I have the back glued in its foam stage, but won't cut into the worbla stencil until I come to a conclusion for the hard-light pieces. The neck area is giving me the most trouble as it's split in the back, but still stressful due to flexibility and where to cut for attachment to the body.

I decided to be brave and take my chances by draping the worbla overtop of the craft foam underlining. It was a risky procedure because it's prone to more heat bubbles when using a heat gun. I managed to keep those to a minimum, hehe...they'll disappear once I add the rest of the detailing.

I layered the foam underneath to achieve the elevated portions. It also helps guide me for painting as well. When creating the foam version, I decided to try Krazy Glue. That stuff is very durable, however, I ended up with a chemical burn. I didn't realize that it would leak (it's liquid, not a viscous medium) as I held the pieces upright to keep the curved shaped....yeah, it really does burn. As both sides adhere to the other, if there's excess, you'll see it crystallize as it's drying. One drop on the hand and bam - you get burned. Use caution and follow all necessary safety procedures when using those types of products. Don't do what I did.
armor.JPG
Back.pngBack - details.JPG

Moving on to the back, I'll probably cut each piece, wrap it in worbla, then attach it to that center piece with the symbol above. There are two of these symbols; one already glued to the back, and this one for the front. Yes, it will be elevated with space magic. I have a plan once the armor is painted.
symbol.JPG


As I was clearing out some SDHD cards for my cameras, I came across these quick gems:
P1030983.JPG <-warlock bond 'Seal of the Twin Eagles', and base coat...which is still hanging in the closet [Destiny],
IMG_1743.JPG <-Halo gravity hammer I made in 19 hours from start to finish for Halloween last year. [all free-hand, no templates were used other than reference images]
 
Last edited by a moderator:
Wow. I completely adore how you're starting your Cortana project and I can't wait to see more progress!
It looks so good already! :D
 
So many cool concepts. I'm intersted to see how you elevate the front emblem as that's something I still have yet to figure out. I'll be doing a lot of my parts with PETG or possibly Transpart as you suggested. The only concern I have is handforming the material as I do not have a vacuform table or the means/space for one of a large size. A lot of the ridging for mine is going to occur under the base suit so I have to ensure I do it correctly. I may nab some of your references here and there too. I'm still trying to figure out some of the mechanics for the hard-light parts (particularly the "pack" like thing she has on her back) as I want to incorporate some form of a basic storage or carry system for valuables.That's going to require a hollowed out spot somewhere on the body and I am also trying to determine the best method to attach the hard-light armours to the body as some of it will have to be permanently affixed and others will have to be removable (again refers to the "pack" and the bust area).
 
CommanderPalmer, seantrooper, & PinnacleCosplay, thank you! I quite literally have 3 days left to finish and need all the motivation I can get.
IshidaRyusei, you amuse me because all your concerns for Cortana's character were the easiest for me to figure out, yet my greatest challenge was forming the neck region, and contemplating how to attach the front to the back with straps and buckles :eek:)
-I can't speak for PETG, but TranspART worbla is shaped the same as regular worbla. Someone can correct me if I'm wrong, but the only difference is the heat setting and to use hand protection (always!!!) not only to reduce finger prints on the clear plastic, but to protect yourself from burning as the TranspART requires at least 90C to shape. (I haven't tested it out yet, but will update when I get to that part very, very soon)
-As for the 'pack', because I overlay worbla atop craft foam, it sticks together - so the pack will be fused this way, and I also give a few shots of krazy glue or gorilla glue. I don't trust my glue gun to hold when working with heavier pieces....especially the pack; it's 2 layers of craft foam + worbla overtop with added detailing. It's solid, but carries some weight.

*What I did notice, was that when the worbla is set and cooled, it still holds some flexibility, so I'll be able to slide the neck part on like a backwards vest, and use velcro to secure it at the back so it's hidden.

This past week has been full of the unexpected with my phone dying (hurray for upgrading!), overtime at work, and other problems. I'm honestly surprised how much I've completed with this project and strongly believe that I will make my deadline before DragonCon. Especially now that I'm on official vacation :p
Right now, my back is killing me from being bent over all day trying to keep the worbla in place as it cooled. The metal coil next to the neck is aluminum found at Michael's craft store and will be used for the Halo around her neck.

Consider the picture a teaser of sorts. It's dark and late, so lighting isn't very good right now. Perhaps I'll model it tomorrow for better reference...and yes, the Forerunner symbol is elevated. Hehe
As it stands, the entire front is complete minus the hard-light pieces, and small reinforcements required where you see light blue foam. That will be fixed with worbla.
armor - chest.JPG

Might get some food and watch RWBY for a bit while I finish highlighting stencils on the bodysuit for painting later tomorrow.
 
Last edited by a moderator:
I'm curious about the mantle emblem you have on the front and how you elevated it. I'm following you for any tips and tricks I can pick up.
 
Work on it! 3 days is enough I'm sure!
You can do it!
We all want to see your Halo 5 Cortana finished, because your progress photos look AWESOME! :D
 
IshidaRyusei, the Mantle symbol piece was mounted by rolling extra worbla fragments together with a heat gun, then setting it on the winged based with added reinforcement from gorilla glue. One benefit to worbla: no scraps! Everything can be molded and reshaped, yet it's very expensive. The elevation isn't as high as in-game. It was a last-minute decision for me as I build everything while making sure it'll survive in a suitcase for a flight. Originally I was going to use the TranspART worbla for the clear effect, but thought otherwise. I'm taking no chances despite how durable it is.

Hope these pictures help clarify...not sure why the last one is sideways, but I realize now that the middle oval piece should've been doubled-up to keep form. Ah well, I'll fix it after Atlanta. I'll be adding the rest of the etched details prior to painting.
DSC01861.JPGDSC01860.JPGDSC01863.JPGDSC01864.JPG
h5 cortana 15.png

CommanderPalmer, I do believe 3 days will be enough. Time to blare some music and continue onward! ;)
 
Last edited by a moderator:
Those photos show some seriously amazing craftsmanship!
I adore how you are assembling all parts together.
 
I glow in the dark...really glow in the dark. You can't quite see it here -found a blue pen I forgot I had - tested it out and it works. (Haven't figured out the low light settings on my camera yet, but this is just awesome.)
Today I will finish this project. More pictures to follow at the end of the day.
Still to do: TranspART, paint bodysuit, and fully test everything. I see the light at the end of this long tunnel. It will get done today. :eek
DSC01871.JPG
 
That's genius! Actually, you gave me an idea as to how to approach it for mine >.> ....>:)
Glad I could help one way or another...seeing as I botched my bodysuit from painting last night due to nerves spasms. Yikes.
Now I have to try to fix what I can today while trying not to cause more physical damage to my arm, and see about getting the hard light pieces done. I'm crying internally over this, lol.

Front.jpg

With that said, for inspiration and motivation to continue onward and be happy with this project as is, a friend linked me the following video: Finished Not Perfect. It's geared towards creators and encourages everyone to finish what they start, no matter how unhappy you are with the initial result - because in the future, you'll get better and better with practice.
What I have to keep in mind is that this is the first costume I've more or less completed in a very short time span. That alone, I should be proud despite all the flaws. :wacko

Due to time constraints, the neck area is a mess. It's held together by snap magnets and a buckle on the left side. For some odd reason, the one side is a little warped, so I'll have to use a snap button to hold the front down in place to keep it straight. Something tells me this was caused by the humidity and weight of the worbla as I painted it outside. Hmm...

I'll definitely have completed pictures later today as I leave tomorrow for Atlanta.
 
Alrighty, with added confidence, I was able to fix, most of the issues with the bodysuit, and add minor detailing to the chest piece. As a last minute decision once again, I scrapped doing the hard light pieces only because I want to do those right. On the other hand, I added one piece of hard light near the waist for now. (I'm hoping that the snap buttons hold, or else I'll return the gorilla glue if it can't do its job, lol)

I managed to add the spine in before the pain set in again....and something else I haven't shown: all the shoulder, arm, and back pieces. They're all made the same way as the chest: worbla over craft foam. I'll add a picture of all the paints and other fun things used in this project.
Once DragonCon is over, I'll focus on touching up the suit to resemble more in-game...so forgive me if the painted legs look horrible. :p

What isn't shown: The spine has metallic paint and it reflects light, and of course everything is highlighted so I kind of glow in the dark, too!
I didn't want to suit up for a picture because if something decides to fall apart, I want to take that chance once.........despite EVERYTHING being reinforced with gorilla glue and glue gun.
phase 1.JPG

Speaking of DragonCon2016....
I'll be in my Division gear both Friday AND Sunday this weekend. So if you see me wearing this sign on my head, feel free to come up and say hi! I'll certainly be doing that to anyone in Halo costumes.
(I also have a 405th Canadian Regiment sticker on the backpack as an identifier.)
Gone Rogue.JPG

I'm going to pack up all the costumes and call it a night. Safe travels to everyone flying out, and here's to seeing most of you at the parade and around Atlanta! :cool

phase 1.JPG


Gone Rogue.JPG
 
Last edited by a moderator:
With Dragon*Con officially over, I've been resting and trying to rid myself of con crud. I guess it evens out after having such a good time being surrounded by amazing people.
What amused me the most last weekend was how much I looked forward to dressing up as a Division Agent more than Cortana because that costume was mostly complete. Only 4 random people knew who I was...and they exchanged gamertags with me. LOL

On the bright side, I stopped counting how many times I was stopped for pictures [dressed as Cortana], after 54. I only wore the costume on Saturday, nearing missed the meetup for the parade due to my alarm not going off, and people STILL complemented me on my makeup (albeit, a rushed job in 25 minutes), and the costume itself remaining unfinished due to time constraints. I can't tell you how happy and surprised that made me feel.

Someone even yelled 'Stop spoiling the game!' at me as I got on the elevator to go back to my room because I was carrying my RC warthog. Talk about random. :lol
The feedback I received was really positive. After spending nearly 17 hours in it, small repairs need to be made to the underside as it rubbed against the bodysuit and flayed the fibers in the fabric. I'll either have to purchase a new suit, and/or properly cover the backing of the armor piece with foam. Worbla is not smooth when hardened, and I need to reshape the neck region so it won't dig in again.
Despite having the shoulder pieces done, I mistakenly used too much gorilla glue and so the snap buttons wouldn't join....hence the buttons are visible in some of the shots. Heh.

There's a lot that needs to be redone or altered as I continue. Especially making all the blue paint uniformed. Too many variations. Whoops. No contact lenses either. Double Whoops (I'm paranoid. Can't put anything in my eyes.) :$
I'll need to alter the wig a bit too so it matched Cortana's length. I barely touched the original shape of it, but kind of like that length...we'll see. Might even add a makeup tutorial, because apparently the route I took was very different than the other Cortanas. Everyone looked spot on during the parade, that's for sure!

I'm going to give myself a week or two to allow my hand to properly heal before I jump back into this project. The confidence and motivation has skyrocketed thanks to my experience alongside the 405th in Atlanta this year. Below are some pictures I took, as well as by others, and even one by a professional photographer with my new friend in her ODST armor. What a blast that was!

Cortana - parade.png by Blaine Self 2.jpg by Joshua Brooks 2.jpg True Light Photography.jpg 14233381_10208834332828168_1025322832_o.jpg
[Photo Credit: myself, Blaine Self, Josh Brooks, Dr. LAW's Lab, True Light Photography, Rancid Props]

Below is a candid shot of me at the Destiny photoshoot alongside SpartanJem013 in his EXO hunter. We were watching the Husky Raid dance video to re-enact a live version. Needless to say, it got the attention of a lot of photographers in the area. Unfortunately my camera decided it didn't like the Atlanta heat, so I had to record everything on an iPhone...but the quality still turned out great. For the video itself, I wish I spent more time positioning people, but it'll still be something fun to watch. Rancid Props and my new ODST friend were kind enough to participate as well. I can't thank everyone enough for all the wonderful memories.
Dr LAWs Photolab.jpg

Maybe I'll get this costume complete in time for next year. Halloween is just around the corner!
 
Last edited by a moderator:
Status
Not open for further replies.
Back
Top