edwardjlw's Halo 4 Master Chief - Scratch build

Status
Not open for further replies.

edwardjlw

Jr Member
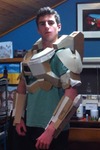
UPDATE: See below for original first post! I will try and keep this section updated with the latest pics and progress.

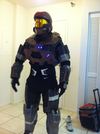
The armour is now complete! Go to post 29 on page 3, and post 49 on page 5 for more finished build pics! :)

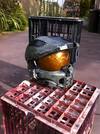
IMG_0533_zps2afb0b94.jpg


IMG_0750_zps9c5e913c.png


IMG_0754_zps767ec373.jpg


MyBuildProgress_zps1fee3bb1.jpg


Hello all!

This is my first post here after many years of lurking the forums being amazed by some of the truly inspiring work that goes on around here. I've been a big Halo fan for years and have been playing since the first game, and I'm really excited to become more involved with this awesome community. I've been wanting to put together my own suit for a while, but for whatever reason have not gotten around to it yet (some would say I've been busy at school, others would just call me lazy :p).

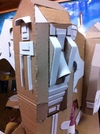
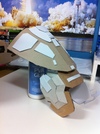
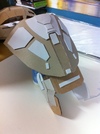
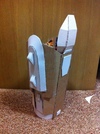
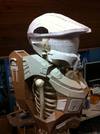
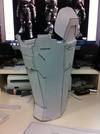
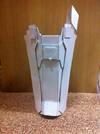
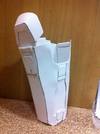
Anyway, recently I was stuck at home with the flu during the holidays, and decided it was the perfect opportunity to get crackin on some armour. Seriously. After years of wanting to do this, I ended up starting the project on a spur-of-the-moment decision whilst being sick. Anyway, after briefly thinking about an ODST or Spartan IV build, I decided to build the iconic Master Chief in all of his shiny halo 4 glory. The build itself is being done with a cardboard structure, and I'll be layering on plenty of foamies to give the suit the depth, detail and accuracy that it deserves. I also plan on doing my own undersuit.


Some (I'm sure there's more I can't think of right now) goals for the suit include:
- Be able to put it on by myself (Because I'm that antisocial -_-)
- Give it manouverability (If I'm atleast able to walk without looking like a malfunctioning C3PO, I'll be satisfied)
- Have it finished by Supanova Adelaide (any other Aussie builders out there?)
- Make it look awesome and as game accurate as possible.

The Supanova convention deadline leaves me with around 3 months of build time, which gives me plenty of time and should mean I won't have to rush too much to get the suit finished.

So, without further delay, here is my progress on the suit:


photo1_zpsace65c92.jpg
photo2_zps9c24ceed.png


In it's current stage, the armour doesn't have a lot of detail to it, instead the pieces I make from cardboard will serve as a base to layer up foamies to achieve the detail I want, as foam is much nicer to work with and has more thickness to play around with. I've heard that certain resins don't mix well with craft foam, so I will have to make sure I either seal the foam properly before resining, or just resin the cardboard base and apply foam over the top once the resin/bondo stage is complete (would appreciate peoples thoughts on this).

Anyway, that's all for now, in future posts I plan on getting more pics up (I got really into the build and kinda didn't think about taking pics along the way :p). Would love to get some feedbak on my plans/progress so far, thanks for checking out my post :)
 

Attachments

  • IMG_0533_zps2afb0b94.jpg
    IMG_0533_zps2afb0b94.jpg
    148.6 KB · Views: 453
  • IMG_0750_zps9c5e913c.png
    IMG_0750_zps9c5e913c.png
    1.1 MB · Views: 322
  • IMG_0754_zps767ec373.jpg
    IMG_0754_zps767ec373.jpg
    110.9 KB · Views: 274
  • MyBuildProgress_zps1fee3bb1.jpg
    MyBuildProgress_zps1fee3bb1.jpg
    65.8 KB · Views: 384
  • photo1_zpsace65c92.jpg
    photo1_zpsace65c92.jpg
    117.1 KB · Views: 292
  • photo2_zps9c24ceed.png
    photo2_zps9c24ceed.png
    1.2 MB · Views: 422
Looking like you're off to a good start so far! Will be interesting to watch the detail build as foamies are added.

Some tips with resin and cardboard.
To be honest, it's not all that strong. I use bits of corrugated to stir/apply resin onto helmets, and they are only a little stiffer than normal.

For foamies, I'm not sure on how resin interacts with them - I don't have any personal experience in this area. I do know that using a PVA/wood glue and water mix (about 50/50) works exceptionally well at sealing foamies and the 10mm sheets. 3-4 coats usually is enough. Most people here use this method if they don't want to/can't get/can't afford Plastidip as a sealant. (Not really sure if any stores stock it here.)
Running a heat gun over it at the end often helps to finish it

However, a 3-month deadline might be pushing the limits - accounting for school and all that.
Best advice I can give? If you are running out of time at the end, don't rush it - rushing leads to (lots of) silly mistakes.
And don't panic if it's not ready for this year. I didn't have/wear a set of armour I was happy with until my THIRD Supanova Syd.


There are plenty of Aussies around here, but can't quickly think of any I know around SA/Adelaide.

Regards,
MS7
 
Mate that is an awesome start, though a 3 month deadline is cutting it close. Waiting for pieces to dry/cure can be painfully slow, especially while its still winter (don't know about you but perth is having a few lovely showers). As MS7 said try not to rush, no biggy if you don't finish it, I gave myself a similar deadline to get a deadspace 2 suit ready for perth comiccon, didn't look to good at the end, and I'm sure someone at the tip will find is interesting.

GL HF
 
Cheers for the replies, it's always great getting some other opinions and advice :)

To be honest the deadline I set was more for motivation than anything else. I've been known in the past to start this kind of a project, then lose interest/motivation to keep going. It is a bit optimistic though, and as you guys said I won't want to be rushing to finish.

Thanks for the tips MS7 on resin and foam sealing. I'll look into your method of glue and water to seal the foam. As far as the cardboard goes, what's my best best with hardening it? The armour itself is fairly sturdy, it just needs something to seal/harden it. Maybe your the glue/water method could help me out here? Anyway I'll test the effectiveness of glue, resin, etc. on some practice pieces and materials once I can get some supplies and see how it works out and what I like the best.

Cheers guys

The PVA sealant trick is from this video, which covers sealing/prepping foam for paint. Just if you needed it for reference.

I'm not really sure if there is a way to harden cardboard... add more layers underneath, I guess? Some sort of additional reinforcing would probably give it more strength. If you are just trying to seal it though, resin will probably work.
No sure if the PVA on it would add strength, or just make a soggy mess. Again, I haven't tried this - so let us know how it turns out if you do.

MS7
 
Wow that's sick! especially it being made out of cardboard *salutes* im really hoping for more progress pictures~~~
 
Update time!

So in the time since I last posted, I've been working hard on the suit. I got myself out of the house to pick up some supplies, and I ended up buying out my local craft stores supply of craft foam and hot glue, and picked up some resin and fiberglass matting as well.

So I've been trying to build up the detail of the pieces with craft foam, and I have to say that foam is one of my new favourite materials. Ever. Of all time ;) seriously though it is very nice to work with.

Here are some pics:

IMG_0152.jpg
All of the pieces so far.

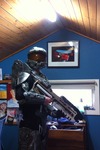
IMG_0123.png
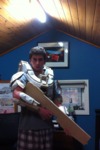
Me wearing the suit. The weapon seen here is a wooden base for a DMR build that I'll finish eventually :)

IMG_0153.jpg
The torso.

IMG_0154.jpg

IMG_0156.jpg

IMG_0160.jpg

IMG_0161.jpg

IMG_0164.jpg

IMG_0168.jpg
Just planning to use a pair of bike riding gloves... they're very comfy and look fantastic, and don't restrict hand movement as much as ski gloves.

IMG_0166.jpg
I crafted the cod and butt plates nearly entirely out of foam, and I'll just seal them with PVA/water so they retain some flexibility.

IMG_0171.jpg
Some exclusive behind the scenes action in my very... professional and tidy studio :p

At the moment the upper body is mostly finished. Apart from finishing the cod piece, and a few minor details here and there, I will be able to start prepping the pieces for resin and glassing. I also just bought a whole bunch of stuff online, including a nice amber bubble visor, some clothing for the base of my undersuit, and various electronics including LEDs and fans. My cardstock for pepping the helmet also just arrived in the mail so I am hoping to get started on that soon to get a bit of a break from scratch building (I love it, but it's been a lot of work the past few weeks).

As for weapons to go with the suit, i was thinking about doing a Halo 4 AR and magnum, but i'd like to get started on those once the suits done. I also really want to do a needler, with a sweet paintjob and LED backlit needles, so one day I will hopefully get around to that.

Little under 3 months til supanova, but I'm making solid progress at the moment so I'll remain optimistic about my deadline :)
 

Attachments

  • IMG_0123.png
    IMG_0123.png
    896.1 KB · Views: 270
  • IMG_0152.jpg
    IMG_0152.jpg
    383.1 KB · Views: 318
  • IMG_0153.jpg
    IMG_0153.jpg
    363.5 KB · Views: 314
  • IMG_0154.jpg
    IMG_0154.jpg
    357.2 KB · Views: 296
  • IMG_0156.jpg
    IMG_0156.jpg
    361.2 KB · Views: 287
  • IMG_0160.jpg
    IMG_0160.jpg
    337 KB · Views: 290
  • IMG_0161.jpg
    IMG_0161.jpg
    327.9 KB · Views: 294
  • IMG_0164.jpg
    IMG_0164.jpg
    425.2 KB · Views: 288
  • IMG_0168.jpg
    IMG_0168.jpg
    309.2 KB · Views: 290
  • IMG_0171.jpg
    IMG_0171.jpg
    343.3 KB · Views: 298
  • IMG_0166.jpg
    IMG_0166.jpg
    340.7 KB · Views: 290
Time for a quick update!

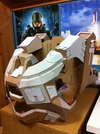
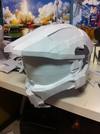
So I've been busy the last few days pepping the helmet. I decided to use Harnor's H4 chief helmet, and it didn't take long before I realised that maybe I should have started something simpler for my first pep. I pushed on, however and seemed to get the hang of it pretty fast. Then I ran into another issue.

IMG_0284_zpsd884edd8.jpg


I created a bobble-head chief!

Now, I should say, I DID actually scale it before I printed it out, though obviously a bit too large :p . Anyway, despite pepping not exactly being my favourite pastime, I re-printed the helmet with the scale decreased by about 10% which will hopefully be more in proportion with the rest of the armour (and my head). Can't say I'm happy to do it all again, but I'd much rather have an accurate looking helmet. I'm only just starting the new helmet now and will get some pics up when it's done. In the meantime, here's some pics of the first helmet, and some other stuff.

IMG_0255_zpsbe8dd621.jpg


IMG_0269_zps171d8e1b.jpg


IMG_0270_zps1223c753.jpg

So my visor just arrived. Quick question, I've seen other members use these visors who made them more reflective by lightly coating the inside with some spray paint. I was just wondering what kind I might need ie. will any old silver work or is there some kind of specific mirrored or chrome paint.

IMG_0265_zps45d8fece.jpg

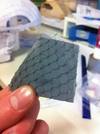
I also figured out how I'm going to achieve the hex pattern of the undersuit. This is just some mesh from a bag of oranges glued to some craft foam. Eager to get my clothing to start working on the undersuit. :)

That's it for now, even though it's a little over-sized I'd appreciate some feedback on my first pep. :)
 

Attachments

  • IMG_0270_zps1223c753.jpg
    IMG_0270_zps1223c753.jpg
    91.8 KB · Views: 286
  • IMG_0255_zpsbe8dd621.jpg
    IMG_0255_zpsbe8dd621.jpg
    83.3 KB · Views: 289
  • IMG_0265_zps45d8fece.jpg
    IMG_0265_zps45d8fece.jpg
    84.8 KB · Views: 271
  • IMG_0269_zps171d8e1b.jpg
    IMG_0269_zps171d8e1b.jpg
    89.5 KB · Views: 296
  • IMG_0284_zpsd884edd8.jpg
    IMG_0284_zpsd884edd8.jpg
    76 KB · Views: 277
My main issue with that visor is that it's too damn big. I still need to find a way to heat it up sufficiently so that I can shape it to a smaller size, I'm thinking about using my oven at home...

Once that's done the silver coating should look like a quite simple step.
 
Thanks everyone for the positive feedback, really helps keep me motivated during the build :)

My main issue with that visor is that it's too damn big. I still need to find a way to heat it up sufficiently so that I can shape it to a smaller size, I'm thinking about using my oven at home...

Once that's done the silver coating should look like a quite simple step.

Yeah I see what you're saying with the visor. What I've seen most people do (and what I'm planning to do myself) is draw out the desired shaped onto the visor using a stencil, then cut it out carefully with a dremel. Then you could just heat the visor with a heat gun or oven and carefully bend it a little until it fits the helmet. The pic below shows what I mean incase I din't explain it very clearly :p

visorplan_zps7274dbd5.jpg


The red line would be approximately where I would cut, then it would just be a matter of curving the visor until it fitted the helmet.

And yeah, I expect as long as you're careful and don't apply to much spray paint, getting the silver coat should be pretty simple. My question is more about what kind of paint I would need to use (I'm hoping a normal can of silver spray paint will do the job)

Thanks for taking a look :)
 

Attachments

  • visorplan_zps7274dbd5.jpg
    visorplan_zps7274dbd5.jpg
    93.3 KB · Views: 279
You asked about visor painting well here is the best method I have been able to find. http://www.405th.com/showthread.php/16910-Tutorial-Make-amp-Paint-Your-Own-See-through-Visor

Thank you soooo much for showing me that tutorial... :D it's very in depth. Only problem is, I don't own a spray gun, though I know some people who might let me use theirs. Anyway, got a lot to do this week so I probably won't make much progress until the weekend.

2 Months and 19 days til my deadline... with the weather starting to warm up again I'm hoping to get some resining and painting done in the next few weeks, and with school break coming up in about a month that should allow me plenty of time to sit down and work on this thing :)
 
Mirra Chrome is what some of the guys use to spray on the inside to get it highly reflective on the outside. In this pic, you can see Blackula727's visor.
29844C55-3806-4CC8-8B17-9C5D8D6C9261-52461-00002F9EAC6D0D13.jpg

Mind you, his was a clear vac formed visor that was dyed then painted on the inside. It should still yield similar results. Best of luck to you and great job so far. Your scaling on the armor looks spot on. :D
 

Attachments

  • 29844C55-3806-4CC8-8B17-9C5D8D6C9261-52461-00002F9EAC6D0D13.jpg
    29844C55-3806-4CC8-8B17-9C5D8D6C9261-52461-00002F9EAC6D0D13.jpg
    75 KB · Views: 231
That's quite impressive, especially for being made of cardboard! Keep the posts coming, I want to see how this turns out. Best of luck!
 
I've cut it with a Dremel and heat gunned the hell out of it, trust me on this one. Heat gun is not gonna be enough IMHO.
 
Update time :)

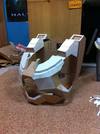
So I've had a busy couple weeks, and was at rowing camp the last four or so days, so progress has been slow. I was able to whip up a shin piece in a few spare hours I had, overall I'm happy with it and it seems to be scaled okay, so I'm happy. Nice to be back to scratch building, after pepping the same helmet twice you need a break :) At this stage I only have one complete but the pieces for the other shin are ready to be put together.

IMG_0330_zps0dff0c46.jpg


IMG_0327_zps346a5009.jpg


IMG_0329_zps48042ad9.jpg


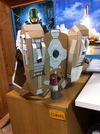
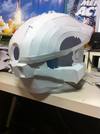
Apart from the shins, my new helmet is in the final stages of pepping. All that remains are a few pieces around the jaws and ears, then I can slap some resin on and glass the thing (should weather permit). I'm much happier with the scale of the new helmet, and looking back I'm so glad I put the time in to redo it as it fits much better now and is more in proportion with the torso. Also, I forgot to turn on edge IDs when I printed it, so it looks pretty kewl ;)

IMG_0331_zps07faa08b.jpg


IMG_0332_zpse3e67f69.jpg


IMG_0333_zpsd9964260.jpg

A comparison of my first and second attempt at the helmet. The One on the left was the first, and scaled too large.

Only a couple weeks till school break, I would love to finish off the legs by then and use my two weeks for resining, glassing and applying and sanding body filler. Wish me luck :cool
 

Attachments

  • IMG_0332_zpse3e67f69.jpg
    IMG_0332_zpse3e67f69.jpg
    74.3 KB · Views: 265
  • IMG_0330_zps0dff0c46.jpg
    IMG_0330_zps0dff0c46.jpg
    76.6 KB · Views: 271
  • IMG_0327_zps346a5009.jpg
    IMG_0327_zps346a5009.jpg
    125 KB · Views: 286
  • IMG_0329_zps48042ad9.jpg
    IMG_0329_zps48042ad9.jpg
    110.8 KB · Views: 265
  • IMG_0331_zps07faa08b.jpg
    IMG_0331_zps07faa08b.jpg
    77.4 KB · Views: 260
  • IMG_0333_zpsd9964260.jpg
    IMG_0333_zpsd9964260.jpg
    87.1 KB · Views: 258
Status
Not open for further replies.
Back
Top