Howdy folks.
Well over on the Pepakura and Cardboard armor forum I am working on a MK.V foam build right here:
http://www.405th.com/showthread.php...m-Armor-Attempt!-Reach-MK-V-Style-*Pic-Heavy*
The reason I bring this up is that I am working on a very personalized spartan. One with a lot of features and additions that aren't found on the presets on the game. So I decided for every 2 hours I put into the armor, I'll put 1 hour into designing the props and additions for the armor. Not only will the props and additions be done by (or before) the time the armor is finished, but it also gives me a break on the armor every night cuts stress from building the armor itself.
This pic one is the machete featured in almost all of the Halo games. ( I've seen them built here before, so sorry for the "well duh" moment)

So I started by blowing up the image to be about the scale I thought would be correct. (Not going for a 1:1 scale honestly, I find that I want to be able to wield it and have a comfortable fit)
this is how it turned out.

For a little background on the weapon, it is in 4 parts currently ( I removed the black crossguard, I didn't like): the blade, the blade channel, and the grips that hold everything together.
All of the components are made out of copolymer sheeting, a resource I have readily available through working at an Orthotics and Prosthetics company. Copolymer plastic is an incredibly resilient plastic, it can't be torn, it flexes to accommodate give , yet remains rigid and doesn't warp. The stuff is used to make braces to correct spinal misalignment, realign legs and feet, it's even used in a lot of artificial limbs! The stuff is life ready! It'll dent if you whack at something with enough force, but it will never warp, bend, or lose the general shape. We have to use routers and belt sanders with carbon grit to add any detail or buff the stuff out, no sandpaper of any kind will do anything but leave a few scratches on the stuff!
The only downside is that copolymer when used in molding has almost no external detail at all. It can capture all the detail you want on the inside of the mold, but has almost no use for armor fabrication whatsoever, I have tried on multiple variations of armor from Halo to Star Wars. The thinnest it comes in is about 1/8 of an inch.
Update:
After working diligently on my armor for 2 hours, at 10 oclock I started working more on the machete.
As you can see, I removed the crossguard. By doing so, the blade didn't sit flush with the hilt anymore, so I elongated the blade channel and sanded down the hilt. It is very light, yet has a nice heft to it, you can swing it around and feel the weight, but what's the point? It's a prop.

I have sanded the edges of the blade to give it a sharpened appearance, but it's not too visible, and won't be until painted. And that won't be for a while there still is a lot of work to be done, it's still very rough and up close it's very unsightly.
And I am trying to come up with a way to wrap the hilt. Not too sure what to do there, if anyone has any suggestions, shoot! I all ears!
I also put together a sheath for it as well! Well, it's not "put together" but when it's all held in place, the blade locks in rigidly and draws very nicely so I'm pretty happy. Still needs to be sanded and prettied up. I am also going to put some felt on the inside to give the blade some cushion, as it will be painted, I don't want it to be scratched and lose visual appeal when drawn.

Anyway, leave some comments on what you'd like to see! Again I am also looking for ideas on what to wrap the hilt in, so chime in! I'd love to hear some suggestions! (no electrical tape, I already tried, it looks trashy...)
Update 8/24/13:
I have successfully put the sheath together and the blade fits like a glove!
The machete is held in place by tension and no matter how hard you shake the sheath, the blade doesn't fall out!
I went for a completely enclosed sheath design, counting there really is no real sheath or way of storing a weapon in Halo that is used as a decoration, I got creative. I am still deciding on a way to paint it, I am thinking an ammo crate design, something that has a serial number, barcode, and info regarding the blade. The sheath will be attatched to the armor "scout" style located on the lower back and can be drawn in a standard grip or reverse grip.
Something else I did was remove a corner of the grip revealing the underlying plastic. I plan on putting a hollow rivet in the handle to allow the blade to be either carried without a sheath by being attatched to a belt, or just as a hole for putting dog tags on for decoration or to remind the spartan of his fallen allies.
pics!
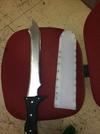
Machete and Sheath (drawn)

Machete and Sheath (un drawn)

And I think I figured out how I want to do the grips. I have some leftover hydro dipping materials from a camo gun stock I worked on once. I am about to order some carbon fiber material for an airsoft project, and I think I am going to add that to the grips for effect!
Now I do need some help, I am looking to paint the blade silver, I have Rustoleum Silver Enamel, I am not going to paint it straight chrome so no Mirrachrome. The only problem is the sheath is in contact with the broad side of the blade as well as certain edges. I don't want the paint to scrape off on the inside of the sheath and make the blade look gross. So I thought about putting some washers in between the nuts and screws to give it a little bit of space while keeping the blade still and rigid.
My question is would adding some kind of fabric like felt reduce friction and maybe reduce scraping the paint off as well?
Update 8/28/13:
No pics right now, because my cam can't pick up the detail on what I did.
Added washers to space the sheath out to avoid potential paint scratching on the blade. In addition to that I have sanded the sheath in prep for painting.
On the blade itself I have cut down some prosthetics parts to go in place of two screws and bolts located parallel with the base of the blade. It keeps it flush without compromising the hilt.
I also sanded the hilt to make the grip feel better and look better.
Update 9/2/13:
Alrighty folks! I have made some changes tonight.
-Traced, Cut, and sanded brand new black co-polymer grips, they are in much better condition and look much cleaner than the clear co-polymer grips I have been using, and I sanded them in a way to give them a nylon fiber/Bakelite look.
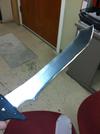
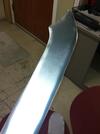
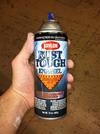
-Painted the Blade, partially. The paint I used is a Rustoleum Stainless Steel enamel. I bought a new can because I cannot find my spray paint anywhere... I don't like the look of the paint as it is more metallic sparkle than smooth metallic like the other can of paint I had, so as soon as I find that, the blade is going to be refinished. On top of that, I plan on painting the flat sides of the blade matte black to give it a hard oxide look.
-Scabbard has been doubled spaced. I put washer between both sides of the walls, it gives the blade plenty of room to be inserted, as well as drawn with minimal damage to the paint on the blade. But here I am still having trouble,
HELP!!! What would anyone suggest that I put inside the scabbard to give it padding so the plastic walls don't scrape the paint off? Some kind of cloth? Craft foam? I need some input here! and thanks!
pic-y pic-y


Well over on the Pepakura and Cardboard armor forum I am working on a MK.V foam build right here:
http://www.405th.com/showthread.php...m-Armor-Attempt!-Reach-MK-V-Style-*Pic-Heavy*
The reason I bring this up is that I am working on a very personalized spartan. One with a lot of features and additions that aren't found on the presets on the game. So I decided for every 2 hours I put into the armor, I'll put 1 hour into designing the props and additions for the armor. Not only will the props and additions be done by (or before) the time the armor is finished, but it also gives me a break on the armor every night cuts stress from building the armor itself.
This pic one is the machete featured in almost all of the Halo games. ( I've seen them built here before, so sorry for the "well duh" moment)
So I started by blowing up the image to be about the scale I thought would be correct. (Not going for a 1:1 scale honestly, I find that I want to be able to wield it and have a comfortable fit)
this is how it turned out.
For a little background on the weapon, it is in 4 parts currently ( I removed the black crossguard, I didn't like): the blade, the blade channel, and the grips that hold everything together.
All of the components are made out of copolymer sheeting, a resource I have readily available through working at an Orthotics and Prosthetics company. Copolymer plastic is an incredibly resilient plastic, it can't be torn, it flexes to accommodate give , yet remains rigid and doesn't warp. The stuff is used to make braces to correct spinal misalignment, realign legs and feet, it's even used in a lot of artificial limbs! The stuff is life ready! It'll dent if you whack at something with enough force, but it will never warp, bend, or lose the general shape. We have to use routers and belt sanders with carbon grit to add any detail or buff the stuff out, no sandpaper of any kind will do anything but leave a few scratches on the stuff!
The only downside is that copolymer when used in molding has almost no external detail at all. It can capture all the detail you want on the inside of the mold, but has almost no use for armor fabrication whatsoever, I have tried on multiple variations of armor from Halo to Star Wars. The thinnest it comes in is about 1/8 of an inch.
Update:
After working diligently on my armor for 2 hours, at 10 oclock I started working more on the machete.
As you can see, I removed the crossguard. By doing so, the blade didn't sit flush with the hilt anymore, so I elongated the blade channel and sanded down the hilt. It is very light, yet has a nice heft to it, you can swing it around and feel the weight, but what's the point? It's a prop.
I have sanded the edges of the blade to give it a sharpened appearance, but it's not too visible, and won't be until painted. And that won't be for a while there still is a lot of work to be done, it's still very rough and up close it's very unsightly.
And I am trying to come up with a way to wrap the hilt. Not too sure what to do there, if anyone has any suggestions, shoot! I all ears!
I also put together a sheath for it as well! Well, it's not "put together" but when it's all held in place, the blade locks in rigidly and draws very nicely so I'm pretty happy. Still needs to be sanded and prettied up. I am also going to put some felt on the inside to give the blade some cushion, as it will be painted, I don't want it to be scratched and lose visual appeal when drawn.
Anyway, leave some comments on what you'd like to see! Again I am also looking for ideas on what to wrap the hilt in, so chime in! I'd love to hear some suggestions! (no electrical tape, I already tried, it looks trashy...)
Update 8/24/13:
I have successfully put the sheath together and the blade fits like a glove!
The machete is held in place by tension and no matter how hard you shake the sheath, the blade doesn't fall out!
I went for a completely enclosed sheath design, counting there really is no real sheath or way of storing a weapon in Halo that is used as a decoration, I got creative. I am still deciding on a way to paint it, I am thinking an ammo crate design, something that has a serial number, barcode, and info regarding the blade. The sheath will be attatched to the armor "scout" style located on the lower back and can be drawn in a standard grip or reverse grip.
Something else I did was remove a corner of the grip revealing the underlying plastic. I plan on putting a hollow rivet in the handle to allow the blade to be either carried without a sheath by being attatched to a belt, or just as a hole for putting dog tags on for decoration or to remind the spartan of his fallen allies.
pics!
Machete and Sheath (drawn)
Machete and Sheath (un drawn)
And I think I figured out how I want to do the grips. I have some leftover hydro dipping materials from a camo gun stock I worked on once. I am about to order some carbon fiber material for an airsoft project, and I think I am going to add that to the grips for effect!
Now I do need some help, I am looking to paint the blade silver, I have Rustoleum Silver Enamel, I am not going to paint it straight chrome so no Mirrachrome. The only problem is the sheath is in contact with the broad side of the blade as well as certain edges. I don't want the paint to scrape off on the inside of the sheath and make the blade look gross. So I thought about putting some washers in between the nuts and screws to give it a little bit of space while keeping the blade still and rigid.
My question is would adding some kind of fabric like felt reduce friction and maybe reduce scraping the paint off as well?
Update 8/28/13:
No pics right now, because my cam can't pick up the detail on what I did.
Added washers to space the sheath out to avoid potential paint scratching on the blade. In addition to that I have sanded the sheath in prep for painting.
On the blade itself I have cut down some prosthetics parts to go in place of two screws and bolts located parallel with the base of the blade. It keeps it flush without compromising the hilt.
I also sanded the hilt to make the grip feel better and look better.
Update 9/2/13:
Alrighty folks! I have made some changes tonight.
-Traced, Cut, and sanded brand new black co-polymer grips, they are in much better condition and look much cleaner than the clear co-polymer grips I have been using, and I sanded them in a way to give them a nylon fiber/Bakelite look.
-Painted the Blade, partially. The paint I used is a Rustoleum Stainless Steel enamel. I bought a new can because I cannot find my spray paint anywhere... I don't like the look of the paint as it is more metallic sparkle than smooth metallic like the other can of paint I had, so as soon as I find that, the blade is going to be refinished. On top of that, I plan on painting the flat sides of the blade matte black to give it a hard oxide look.
-Scabbard has been doubled spaced. I put washer between both sides of the walls, it gives the blade plenty of room to be inserted, as well as drawn with minimal damage to the paint on the blade. But here I am still having trouble,
HELP!!! What would anyone suggest that I put inside the scabbard to give it padding so the plastic walls don't scrape the paint off? Some kind of cloth? Craft foam? I need some input here! and thanks!
pic-y pic-y
Attachments
Last edited by a moderator:


