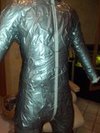
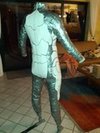
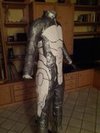
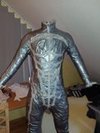
Halo 4 Recon Build + 3D Printer Projects

Status
Not open for further replies.

harican89

Well-Known Member
Hey guys,

a long time ago in a country far, far away.... from the USA xD
I want to make my third and hopefully the last halo armor i will build. The Halo 4 Recon is my upcoming project and will include all the solutions for the damn issues my brain stuck on the last sets of armors.
After building an ODST from Halo 3 (in fiberglass) and the Jun Mod from Halo Reach (in Foam) i want to mix up my expierences with foam and fiberglas.
This build will include all the solutions for the halo 4 spartan armors problems ive considered of.

UPDATE
I just bought a new CTC Printer and iam going to print the Battle Rifle (H4). The File i use is really great.
http://www.405th.com/showthread.php/36190-Release-Halo-4-Battle-Rifle-(For-CNC-Machines)

i edited some of the parts and slice the battle rifle to fit in my printer.

Here is the UStream Livestream of printer.
http://www.ustream.tv/channel/ctc-3d-printer---workflow

th_IMG_20140418_172510_zpsy8vj3prw.jpg th_Messenger_5862908562549581925_13978263288866136_zpsdzdzgdw0.jpg th_IMG_20140418_172517_zpsscszstb5.jpg

Watch the latest post to get further Updates.

Here are my last two armors:
http://i1183.photobucket.com/albums/x463/harican89/finished armor/P8200129.jpg
http://i1183.photobucket.com/albums...151230026927866_1463650410_o2_zps9632b92a.jpg


i will subdivide the build in 3 stages.
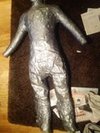
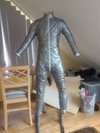
  1. The Undersuit (Duct-Tape Dummy)
  2. The Fiberglas Armor Plates
  3. The Armor Strapping & Electronics (led, fan for the helmet, helmet Com with microphone, speakers and so on. maybe a cooling solution)


Tutorials:

Undersuit:


The Undersuit is a little tricky and i want to explain my solution. Most of the armor plates will be screwed on the undersuit directly and i want the sew the armor strapping directly inside the undersuit, hidden beneath the foam padding.
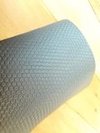
I will use some foams, fabrics in diffrent colors, some perfect gloves by O'neil, an 2 pieces thermo underwear and some hex-pattern foam padding. most of the foam pieces will be carved in the shape of muscles and get covered with the fabric and a black mesh to get the right look.
another 405th used this method one year ago and its mostly perfect.

8363605774_d36c9169b7_zpseead71dd.jpg


instead of his build, i want to reduce the abount of muscle padding. within these foam padding i want to implement some hard foam (eva foam) details like the one in this build:

wgT82BD.jpg


This will help me to get the perfect spartan muscle look and the correct details without any hard circumstances. but the idea, inspired by myself, is the strapping. i want to screw all the armor pieces directly on the undersuit without any visual strapping belts. but i will come to this point when iam ready ^^
The basic idea of this build is to get one "ideal" method for the halo 4 spartan builds, because until now, there is no perfect way to get the armor AND the undersuit looking great. i want to help you out and will offer many tutorials for the "way i want to build it".

First Step:
The Undersuit

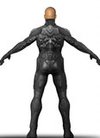
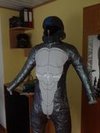
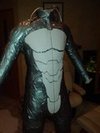
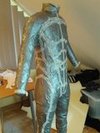
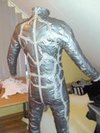
I will create a duct tape dummy and draw the template for the undersuit on it. after that i will create the pattern. the next image shows my undersuit pattern design in red lines, the hex foam in orange and the eva foam details in blue. the zippers are marked with yellow.

Unteranzug-All_zpsfc6d124f.jpg


Next week i will order all the materials i need for the undersuit and the first bucket of fiberglas resin and fiberglas cloth. the armor i want to make is the halo 4 recon.

979_large.jpg

BTW: i want to thanks fat-hi555 for most of the files i want to use and the great work he has done for me :)

th_IMG_20140418_172510_zpsy8vj3prw.jpg


th_Messenger_5862908562549581925_13978263288866136_zpsdzdzgdw0.jpg


th_IMG_20140418_172517_zpsscszstb5.jpg


8363605774_d36c9169b7_zpseead71dd.jpg


wgT82BD.jpg


Unteranzug-All_zpsfc6d124f.jpg
 
Last edited by a moderator:
Okay. it was a long last month and now iam free for the project.
on the weekend i will finish the duct-tape dummy and start with the template for the undersuit.

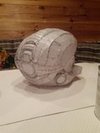
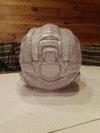
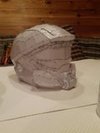
i already started the helmet and used the file created by monkeyfuj. i have to admit, that ive made some fixed on the 3d Model and now the visor is just in shape ^^

here are the helmets:
7a0e9c45-087c-432f-9540-9c91d02ad1bd_zps7ebc2c27.jpg
7442a89f-afa1-4403-bb92-93be462eaaf2_zpsbc17ec5a.jpg


ive added the first 2 layers of resin (the picture was taken after the first one):
ef1b3f90-21ba-4145-8d89-eca1e3974671_zpsc31343e2.jpg


on the next weekend iam on the way to harden the helmet with my new fiberglascloth.
 

Attachments

  • 7a0e9c45-087c-432f-9540-9c91d02ad1bd_zps7ebc2c27.jpg
    7a0e9c45-087c-432f-9540-9c91d02ad1bd_zps7ebc2c27.jpg
    306.8 KB · Views: 297
  • 7442a89f-afa1-4403-bb92-93be462eaaf2_zpsbc17ec5a.jpg
    7442a89f-afa1-4403-bb92-93be462eaaf2_zpsbc17ec5a.jpg
    280.5 KB · Views: 279
thanks for the compliment. within the next month i will posts some tutorials for my undersuit and the other points i mentioned. :)
 
The weekend is over and a new week is going to start.
Over the last 2 Days i spend the noon and the evening with hardening the two helmets with fiberglas cloth and its going pretty well.

th_IMG_20131027_023008_zps497bde29.jpg th_IMG_20131027_023033_zps3f3d0dbd.jpg th_IMG_20131027_023052_zps7428b49e.jpg

The other helmet looks the same ^^ next week iam planing to finish the hardening process and start with bondo ;-)

The next big deal is the undersuit and the ducttape dummy i talked about.

Here is the first step for the undersuit.

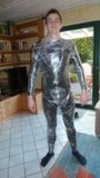
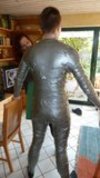
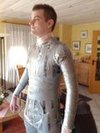
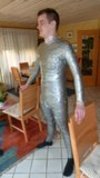
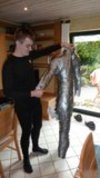
Undersuit Tutorial Part 1 - Duct Tape Dummy

What will you need?

  • some kind of a slim underwear.
    (if you want to follow my way for the undersuit, you will need a good thermo underwear, which keeps you cool, because this will be the first layer of the undersuit)
  • duct-tape
    (1 roll with 5cm*50m = 2,5² and the average body surface for men is 1,9m² and for women 1,6m². with 2-3 layers you will need at least 2 rolls with 5m²)
  • plastic wrap (1-2 rolls)
  • tiny scissors


Steps:

  1. jump in your underwear ^^
  2. cover your body with the plastic wrap
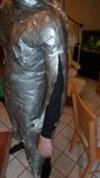
  3. use the duct-tape to wrap your complete body on the surface of the plastic wrap
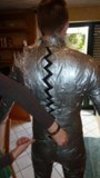
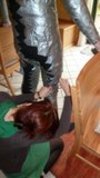
  4. the scissors helps you out of the tape. use zig zag lines instead of straight cutting lines.
  5. after you get out of the suit, tape the zig zag lines back together.
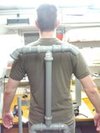
  6. optional: use some pipes to create a stand for your duct-tape dummy. its a good choice for a mannequin
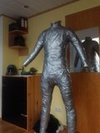
  7. use some old newspapers to fill up your dummy ;-)


Additional Information:

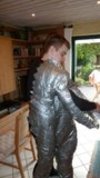
You will need an assistent who will helps you because with the plastic wrap and especially the duct tape you wont be able to move around or bend over.
The whole process will take some time but if you dont work under pressure it will take around 2 hours the get it done.

Images:
th_P1050310_zpsb26d9a4c.jpg th_P1050311_zps53e30c08.jpg th_IMG_20131027_140726_zps7c4197d2.jpg th_IMG_20131027_140748_zps4dd59366.jpg th_P1050319_zps83dd64d3.jpg th_P1050321_zps8b5cb244.jpg th_P1050323_zps7721d35b.jpg th_P1050327_zps6db5601c.jpg th_P1050328_zps7a0a2bd4.jpg th_P1050329_zps5957d9b9.jpg th_P1050332_zps3e643be1.jpg th_P1050335_zps1e1a62a4.jpg
 

Attachments

  • th_IMG_20131027_023033_zps3f3d0dbd.jpg
    th_IMG_20131027_023033_zps3f3d0dbd.jpg
    4.4 KB · Views: 355
  • th_IMG_20131027_023052_zps7428b49e.jpg
    th_IMG_20131027_023052_zps7428b49e.jpg
    4.3 KB · Views: 332
  • th_IMG_20131027_023008_zps497bde29.jpg
    th_IMG_20131027_023008_zps497bde29.jpg
    4.2 KB · Views: 323
  • th_P1050311_zps53e30c08.jpg
    th_P1050311_zps53e30c08.jpg
    6 KB · Views: 343
  • th_P1050310_zpsb26d9a4c.jpg
    th_P1050310_zpsb26d9a4c.jpg
    5.6 KB · Views: 343
  • th_IMG_20131027_140726_zps7c4197d2.jpg
    th_IMG_20131027_140726_zps7c4197d2.jpg
    6.7 KB · Views: 372
  • th_P1050319_zps83dd64d3.jpg
    th_P1050319_zps83dd64d3.jpg
    5.9 KB · Views: 353
  • th_IMG_20131027_140748_zps4dd59366.jpg
    th_IMG_20131027_140748_zps4dd59366.jpg
    6.3 KB · Views: 338
  • th_P1050327_zps6db5601c.jpg
    th_P1050327_zps6db5601c.jpg
    5.6 KB · Views: 338
  • th_P1050323_zps7721d35b.jpg
    th_P1050323_zps7721d35b.jpg
    5.2 KB · Views: 329
  • th_P1050321_zps8b5cb244.jpg
    th_P1050321_zps8b5cb244.jpg
    5.3 KB · Views: 337
  • th_P1050328_zps7a0a2bd4.jpg
    th_P1050328_zps7a0a2bd4.jpg
    5.7 KB · Views: 347
  • th_P1050329_zps5957d9b9.jpg
    th_P1050329_zps5957d9b9.jpg
    5.3 KB · Views: 331
  • th_P1050332_zps3e643be1.jpg
    th_P1050332_zps3e643be1.jpg
    5.6 KB · Views: 343
  • th_P1050335_zps1e1a62a4.jpg
    th_P1050335_zps1e1a62a4.jpg
    5.6 KB · Views: 331
Update: This update is 4 days old but i had no time to post it. tomorrow evening i will start with the undersuit pattern design on my dummy and continue with bonding my helmets.

But here are the images.

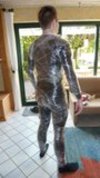
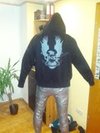
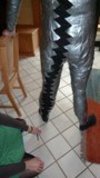
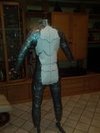
First of all, the Duct-Tape Dummy ist ready to use. I implemented several pipes which creates the basic scructure for the skeleton and use simple newspapers to fill the dummy up. the left right leg and arms came out pretty nice but the left leg is kinda creepy :) but this doesnt matter because you just need one good side for the undersuit template.

th_IMG_20131102_161647_zps2bf698e8.jpg th_IMG_20131109_185518_zps2e2a85ff.jpg th_IMG_20131110_125928_zps95945d81.jpg th_IMG_20131110_005903_zps10956ac0.jpg th_IMG_20131110_005935_zps87c1aa08.jpg th_IMG_20131110_135517_zps36b3ab83.jpg

For the next Steps (Will be updated on Sunday):
  1. Create a Simple and in-complete Template for the Undersuit on Computer
  2. Scale the template to fit nearly perfect
  3. Print, cut and bring it on the dummy with some painting tape
  4. add the rest of the template free by hand


Hope you like my Dummy :)
 

Attachments

  • th_IMG_20131102_161647_zps2bf698e8.jpg
    th_IMG_20131102_161647_zps2bf698e8.jpg
    5.9 KB · Views: 340
  • th_IMG_20131110_005935_zps87c1aa08.jpg
    th_IMG_20131110_005935_zps87c1aa08.jpg
    5.9 KB · Views: 332
  • th_IMG_20131110_005903_zps10956ac0.jpg
    th_IMG_20131110_005903_zps10956ac0.jpg
    5.5 KB · Views: 303
  • th_IMG_20131110_125928_zps95945d81.jpg
    th_IMG_20131110_125928_zps95945d81.jpg
    5.3 KB · Views: 321
  • th_IMG_20131109_185518_zps2e2a85ff.jpg
    th_IMG_20131109_185518_zps2e2a85ff.jpg
    6.8 KB · Views: 319
  • th_IMG_20131110_135517_zps36b3ab83.jpg
    th_IMG_20131110_135517_zps36b3ab83.jpg
    5.7 KB · Views: 336
  • th_IMG_20131110_005935_zps87c1aa08.jpg
    th_IMG_20131110_005935_zps87c1aa08.jpg
    5.9 KB · Views: 318
Okay i started to work on the undersuit pattern, take my time to try some ways and here is my favorit solution to work:

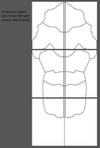
Undersuit Tutorial Part 2 - Undersuit Pattern / Template

What will you need?

  • Printer, Paper, Scissors, Crafting Glue or Tape
  • Image of your favorit Undersuit design (Front, Back or Side)
  • Photo editing software (Gimp is free)
  • Software called Posterrazor

th_Back_zps5fc1ec86.jpg

Steps:

  1. Open up Gimp and import your image
  2. Select the tracing path tool in the tool bar
  3. Start with the tracing
  4. After you finished your first path, select the path tab in the window on the top right and create a new path layer
  5. Continue with the tracing
  6. After you finished, select the layer tab and create an empty layey
  7. Switch back to the path tab, right click on every path and select the 'fill out path line' option [Or called something similar]
  8. Modify the thickness of the line and hit enter
  9. Hide the image layer and start with the scaling
  10. Save the project file and export your image (jpeg, png,...)

th_Gimp_TracingPaths1_zps64334dd5.png th_Gimp_TracingPaths2_zpsf9481e76.png th_Gimp_TracingPaths4_zps7d9456c0.png th_Gimp_TracingPaths5_zpsc3d4dbe2.png th_Gimp_TracingPaths7_zps5e92181c.png


Now print your template with posterrazor

th_Posterrazor1_zps23093db8.png th_Posterrazor2_zps99f5f445.png th_posterrazor3_zps0a4a4eb5.png


Additional Information:

  • The undersuit pattern needs only one side, because you can mirror the other. in Gimp you can do this by selecting the transformation option und mirror horizontal.
  • Keep your undersuit design simple as possible because tiny and small pieces are hard to cover with the fabric in the later process.


Here are my results for the front side:

th_IMG_20131116_101850_zpsbe1736e5.jpg

I also worked on my two helmets, but there is no image to show :) sry
For the both projects i promise a huge update :) (Hope so xD)
 

Attachments

  • th_Back_zps5fc1ec86.jpg
    th_Back_zps5fc1ec86.jpg
    4.2 KB · Views: 328
  • th_Gimp_TracingPaths2_zpsf9481e76.png
    th_Gimp_TracingPaths2_zpsf9481e76.png
    23.5 KB · Views: 343
  • th_Gimp_TracingPaths1_zps64334dd5.png
    th_Gimp_TracingPaths1_zps64334dd5.png
    24 KB · Views: 354
  • th_Gimp_TracingPaths4_zps7d9456c0.png
    th_Gimp_TracingPaths4_zps7d9456c0.png
    15.8 KB · Views: 328
  • th_Gimp_TracingPaths5_zpsc3d4dbe2.png
    th_Gimp_TracingPaths5_zpsc3d4dbe2.png
    13.7 KB · Views: 321
  • th_Gimp_TracingPaths7_zps5e92181c.png
    th_Gimp_TracingPaths7_zps5e92181c.png
    10.3 KB · Views: 310
  • th_Posterrazor1_zps23093db8.png
    th_Posterrazor1_zps23093db8.png
    14.2 KB · Views: 323
  • th_IMG_20131116_101850_zpsbe1736e5.jpg
    th_IMG_20131116_101850_zpsbe1736e5.jpg
    5.2 KB · Views: 322
  • th_posterrazor3_zps0a4a4eb5.png
    th_posterrazor3_zps0a4a4eb5.png
    7.4 KB · Views: 320
  • th_Posterrazor2_zps99f5f445.png
    th_Posterrazor2_zps99f5f445.png
    18 KB · Views: 329
Update:
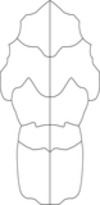
Okay, i finished tracing all of the patterns i need. these are the basic areas for the front, back and the side. the rest have to be added free by hand.
here are the simple steps i followed:

Adjust the Template:
1. After scaling the patterns just cut them out and arrange them on the right areas. Use some tape for pins to hold them on spot.
2. Use a dark pen to mark all of the outlines. if you have to fill up some empty spots around the patterns, just do it. the traced patterns dont have to fit perfectly.
3. Cover the dark lines with painters tape and copy / trace all the lines through the painters tape. it will help you to find the lines and to adjust some mistakes in the template.
4. the next step is the fill out all the empty areas with custom patterns by free hand.

Images

th_3d4a692c-57fb-47fb-b750-378307bcb176_zps24e59247.jpg th_IMG_20131121_202725_zps9f555ecd.jpg


th_IMG_20131121_202744_zps886a0d5d.jpg th_IMG_20131121_205127_zps47f2547b.jpg th_IMG_20131121_224219_zps90eb8601.jpg th_IMG_20131123_001247_zpsbd647d92.jpg th_IMG_20131123_001308_zps44f9ebee.jpg


th_IMG_20131124_125930_zps0cb19db4.jpg th_IMG_20131124_125939_zpsb32738f0.jpg th_IMG_20131124_125954_zps4521452c.jpg


And here is the first try creating the material to cover the upcoming foam. its the material i want to use to cover the shoulders, some back parts and the major side parts. its just for detailing. the undersuit is still breathable.

th_IMG_20131124_130803_zps52559d3e.jpg


Hope you like the results.
by the way. this step is 4 days old. this weekend i dont have much time to work on the undersuit (just finishing the template and start to create the first foam templates. the ps4 is waiting for my attention :)
 

Attachments

  • th_3d4a692c-57fb-47fb-b750-378307bcb176_zps24e59247.jpg
    th_3d4a692c-57fb-47fb-b750-378307bcb176_zps24e59247.jpg
    5 KB · Views: 247
  • th_IMG_20131121_202725_zps9f555ecd.jpg
    th_IMG_20131121_202725_zps9f555ecd.jpg
    4.8 KB · Views: 298
  • th_IMG_20131121_205127_zps47f2547b.jpg
    th_IMG_20131121_205127_zps47f2547b.jpg
    4.9 KB · Views: 315
  • th_IMG_20131121_224219_zps90eb8601.jpg
    th_IMG_20131121_224219_zps90eb8601.jpg
    4.7 KB · Views: 299
  • th_IMG_20131121_202744_zps886a0d5d.jpg
    th_IMG_20131121_202744_zps886a0d5d.jpg
    6.3 KB · Views: 287
  • th_IMG_20131123_001308_zps44f9ebee.jpg
    th_IMG_20131123_001308_zps44f9ebee.jpg
    6.5 KB · Views: 298
  • th_IMG_20131123_001247_zpsbd647d92.jpg
    th_IMG_20131123_001247_zpsbd647d92.jpg
    5.5 KB · Views: 295
  • th_IMG_20131124_125930_zps0cb19db4.jpg
    th_IMG_20131124_125930_zps0cb19db4.jpg
    5.6 KB · Views: 313
  • th_IMG_20131124_125939_zpsb32738f0.jpg
    th_IMG_20131124_125939_zpsb32738f0.jpg
    6.2 KB · Views: 306
  • th_IMG_20131124_125954_zps4521452c.jpg
    th_IMG_20131124_125954_zps4521452c.jpg
    6.4 KB · Views: 306
  • th_IMG_20131124_130803_zps52559d3e.jpg
    th_IMG_20131124_130803_zps52559d3e.jpg
    4.5 KB · Views: 285
Undersuit Patterns

Here are the traced patterns for the undersuit i used:


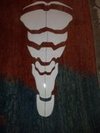
th_Schnittmuster_front_h70_w375_zps58c86a73.png th_Schnittmuster_Traced_Back_zps0cde759f.png th_Schnittmuster_Side_zps6e9ec670.png
 

Attachments

  • th_Schnittmuster_Traced_Back_zps0cde759f.png
    th_Schnittmuster_Traced_Back_zps0cde759f.png
    4.8 KB · Views: 318
  • th_Schnittmuster_Side_zps6e9ec670.png
    th_Schnittmuster_Side_zps6e9ec670.png
    4.4 KB · Views: 309
  • th_Schnittmuster_front_h70_w375_zps58c86a73.png
    th_Schnittmuster_front_h70_w375_zps58c86a73.png
    10.3 KB · Views: 293
Love what you're doing man. I have a question though, If I had a lycra suit could I attach pieces of foam to it underneath my armor to make it look more like the nano suit from the game? If so are there templates out there that I could use?
 
actually i do the same.
my suit is made of a thermo suit (not lycra) and on top of that i sew and glue some foam pads like the muscles covered with fabric and mesh. there are no templates currently and thats the reason why i post them in my thread.

you can glue those foam pads with latex glue.
 
Incredible. It is a very good project. I like the result of material to cover the undersuit!!
 
Okay... Winter season break ^^ lazy for a long time. last week i continued with the work on my helmet. now i will concentrate my work on ONE helmet and start with the Shoulders. The chest piece have to wait until i get my undersuit ready. i will try to switch to another fabric. this should save some time.
 
Status
Not open for further replies.
Back
Top