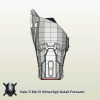
The Mjolnir Mk VI forearm Pepakura armor model lacks a prominent feature at the antecubital space (elbow pit). This feature is completely absent in the normal detail models, and although represented in the High Detail (HD) models, it’s very inaccurate when compared against reference photos:


I chose to create this detail such that the armor pieces more-closely resemble their appearance in photos. Since I’m better with computers than I am at sculpting, and producing a Pepakura file of the detail would enable it to be scaled more easily, the obvious option was design a model for pepping (or 3D-printing for those of you with access to such a magical device). TurboCAD Mac Pro was used to create a 3D model from many wonderful reference photos provided by SirPalesAlot (thank you!).

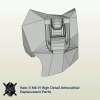
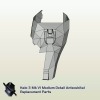
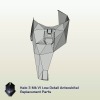
Four versions of the detail were created with incremental degrees of complexity for compatibility with the existing Mk VI forearm models:
ND (Normal Detail) Mk VI Forearm by ROBOGENESIS
Height = 381
Width = 193
Depth = 180
Scale = 86.0
ND Mk VI Antecubital Detail

MD (Medium Detail) Mk VI Forearms by flying_squirl
Height = 290
Width = 342 (model includes both forearms)
Depth = 134
Scale = 2.272698
MD Mk VI Antecubital Detail

HD (High Detail) Mk VI Forearm by nugget
Height = 330
Width = 177
Depth = 149
Scale = 465.522422
HD Mk VI Antecubital Detail

UD (Ultra-High Detail) Mk VI Forearm by SirPalesAlot and RobotChicken
Height = 304
Width = 169
Depth = 135
Scale = 1.0
(Antecubital detail is integrated into the forearm model.)

3D (3D Printer) Mk VI Forearm by SirPalesAlot and RobotChicken
Height = 304
Width = 159
Depth = 135
Scale = 1.0
(Antecubital area is flat for attaching a 3D-printed detail part.)


Scaling The Model
The detail parts are drawn at the same scale as their associated forearms, so simply enter the same Scale value for the antecubital detail model in Pepakura that was used for the forearm model and the parts will print at the correct size. Each of the detail models includes the forearm's perimeter polygons for interfacing with the detail. To avoid having to modify the forearm unfold, these modified perimeter polygons also include the full forearm part they're associated with. This means you can simply swap out forearm parts with the detail parts without needing to get your hands dirty with any changes to the unfolding (unless you want to).
After resizing the detail model to match the scale of your forearm, the page layout will probably need adjusting. The detail models are all drawn for the right forearm, so you will need to Mirror the model in Pepakura (invert it) to print parts for the left forearm. Each file is set up with Edge IDs turned off (the reason why should become obvious if you turn them on), and due to the parts size I’ve set the Lineweight print setting to 1 so they print clearer (hairlines allow for more precise folding and cutting). You’ll see in the photos just how small the pieces were for my child-sized build and I was able to successfully assemble them (tweezers and magnifier lamp were indispensable), so if anything it should be a bit easier with larger, adult-sized, parts.
I chose to create this detail such that the armor pieces more-closely resemble their appearance in photos. Since I’m better with computers than I am at sculpting, and producing a Pepakura file of the detail would enable it to be scaled more easily, the obvious option was design a model for pepping (or 3D-printing for those of you with access to such a magical device). TurboCAD Mac Pro was used to create a 3D model from many wonderful reference photos provided by SirPalesAlot (thank you!).
Four versions of the detail were created with incremental degrees of complexity for compatibility with the existing Mk VI forearm models:
ND (Normal Detail) Mk VI Forearm by ROBOGENESIS
Height = 381
Width = 193
Depth = 180
Scale = 86.0
ND Mk VI Antecubital Detail
MD (Medium Detail) Mk VI Forearms by flying_squirl
Height = 290
Width = 342 (model includes both forearms)
Depth = 134
Scale = 2.272698
MD Mk VI Antecubital Detail
HD (High Detail) Mk VI Forearm by nugget
Height = 330
Width = 177
Depth = 149
Scale = 465.522422
HD Mk VI Antecubital Detail
UD (Ultra-High Detail) Mk VI Forearm by SirPalesAlot and RobotChicken
Height = 304
Width = 169
Depth = 135
Scale = 1.0
(Antecubital detail is integrated into the forearm model.)
3D (3D Printer) Mk VI Forearm by SirPalesAlot and RobotChicken
Height = 304
Width = 159
Depth = 135
Scale = 1.0
(Antecubital area is flat for attaching a 3D-printed detail part.)


Scaling The Model
The detail parts are drawn at the same scale as their associated forearms, so simply enter the same Scale value for the antecubital detail model in Pepakura that was used for the forearm model and the parts will print at the correct size. Each of the detail models includes the forearm's perimeter polygons for interfacing with the detail. To avoid having to modify the forearm unfold, these modified perimeter polygons also include the full forearm part they're associated with. This means you can simply swap out forearm parts with the detail parts without needing to get your hands dirty with any changes to the unfolding (unless you want to).
After resizing the detail model to match the scale of your forearm, the page layout will probably need adjusting. The detail models are all drawn for the right forearm, so you will need to Mirror the model in Pepakura (invert it) to print parts for the left forearm. Each file is set up with Edge IDs turned off (the reason why should become obvious if you turn them on), and due to the parts size I’ve set the Lineweight print setting to 1 so they print clearer (hairlines allow for more precise folding and cutting). You’ll see in the photos just how small the pieces were for my child-sized build and I was able to successfully assemble them (tweezers and magnifier lamp were indispensable), so if anything it should be a bit easier with larger, adult-sized, parts.
Attachments
Last edited by a moderator:


