Worbla on Pepakura (foam free) Tutorial

Status
Not open for further replies.

Nephtis

New Member
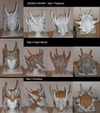
I was asked several times now to explain how I created my armor with Worbla and since I had another model I built sitting on my desk I finished it for this tutorial.

Hope there aren't too many mistakes, I am not a native speaker nor used to write up things like this!

worbla_on_pepakura_tutorial_by_nephtis-d6zw8f3.jpg
 

Attachments

  • worbla_on_pepakura_tutorial_by_nephtis-d6zw8f3.jpg
    worbla_on_pepakura_tutorial_by_nephtis-d6zw8f3.jpg
    627.7 KB · Views: 821
Beautiful!!!

I tried to lay worbla over a just resined piece but it took to the angles too much. I guess maybe the papermache smooths out some of the harsh angles.

What glue do you use for papermache? how long to you let the papermache dry? and how many layers of paper mache are needed?

I love this! very excited to try it. yay worbla!!

Thank you sooo much Nephtis. It is a very nice and well put together tutorial...

Annabellector
 
Thanks!

And to answer your questions:

1) ANGLES: You are right the paper maché does smooth out some of the angles, the more layers the less angles remain. For organic armor that's a good thing. Personally, I do like to keep some (If you look at my breastplate, the shoulders and the sides of the helmet I even highlighted then painting) while I make sure others won't show.

2) LAYERS: It depends on how sturdy your build is - a lot of flaps in a small area can be stable enough for a single layer, larger smooth surfaces will need more. I build the dragon bone warhammer and I added 1 layer from the inside while I was still building it and several from the outside to smooth out most angles. It is currently drying but I'll post pictures.
The model is easy to warp while the glue is still wet -so be careful when you handle it! However, you can also use it to your advantage and shape it to your body I pinned my body armor to my mannequin and left it drying there and left bracers drying with some rubber band pressing them to bottles.

3) GLUE: I use a white/wood glue. It can be bought for little money in large quantities. I am sure any glue will do, really, at this point it's a question of your budget. The one in my build retains a bit of flexxibility when dry. Oh, and I use a fast drying product because I also use the same glue to put several layers on the surface of the finished Worbla build as a base instead of gesso because I am impatient.
BONUS TIP PAINTING: 2 layers of white glue will just reduce the texture of the Worbla a bit without the need to sand - which is good enough for me and my projects. It takes a few layers more to smooth it out completely. Kamui Cosplay has a very helpful post on this Gesso vs. Glue: https://www.facebook.com/photo.php?fbid=634678316560685&set=a.681417608553422.1073741836.155539481141240&type=3&theater

4) TIME: I leave my paper maché drying over night. Do calculate sufficient time for it, as long as it's still wet it can be warped.
 
Great tips and advice.

You are good at the explanations and u wet my appetite to build more.
This may be very beneficial right now as an arm injury is delaying my sanding ability.

Wow. Am so in awe and so ready to try this. I love the look of your builds. I am also a believer in a more organic less perfect look. It adds more realism to the pieces.

And it makes so much sense to papermache the inside during a build... that didn't even cross my mind as an option but I can see the brilliance of that tip since u mentioned it.

Again.... Nephtis, you are pretty dang impressive and I am excited to see more of your builds. Very Inspirational.

I appreciate the time you took to respond to private messages as well as post additional follow ups. 8). Will try to show you I can be a good student by what you have taught me lolol
 
Hey guys!

I just thought I should update you - I have been experimenting with some other thermoplastic materials & techniques for my builds.

This time I used a combination of Worbla's finest art and Worbla's deco Art, white pellets with a melting temperature that is a little lower than the melting temmerature of Worbla's Finest Art. In case you are wondering Worbla's Finest Art has ~90°C, Worbla's Deco Art has ~65°C, so make sure you work on a heat-proof underground.
BONUS TIP: Baking paper can handle heat & is non-sticky so it works really well to roll or knead your Deco Art on but it will not keep the heat from your heat gun from your desk by itself.

BTW, there is a similar product called 'Friendly Plastic' that seems to be available in the US that can be bought in pellets, too. If you look around the internet, you'll find tuturials on how to use and even dye it (haven't tried that yet but it is worth investigating.

Why did I use it?

1) It's sticky enough to be combined with both the paper maché base or on top of the Worbla's finest art without the need for addditional products (in fact it is extremely sticky when you use dry heat to warm it, if you heat the pellets in water you have a more managable product).

2) You can use it to sculpt, and re-heat it to correct mistakes or add to it. The lower melting temperature means you can handle it with your fingers if you wet them (I still burned myself once, so be careful).

3) It is easier to create a smooth surface and I wanted a obvious texture difference between the hammered metal and the bone parts for this project. You can use wet fingers to smooth it or tools. Make sure whatever you use (fingers, tools) is wet so it doesn't stick to your project.

As always, I'll gladly answer any technical questions you might have, for now, let the progress images speak for themselves.
jagged10.jpg
 

Attachments

  • jagged10.jpg
    jagged10.jpg
    8.6 KB · Views: 488
Status
Not open for further replies.
Back
Top