Halo 3 ODST Now Finished!

Status
Not open for further replies.

Halo Master

Member
Hello everyone! Since my last Marine build was a fail, and since I had a scratch foam ODST lying around I decided to redo it. Here is the progress so far....

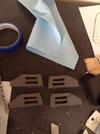
First off are my pepped pieces for the chest.

DSC01070_zps5e4b1134.jpg

Now for the individual pics

DSC01071_zps5cd91358.jpg


DSC01072_zpsf3ffb8eb.jpg


DSC01073_zps8c72f3cf.jpg


DSC01074_zpsc7e1a489.jpg

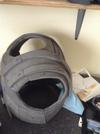
Here is the helmet I started in the first ODST. Keep in mind its only in its rough stages. Its been rondoed and glass where needed.

DSC01075_zpsaed9d556.jpg

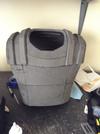
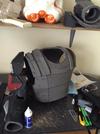
Now is the scratch chest core. Note the hot glue and paint is from ripping off the old foam pieces.

Front
DSC01076_zpsd9fc0457.jpg

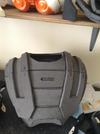
Back
DSC01077_zpsdd760411.jpg

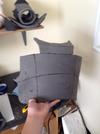
And the pics where all the pieces are on the core. Note its held there with Duct Tape so thing may be lopsided.

DSC01078_zps9ba36631.jpg

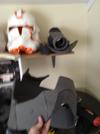
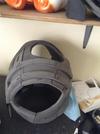
With helmet
DSC01080_zps203f9b1e.jpg


Thats all for now!
Criticisms are welcomed!
 

Attachments

  • DSC01070_zps5e4b1134.jpg
    DSC01070_zps5e4b1134.jpg
    118.9 KB · Views: 378
  • DSC01071_zps5cd91358.jpg
    DSC01071_zps5cd91358.jpg
    61.7 KB · Views: 353
  • DSC01072_zpsf3ffb8eb.jpg
    DSC01072_zpsf3ffb8eb.jpg
    105.9 KB · Views: 381
  • DSC01073_zps8c72f3cf.jpg
    DSC01073_zps8c72f3cf.jpg
    102.9 KB · Views: 361
  • DSC01074_zpsc7e1a489.jpg
    DSC01074_zpsc7e1a489.jpg
    102.2 KB · Views: 354
  • DSC01075_zpsaed9d556.jpg
    DSC01075_zpsaed9d556.jpg
    95.6 KB · Views: 366
  • DSC01076_zpsd9fc0457.jpg
    DSC01076_zpsd9fc0457.jpg
    127.4 KB · Views: 349
  • DSC01077_zpsdd760411.jpg
    DSC01077_zpsdd760411.jpg
    121.3 KB · Views: 377
  • DSC01080_zps203f9b1e.jpg
    DSC01080_zps203f9b1e.jpg
    65 KB · Views: 362
  • DSC01078_zps9ba36631.jpg
    DSC01078_zps9ba36631.jpg
    69.3 KB · Views: 358
Ok no pics today but I have a question for you all. I was looking through the database in Hugh's section and I can't find a file for the right gauntlet. If anyone has or knows of the file for the right gauntlet please let me know.

Comments and criticisms are welcome!
 
Ok everyone! Update time! Since the last update i've got some foam and re-did the chest core. But I was having fun with it and since this is my second day home from school I thought I would be productive, so without further ado. I give you.............PICTURES!!!!!!

Here is the belt

DSC01139_zpsf7c1bf27.jpg

DSC01140_zps3ca20296.jpg

DSC01141_zps4a6869b6.jpg


Shoot my photobucket is being stupid right now but pretend the core and some of the chest assets I re did look pretty. I will edit this post when it starts working again.

EDIT: Ok right after I post this it starts working again, technology is great:angry So those pics!

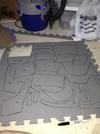
chest core

DSC01144_zps58ad0e1d.jpg

DSC01145_zpsbe89ad40.jpg

And the chest assets

DSC01143_zps210befaa.jpg

Comments and criticisms are welcome!
 

Attachments

  • DSC01139_zpsf7c1bf27.jpg
    DSC01139_zpsf7c1bf27.jpg
    116.8 KB · Views: 345
  • DSC01140_zps3ca20296.jpg
    DSC01140_zps3ca20296.jpg
    95.9 KB · Views: 351
  • DSC01141_zps4a6869b6.jpg
    DSC01141_zps4a6869b6.jpg
    98.8 KB · Views: 353
  • DSC01144_zps58ad0e1d.jpg
    DSC01144_zps58ad0e1d.jpg
    60.3 KB · Views: 359
  • DSC01145_zpsbe89ad40.jpg
    DSC01145_zpsbe89ad40.jpg
    80.7 KB · Views: 353
  • DSC01143_zps210befaa.jpg
    DSC01143_zps210befaa.jpg
    116.3 KB · Views: 356
Ok everyone. Its Easter time and i''m at my grandparents house, soooo I don't have any supplies,so therefore no updates. :( But I got some craft foam so I can scratch build the four side plates for the chest. Then I can work on the shoulders and gauntlets when I get more money and foam(I owe my mom $20 for the first pack of foam.) So it may be a while. I'm not going to work on the helmet because we're moving in the summer and my dad packed up all of his sanding supplies. But I may re do it because it is warped soo badly, but i will try to fix it. Anyways bye!
 
Ok everyone, I have a question. So I made a foam gauntlet ( Hughs file ). But when I change the length it changes the width of the piece too. The length is too short but it is too big width-wise. So how do I change the length but not the width.

Thanks
 
Ok everyone, I have a question. So I made a foam gauntlet ( Hughs file ). But when I change the length it changes the width of the piece too. The length is too short but it is too big width-wise. So how do I change the length but not the width.

Thanks
Your build is looking amazing first off, but i think you cannot change the length or width alone in pepakura designer. You need to modify the model in blender or some other model, or try to scratch build based off it.
 
Unfortunately you can't do that in Pepakura. You can do it in a round about way by exporting the file to a program like sketchup that allows you more scaling options. You can grab meshlab too (which is free) to help you convert between file types.

Basically:
-export from pepakura as .obj
-import to meshlab
-export form meshlab as .3ds
-import into sketchup, and do your scaling.
-export from sketchup as .dae
- import back to meshlab, then export as .obj
-finally, bring it back into pepakura.

Or something like that. It has been a while since I have played around with it. The key is getting meshlab, as it converts pretty much any file type into any other file type.

Thanks for the advice, the problem is you have to have the bought version of pep designer to export a file. So is there any way to work around this? Cause I dont want to have to buy pep designer as of right now.
 
I know the feeling about the forearm being to big around to just get the correct length. The same thing happened to me on my first build. All i did was add some foam to the inside of the forearm piece after i put my arm in it and it worked out great :)
maybe try doing that?
Something my friend did was after he build his forearm he cut it and modified it to be a more snug fit so he didnt have to use as much foam as me. Now we both built ours out of paper.
Since you are doing yours out of foam, you could easily modify it to be tighter to your arm before gluing it together. Just play with some ideas and im sure you will figure it out :)
Best of luck
 
Re: Halo 3 ODST WIP

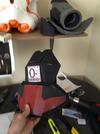
Oh man its been a while! Time to pick things back up again. Had to restart on pretty much all the pieces I've previously made, but i think they look much better than before.
Pictures!

Finished pieces:

Shoulder
767D5932-C498-49E7-B9D0-F635625F4D63_zpstmnxlrrv.jpg

For the blood type I just printed out a pic of it and luckily it fit lol.

Forearm
FE4FF03C-D6AD-4072-B511-C8A6831C83EF_zpswaupxcrr.jpg

And with both of them on
00142F48-DD78-4706-8FAC-E18BBB19B35B_zpsewxyvmal.jpg

Here are the buckles I've made
7066BE80-96B2-4941-A5E6-ECDC171C91C2_zpscvrckcvy.jpg

Still need to plastidip those.

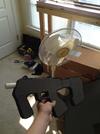
In the process of making an SMG. Still needs lots of details, buuutt I need lots of craft foam for that.
770A84E6-18E6-44A5-8976-0397A099C2FD_zpsk10jcz2w.jpg

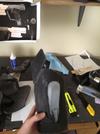
And here is the chest core process
B9CE5685-DF40-49E4-AA69-CCDF1E5A5244_zps7jzgqqje.jpg
6D328CB4-B79D-4B45-BCD0-14CA0A95EC51_zpsunyjpocf.jpg
02624426-3B09-4A1E-B226-EC78B9B311D3_zps381qhidk.jpg

In the last two you can see the other arm on the shelf in the background.

Thanks for looking! Should have the chest core finished by tonight.

EDIT: Sorry for the blurry pics. I will try to fix that as soon as possible.
 

Attachments

  • 767D5932-C498-49E7-B9D0-F635625F4D63_zpstmnxlrrv.jpg
    767D5932-C498-49E7-B9D0-F635625F4D63_zpstmnxlrrv.jpg
    63.9 KB · Views: 280
  • FE4FF03C-D6AD-4072-B511-C8A6831C83EF_zpswaupxcrr.jpg
    FE4FF03C-D6AD-4072-B511-C8A6831C83EF_zpswaupxcrr.jpg
    70.4 KB · Views: 286
  • 770A84E6-18E6-44A5-8976-0397A099C2FD_zpsk10jcz2w.jpg
    770A84E6-18E6-44A5-8976-0397A099C2FD_zpsk10jcz2w.jpg
    70.2 KB · Views: 269
  • 00142F48-DD78-4706-8FAC-E18BBB19B35B_zpsewxyvmal.jpg
    00142F48-DD78-4706-8FAC-E18BBB19B35B_zpsewxyvmal.jpg
    98.9 KB · Views: 316
  • 7066BE80-96B2-4941-A5E6-ECDC171C91C2_zpscvrckcvy.jpg
    7066BE80-96B2-4941-A5E6-ECDC171C91C2_zpscvrckcvy.jpg
    90.6 KB · Views: 272
  • 02624426-3B09-4A1E-B226-EC78B9B311D3_zps381qhidk.jpg
    02624426-3B09-4A1E-B226-EC78B9B311D3_zps381qhidk.jpg
    48.5 KB · Views: 288
  • B9CE5685-DF40-49E4-AA69-CCDF1E5A5244_zps7jzgqqje.jpg
    B9CE5685-DF40-49E4-AA69-CCDF1E5A5244_zps7jzgqqje.jpg
    73.4 KB · Views: 268
  • 6D328CB4-B79D-4B45-BCD0-14CA0A95EC51_zpsunyjpocf.jpg
    6D328CB4-B79D-4B45-BCD0-14CA0A95EC51_zpsunyjpocf.jpg
    55.7 KB · Views: 261
Re: Halo 3 ODST WIP

Ok, update! I'm gonna have to double-post cause nobody else posted. I have finished the chest core! I might have to add some glue to some of the seams but other than that its done.

0A90C726-82DC-487A-8AEF-9E86B79DD575_zpsq6zxmdhc.jpg
A3F682FA-2FAB-4061-9C97-446DDD32D97C_zpshgtvr8eh.jpg
B7AA7886-CE72-4FB7-BF9E-46096887C4A2_zpsdrlok4p6.jpg
3BE7D1AF-5B7B-48B5-9E60-E12B9CFCD1CC_zpso9yzxgwg.jpg

And with the shoulder and forearm

8C3D2C96-6679-46D7-BD8F-5586E2BC2FA0_zpsf8qdhbun.jpg

Thanks for looking!
 

Attachments

  • 0A90C726-82DC-487A-8AEF-9E86B79DD575_zpsq6zxmdhc.jpg
    0A90C726-82DC-487A-8AEF-9E86B79DD575_zpsq6zxmdhc.jpg
    90.3 KB · Views: 271
  • B7AA7886-CE72-4FB7-BF9E-46096887C4A2_zpsdrlok4p6.jpg
    B7AA7886-CE72-4FB7-BF9E-46096887C4A2_zpsdrlok4p6.jpg
    84.6 KB · Views: 266
  • A3F682FA-2FAB-4061-9C97-446DDD32D97C_zpshgtvr8eh.jpg
    A3F682FA-2FAB-4061-9C97-446DDD32D97C_zpshgtvr8eh.jpg
    89.3 KB · Views: 273
  • 3BE7D1AF-5B7B-48B5-9E60-E12B9CFCD1CC_zpso9yzxgwg.jpg
    3BE7D1AF-5B7B-48B5-9E60-E12B9CFCD1CC_zpso9yzxgwg.jpg
    87.4 KB · Views: 262
  • 8C3D2C96-6679-46D7-BD8F-5586E2BC2FA0_zpsf8qdhbun.jpg
    8C3D2C96-6679-46D7-BD8F-5586E2BC2FA0_zpsf8qdhbun.jpg
    95.1 KB · Views: 247
Re: Halo 3 ODST WIP

Thanks for the advice, the problem is you have to have the bought version of pep designer to export a file. So is there any way to work around this? Cause I dont want to have to buy pep designer as of right now.

ok i know the feeling but i found a solution
go to this YouTube link and follow the instructions from the video. really simple, really fast and completely free. any of the passwords he shows you will work. have fun. hope it helps

 
Last edited by a moderator:
Re: Halo 3 ODST WIP

ok i know the feeling but i found a solution
go to this YouTube link and follow the instructions from the video. really simple, really fast and completely free. any of the passwords he shows you will work. have fun. hope it helps


Thanks, buuuttt, I commissioned to try to unfold some files and the guy gave me the password, so yeah. Thanks though!
 
Last edited by a moderator:
Re: Halo 3 ODST WIP

Hey man, you armor is looking really good so far. It's always good to see another Helljumper in the mix!

And it looks like you found my old ODST med badge! I forgot the thing was still floating around the internet, I'm glad to see it's still getting some use.

Keep up the good work!

Haha i didnt even know that was your badge! Now that I look at google I see your name lol. Thanks for the compliments!
 
Status
Not open for further replies.
Back
Top