red vs blue grif

Status
Not open for further replies.

ODCA

RMO
405th Regiment Officer
Stream Team
hello everyone, i've been working on this armor for the past few months, but i've had issues with posting a thread (either i'm busy with school or i'm too tired ... because i was busy with school), anyway, its my first weekend without homework so i finally have time !
now onto the build
i first started with making 2 guns then i decided to make the full suit to go with them
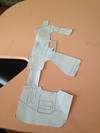
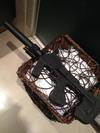
i fist started with the ODST smg
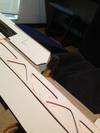
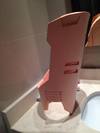
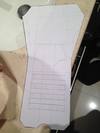
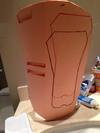
first, after making the full template i started making the layers, i assembled it the same way as a sliced file
IMG_1746_zps054281ee.jpg
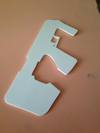
the middle pieces were foam board/foam core poster board
IMG_1747_zpsc27fdbbe.jpg
the next part was 6mm foam
IMG_1748_zps823a0724.jpg
then using 2mm foam i added the details
IMG_1750_zps296db68a.jpg
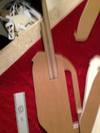
after i was done detailing i grabbed a 5mm diameter wood stick and wrapped it with corrugated cardboard, then drilled in the smg and glued it in
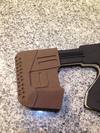
, i added an extra 6mm foam piece as the magazine, i carved some details into it and then using a 12mm foam i made a small box where the mag goes in
IMG_1758_zps6e5cbc72.jpg
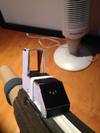
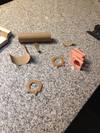
for the scope i used styrene plastic and some cardboard tags i found useful
IMG_1759_zpsd7fed2fc.jpg
IMG_1760_zps811b3a07.jpg
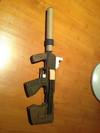
then i added a spare flashlight with red dot laser i had (i just need to put some batteries in it) then painted everything black
IMG_1767_zps2364303e.jpg
 

Attachments

  • IMG_1746_zps054281ee.jpg
    IMG_1746_zps054281ee.jpg
    50.6 KB · Views: 332
  • IMG_1747_zpsc27fdbbe.jpg
    IMG_1747_zpsc27fdbbe.jpg
    41.5 KB · Views: 325
  • IMG_1748_zps823a0724.jpg
    IMG_1748_zps823a0724.jpg
    118.2 KB · Views: 347
  • IMG_1750_zps296db68a.jpg
    IMG_1750_zps296db68a.jpg
    135.4 KB · Views: 345
  • IMG_1758_zps6e5cbc72.jpg
    IMG_1758_zps6e5cbc72.jpg
    77 KB · Views: 317
  • IMG_1767_zps2364303e.jpg
    IMG_1767_zps2364303e.jpg
    85.7 KB · Views: 322
  • IMG_1760_zps811b3a07.jpg
    IMG_1760_zps811b3a07.jpg
    62.4 KB · Views: 337
  • IMG_1759_zpsd7fed2fc.jpg
    IMG_1759_zpsd7fed2fc.jpg
    69.4 KB · Views: 331
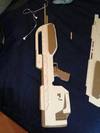
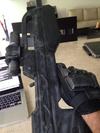
then next gun was the halo 3 battle rifle, i made is similar to the smg, i made a template and started making it similar to a sliced file, the materials i used in this build were 2mm cardboard, foam core poster board/ foam board and 5mm diameter wooden stick
IMG_1803_zps17bc727a.jpg
IMG_1804_zps11882f4e.jpg
IMG_1805_zps1d9306db.jpg
IMG_1806_zps0fe90703.jpg

this time i planned things trough and cut out the space where the barrels would go
IMG_1807_zps98f3921b.jpg
IMG_1809_zpsa42021bf.jpg
IMG_1810_zps2a94ff24.jpg
IMG_1811_zps5b6f2c6f.jpg
IMG_1831_zps91b36971.jpg
i drilled a hole diagonally to make this with the rest of the wooden stick and a piece of scrap foam
IMG_1832_zps2269cbeb.jpg
the was making the scope, which was a good 2 - 3 hours of looking at reference photos to give myself an idea of how the barrel should be, i ended up with this
IMG_1864_zpsa27ead17.jpg

here's the finished piece
10365796_717015791675035_69355602215560369_n_zps2a5b229a.jpg

10384477_717015785008369_5639579798481178936_n_zpsf71be640.jpg
penny for reference
10309165_717015795008368_4000771702924437387_n_zps34ae3e00.jpg

thats if for now, i may upload the armor progress later today, anyway, please post your comments, suggestions or criticism, they're all welcome !
 

Attachments

  • IMG_1803_zps17bc727a.jpg
    IMG_1803_zps17bc727a.jpg
    69.7 KB · Views: 329
  • IMG_1805_zps1d9306db.jpg
    IMG_1805_zps1d9306db.jpg
    65 KB · Views: 336
  • IMG_1806_zps0fe90703.jpg
    IMG_1806_zps0fe90703.jpg
    76.6 KB · Views: 332
  • IMG_1804_zps11882f4e.jpg
    IMG_1804_zps11882f4e.jpg
    67.5 KB · Views: 336
  • IMG_1810_zps2a94ff24.jpg
    IMG_1810_zps2a94ff24.jpg
    50.9 KB · Views: 341
  • IMG_1809_zpsa42021bf.jpg
    IMG_1809_zpsa42021bf.jpg
    84.9 KB · Views: 344
  • IMG_1807_zps98f3921b.jpg
    IMG_1807_zps98f3921b.jpg
    73.8 KB · Views: 314
  • IMG_1811_zps5b6f2c6f.jpg
    IMG_1811_zps5b6f2c6f.jpg
    63.3 KB · Views: 358
  • IMG_1832_zps2269cbeb.jpg
    IMG_1832_zps2269cbeb.jpg
    74 KB · Views: 265
  • IMG_1831_zps91b36971.jpg
    IMG_1831_zps91b36971.jpg
    59.2 KB · Views: 327
  • IMG_1864_zpsa27ead17.jpg
    IMG_1864_zpsa27ead17.jpg
    131.7 KB · Views: 325
  • 10384477_717015785008369_5639579798481178936_n_zpsf71be640.jpg
    10384477_717015785008369_5639579798481178936_n_zpsf71be640.jpg
    70.5 KB · Views: 227
  • 10365796_717015791675035_69355602215560369_n_zps2a5b229a.jpg
    10365796_717015791675035_69355602215560369_n_zps2a5b229a.jpg
    69 KB · Views: 249
  • 10309165_717015795008368_4000771702924437387_n_zps34ae3e00.jpg
    10309165_717015795008368_4000771702924437387_n_zps34ae3e00.jpg
    69.5 KB · Views: 225
allright, now with the arms !
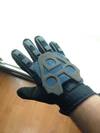
i made the the basic drawing as a base, with 6mm foam and then the detail with a 2mm craft foam, the used an elastic strap to wrap it around my hand
IMG_1985_zps5cb544b0.jpg

for the forearms, i used a low def foam pepakura file, then modified it a bit
IMG_1994_zpsed359a30.jpg
IMG_1989_zps92d5f7f7.jpg

then i made the details with the 2mm craft foam
this piece was inspired from this thread http://www.405th.com/showthread.php...WIP-(many-pics)/page8?highlight=robot+chicken
IMG_1990_zpsd9be733b.jpg
then i added this piece
IMG_1991_zps231ae5d0.jpg
IMG_1992_zpsf7406bc8.jpg
IMG_1993_zps817258b0.jpg

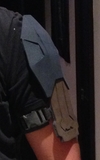
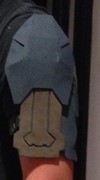
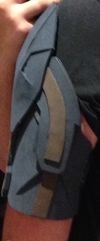
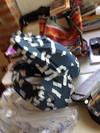
then the shoulder's i first made the shoulder plate with the pepakura foam file, then the bicep piede was made from scratch, i also took inspiration from RobotChicken's thread
27003bb0-2e42-4a95-891e-ee01aba753d0_zps80ca49e8.jpg
62dc2a00-760b-4e4a-9428-0c1829d3bb27_zpsae77ec4e.jpg
e946a5ea-e00f-4221-ba1e-0934e15816e3_zps59948cf3.jpg

then i painted erything, notice how the right forearm has more battle damage, what happened was : when i painted it, the wind blew it away when i left it to dry, when i noticed it, it was too late, the paint was dry and some stones stick to it... so i pulled them off carefully ... but they tore some of the foam off so i improvised, i used some air dry clay to fill the gabs as best as i could, i think it ended up looking quite nice !
IMG_2081_zpsa4b83e91.jpg

anyway, i'd like to know what you guys think, later!
 

Attachments

  • IMG_1985_zps5cb544b0.jpg
    IMG_1985_zps5cb544b0.jpg
    45.9 KB · Views: 321
  • IMG_1994_zpsed359a30.jpg
    IMG_1994_zpsed359a30.jpg
    98.8 KB · Views: 328
  • IMG_1990_zpsd9be733b.jpg
    IMG_1990_zpsd9be733b.jpg
    56.4 KB · Views: 313
  • IMG_1989_zps92d5f7f7.jpg
    IMG_1989_zps92d5f7f7.jpg
    63.6 KB · Views: 316
  • IMG_1992_zpsf7406bc8.jpg
    IMG_1992_zpsf7406bc8.jpg
    57.9 KB · Views: 318
  • IMG_1991_zps231ae5d0.jpg
    IMG_1991_zps231ae5d0.jpg
    55.8 KB · Views: 325
  • IMG_1993_zps817258b0.jpg
    IMG_1993_zps817258b0.jpg
    52.3 KB · Views: 312
  • 62dc2a00-760b-4e4a-9428-0c1829d3bb27_zpsae77ec4e.jpg
    62dc2a00-760b-4e4a-9428-0c1829d3bb27_zpsae77ec4e.jpg
    150.1 KB · Views: 223
  • 27003bb0-2e42-4a95-891e-ee01aba753d0_zps80ca49e8.jpg
    27003bb0-2e42-4a95-891e-ee01aba753d0_zps80ca49e8.jpg
    165.7 KB · Views: 229
  • e946a5ea-e00f-4221-ba1e-0934e15816e3_zps59948cf3.jpg
    e946a5ea-e00f-4221-ba1e-0934e15816e3_zps59948cf3.jpg
    134.5 KB · Views: 239
  • IMG_2081_zpsa4b83e91.jpg
    IMG_2081_zpsa4b83e91.jpg
    67.2 KB · Views: 322
You are very very skilled in the art of turning out a good product with little apparent effort- both of your guns appear to have been built intuitively, and look the part with no apparent bondo application, and all your foam work approaches complex problems and solves them simply and looks great! Keep it up! I wanna see more grif!
 
nothing wrong with more damage :)
just means your suit has been through a lot of battles lol
 
Looks awesome! Just make sure the cod piece has extra damage via tex lmao! But loving this build man great detail.
 
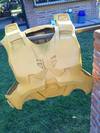
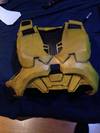
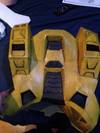
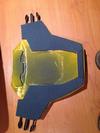
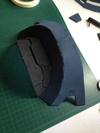
now for the chest, i gotta say it was the most time consuming piece ever, i worked on it on a 24 hours non-stop speedbuid (which ... now that i think about it was a move grif would never do ... unless it involved junk food) , which was quite a challenge, the damage report would be minor hot glue burns all over my hands, i responded to that by taking a 2 day long break from doing anything related to costumes while my hands rested, anyway, here are the pics :
IMG_1997_zps198e0baa.jpg
IMG_1998_zps8f7e12bb.jpg
IMG_2006_zpsa502a2bf.jpg
IMG_2077_zps016cfee6.jpg
IMG_2104_zps27189f2c.jpg
IMG_2105_zps69025dd8.jpg

also, the morning after i finished the paint, i got an award for a job well done in the mail, YES!
IMG_2011_zps1701ea37.jpg

let me know what you guys think
 

Attachments

  • IMG_1997_zps198e0baa.jpg
    IMG_1997_zps198e0baa.jpg
    55 KB · Views: 319
  • IMG_1998_zps8f7e12bb.jpg
    IMG_1998_zps8f7e12bb.jpg
    40.1 KB · Views: 332
  • IMG_2006_zpsa502a2bf.jpg
    IMG_2006_zpsa502a2bf.jpg
    60.5 KB · Views: 320
  • IMG_2077_zps016cfee6.jpg
    IMG_2077_zps016cfee6.jpg
    117.8 KB · Views: 303
  • IMG_2104_zps27189f2c.jpg
    IMG_2104_zps27189f2c.jpg
    73.2 KB · Views: 330
  • IMG_2105_zps69025dd8.jpg
    IMG_2105_zps69025dd8.jpg
    84 KB · Views: 299
  • IMG_2011_zps1701ea37.jpg
    IMG_2011_zps1701ea37.jpg
    78.2 KB · Views: 323
Armor is looking good :), and yes your right, thats not a griff move lol
seems a tad crooked, but maybe that just because its sitting weird i dunno lol
Keep up te good work
 
Armor is looking good :), and yes your right, thats not a griff move lol

seems a tad crooked, but maybe that just because its sitting weird i dunno lol

Keep up te good work


Yeah, it may be because im using a thinner foam, but when i put it on looks good, or at least good enough
3etenuqa.jpg


Enviado desde mi iPhone con Tapatalk
 

Attachments

  • 3etenuqa.jpg
    3etenuqa.jpg
    235.6 KB · Views: 322
hello everyone ! sorry about the lack of posts lately i've been o exams ... in fact i'm on finals right now, but i'm exempt from some subjects so i took this moment to show you guys some of the progress ... enough yapping! heres the build
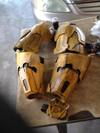
i made the thighs out of 12mm foam (more or less) after a random forum lurking session a few months ago i found this build: http://www.405th.com/showthread.php/35790-KAT-ARMOR-BUILD-with-custom-undersuit
i noticed she made a template for the thighs so i saved it on my computer, just in case, i used that as a reference and drew my own (since my thigh is way bigger than hers) the reason i used her template was because i was running out of the 6mm foam i'm using for the pep-foam parts (which i'm saving for the shin and boot ... coming soon), and also because i'm lazy and this seemed a simpler way to do the thigh ... i was very wrong, since i still don't have a heat gun (i keep spending my money on costuming resources and videogames), it was tricky to bend the thigh, i held it over the stove and put it around my thigh, i repeated this step quite a few times on different sections of the thigh, since it would cool off quickly, after that it turned out to be about an inch smaller than my thigh, so used some elastic to keep the thigh from bending open and also helping it stay close to my leg.
IMG_2101_zps8c2f1781.jpg
i also drew this piece (referencing a halo figure i have) to add on the side of the thigh
IMG_2102_zps52ba8770.jpg
after that i marked where i wanted to glue it
IMG_2103_zps648a1837.jpg
after carving a few details i painted it
IMG_2176_zpsa1d4f7c5.jpg
IMG_2178_zps176d9cee.jpg

i also added some nylon webbing to the upper section of the thigh to attach it to a belt that i will hear under the codpiece
speaking of the codpiece
i didnt take any pics of it pre-paint, but its a pretty simple piece, i made it out of a pep file, using the 6mm foam, using a halo figure for reference i used my dremel's sanding attachement to make some details, i used 2 buckles on the sides to make it easy to put on and take off
IMG_2173_zpsfdd91de8.jpg
IMG_2174_zpsee05609f.jpg
IMG_2177_zps2f18ea5f.jpg

a few weeks after this, it broke (a sad thing) since a 6mm piece, where one of the buckles were attached was too thin and just snapped, i used some more 6mm foam on both sides to reinforce and also on some other sections i considered that could break as well
10479732_729247017118579_4040561337020067224_n_zpsa60ca9cd.jpg

here's a pic of the thighs and the codpiece on me
Fotodeldi3010a19-06-2014alas22212_zps854193a3.jpg

one think i'm planning to do, is boy a chrome duck tape i saw at home depot last time i went there to buy paint, i'll use that on the thighs (the rectangles that are supposed to be the lights) and also on my halo 4 knife (a new one out of styrene maybe)

that's all for now, please tell me what you think of the build so far and feel free to leave constructive criticism, next update will probably be the helmet, by the way, if anyone has any suggestions on how to make a visor on a budget ... a really really really short budget, please post an answer or link
thank you and wish me luck on my finals
 

Attachments

  • IMG_2101_zps8c2f1781.jpg
    IMG_2101_zps8c2f1781.jpg
    36.1 KB · Views: 314
  • IMG_2102_zps52ba8770.jpg
    IMG_2102_zps52ba8770.jpg
    40.9 KB · Views: 284
  • IMG_2103_zps648a1837.jpg
    IMG_2103_zps648a1837.jpg
    47.3 KB · Views: 291
  • IMG_2176_zpsa1d4f7c5.jpg
    IMG_2176_zpsa1d4f7c5.jpg
    73.2 KB · Views: 282
  • IMG_2178_zps176d9cee.jpg
    IMG_2178_zps176d9cee.jpg
    90 KB · Views: 277
  • IMG_2173_zpsfdd91de8.jpg
    IMG_2173_zpsfdd91de8.jpg
    92.3 KB · Views: 283
  • IMG_2177_zps2f18ea5f.jpg
    IMG_2177_zps2f18ea5f.jpg
    101 KB · Views: 292
  • IMG_2174_zpsee05609f.jpg
    IMG_2174_zpsee05609f.jpg
    82.5 KB · Views: 289
  • 10479732_729247017118579_4040561337020067224_n_zpsa60ca9cd.jpg
    10479732_729247017118579_4040561337020067224_n_zpsa60ca9cd.jpg
    87.7 KB · Views: 192
  • Fotodeldi3010a19-06-2014alas22212_zps854193a3.jpg
    Fotodeldi3010a19-06-2014alas22212_zps854193a3.jpg
    107.9 KB · Views: 289
This looks really good! from the way you posted the pics, are you starting on part and finishing it before doing another?
 
This is looking super awesome! I love seeing people do RvB builds. Very nice foam work, and the paint/weathering job really sells it.
 
weekend finally! just 2 days of exams left! then i'm graduating from high school!
alright now , big update...the helmet
i started my assembling all the pieces (i didn't have my computer with me to reference the file)
IMG_2385_zps63b815b2.jpg
then i started building the helmet, i used 2 files for this, a foam unfold of the helmet and an hd file for the details that i would add with craft foam
IMG_2386_zps61531640.jpg
IMG_2395_zps1c451e4e.jpg
IMG_2396_zps188cb01c.jpg
IMG_2397_zps12997c25.jpg
IMG_2404_zps2c51cb12.jpg
IMG_2405_zpsbe23b578.jpg
IMG_2407_zps8472b5a7.jpg
IMG_2837_zpscd5bc054.jpg

since i'm on a budget, i temporarily painted the visor as well
i'm planning to do something similar to a dual layer visor, i will cut the shape from the center and put a plastic sheet or some sort of mesh behind, but, im open for suggestions

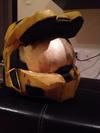
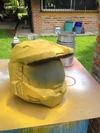
here's the finished helmet after the 3 coats of yellow ... or as grif would say "im f***ing orange!", the black details and wash, and the gold visor
you may notice a bit of the golden paint slipped trough the paper i used to cover the rest of the helmet, so i tried to hide it making it battle damage
IMG_2933_zpsb81beca9.jpg

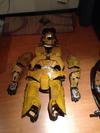
here's a photo of everything i have so far
IMG_2934_zpsf48f3851.jpg

as always comments and constructive criticism are more than welcome
 

Attachments

  • IMG_2385_zps63b815b2.jpg
    IMG_2385_zps63b815b2.jpg
    81.4 KB · Views: 275
  • IMG_2395_zps1c451e4e.jpg
    IMG_2395_zps1c451e4e.jpg
    80.1 KB · Views: 297
  • IMG_2386_zps61531640.jpg
    IMG_2386_zps61531640.jpg
    76 KB · Views: 283
  • IMG_2396_zps188cb01c.jpg
    IMG_2396_zps188cb01c.jpg
    77.3 KB · Views: 271
  • IMG_2397_zps12997c25.jpg
    IMG_2397_zps12997c25.jpg
    71.6 KB · Views: 270
  • IMG_2407_zps8472b5a7.jpg
    IMG_2407_zps8472b5a7.jpg
    121.7 KB · Views: 272
  • IMG_2404_zps2c51cb12.jpg
    IMG_2404_zps2c51cb12.jpg
    139.4 KB · Views: 286
  • IMG_2405_zpsbe23b578.jpg
    IMG_2405_zpsbe23b578.jpg
    91.5 KB · Views: 292
  • IMG_2933_zpsb81beca9.jpg
    IMG_2933_zpsb81beca9.jpg
    86.1 KB · Views: 301
  • IMG_2837_zpscd5bc054.jpg
    IMG_2837_zpscd5bc054.jpg
    115.2 KB · Views: 287
  • IMG_2934_zpsf48f3851.jpg
    IMG_2934_zpsf48f3851.jpg
    83.8 KB · Views: 298
Looking good so far, but that cod piece needs way more weathering if you're going to be Grif. I can't believe a warehouse full of Tex's didn't leave a scratch on that thing.
 
Agreed on the cod piece ;)
Based on his personality and some lines in the early season, drawings/comics of Grif tend to be... big boned. Are you going that route by any chance?
I'm a huge fan of Grifball (captain of What the Grif for 3 years) and love the messenger bag.
Good luck on the build! Looks good so far.
 
good point on the cod piece, i'm rewatching episodes to see what else to add, for example, i'll start making grif's iconic weapon of choice, the traffic cone and probably a speed unit, also dog tags (Captain / Minor Junior Private Negative First Class / Private / Sergeant ) dexter grif, red army
also, i will be going with the "big boned" route (tough not as much as in the animated short ), temporairly, since i've been going to the gym and dieting lately
 
allright everyone, i need your opinion, which dog tag should i do ?

PVT.
GRIF, DEXTER
RED ARMY
BLOOG GULCH OUTPOST 1-B


MINOR JR. PVT. – FC
GRIF, DEXTER
RED ARMY
VALHALLA OUTPOST 17-B


CAPT.
GRIF, DEXTER
GOLD SQUAD
CHORUS, NEW REPUBLIC
 
Status
Not open for further replies.
Back
Top