- Member DIN
- S474
Well as a way of starting with an introduction and the story behind this project. My Wife Ashuraa like's doing costume's for ren fairs and sci fi con's and what not. She has been on me for years about wanting me to go with her in costume to these events. I have resisted till now. She has finally won the battle and I have gone to the dark side of doing costume's. I informed her that the only way I would go was in armor. Originally I had wanted to so a space marine from Warhammer 40k. I quickly discarded with my recent opinion of GW and some of the little things they have been doing. With much snooping around in youtube and other venue's we both found our way here. I was already looking toward a Halo armor or a mass effect type of armor.
Thankfully my wife and I are to the stage of life that our two legged child is grown and out of the house and we are down to just 4 legged children which are perfectly content to spend hours laying beside you on the floor or on their favorite chair while you work on projects. We are both also well blessed with ton's of modeling skills between the two of us. We have spent years playing miniature war game's and building scenery and making our own pieces for these games. So moving to one to one scale in a lot of ways is a lot easier then modeling in 1/87th or even smaller.
Anyhow I am straying. We found our way here and I did one of the first things that the noob guides suggest. We started to read. Thankfully the two of us read rather quickly. And not only did we read but we spent hours watching the various video's that have been posted by various members of this fine community. We started out in concept that I was going to build a foam rubber costume. After a couple days of reading and more consideration I decided I did not want to be a cooked Kusak if I went to a summer convention in about 30 Lb of body encasing Foam rubber.
My first thoughts were I was going to do a simple Marine armor. From the pictures and models my conclusion was that it was going to be the simplest of the armors to do and complete in a timely fashion. About this point in time my wife Ashuraa stepped in and Said No if we were going to do this she wanted to do something that presented us with a challenge. Back to the drawing board I went for about 15 minutes at most and with her holding the proverbial wife type autocannon to my head I opted to go with an ODST. My though process was that the ODST armor presented me with sufficient opportunity to mix and mach part's and still look correct and be close to the Lore of the books and Games. Part of that logic being at 40 years old I am no small guy. Being a Delivery truck driver I am build more like a tank. May of been easier to costume myself as a Warthog. Anyhow I could pick and choose parts from various ODST Armors that would best fit my size. I wanted us to be able to complete one suit of the armor with minimal fussing around with sizing issues. And later if we really enjoyed the process we could come back and try some of the more complex pieces that I had concerns about fitting on my not so small frame.
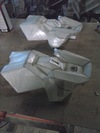
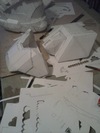
Anyhow at this point in time it was off to the Races. Thanks to the wonderful resources of this community and us doing lots of reading and snooping quietly. We quickly settled on Pep. It would permit her and I to use skill sets that we already have and to advance skills that we know we could do but needed more practice in. Insert one week of my yearly vacation at this time. I have now spent a week patiently folding paper into giant pieces of armor. We started with Kirrou's unhinged shoulder guards. In a few hours we pushed them through and they weren't what Id call show quality but we had something to work on. I hardened them and we spent an afternoon applying the first layers of bondo to them and learning from our mistakes. And Mistakes were plentiful. I also discovered my patience for fine detail bondo work SUCKS as Ashuraa puts it. But I can happily spend hours on end folding and making the Pep pieces and doing all of the resin work because the odor from the Resin causes Ashuraa to have migraines. Anyhow we spent about 2 days on these two shoulder guards and at the end of the second day I declared that I was not satisfied with them and they also were not going to fit correctly.
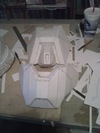
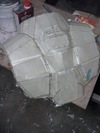
At this point in time Ashuraa had been looking at the PEP's and Kirrou's hinged shoulder guards had drawn her attention. A slight increase in the sizing and we were off again on these. Again another evening of folding and gluing my fingers together and I had the PEP's done for two of them and now my skills on that front had improved dramatically and the result was much better. Also in the process I had been looking at the various chest and back pieces trying to find a combination that I was fairly sure that we could make fit on me. I found a torso back that I figured would present the least problems for my size and folded that out. That Piece is currently sitting on the work bench ready to be bondo smoothed once I make some adjustments to the neck guards to make it fit correctly. Otherwise it fits about perfectly. Again thanks to the various video's on sizing that I found links to here.
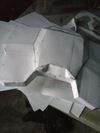
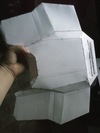
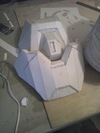
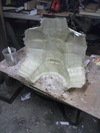
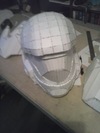
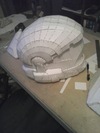
Somewhere in this process. I had come to the conclusion that in my opinion the component that was going to make or break the entire project was going to be the helmet. If I couldn't get the helmet made to my satisfaction there was no point working on any of the other pieces. I spent about 20 hours folding the helmet pieces and at this time I happy to say it is sitting on my work bench in the basement. It has received one layer of fiberglass at this time. I am going to add another here in the next few days when Ashuraa is not home. But I opted to go ahead today and start working on the smoothing coats of bondo. And I am very pleased with how it is coming along. A few more hours of patience and we should have the basic smoothing work done. I will need to build a vacuum forming table here in the next few weeks or so to vacuum form the visor. Once we have completed the helmet we will move on to the other sections that I have waiting. Once we have them further along I will begin the pep work on the next sections of the armor.
Ashuraa has the various pictures that we have taken so far and she will be adding them to the thread once she has some time to do so.
I also would like to say Thanks to all of those who have taken the time to do the various videos and FAQ's and to those folks who have taken the time to unfold the various components to make the PEP files.
Hopefully if we can maintain a steady rate of work on this I will have it ready for a January showing at one of the local sci fi con's here in Pennsylvania. We will do our best to keep updating this as we make progress.
Thanks
Eric <aka Kusak>


