Duke's Halo 4 Venator Helmet Pep *COMPLETE* (with Step-by-Step)

Status
Not open for further replies.

PerniciousDuke

Sr Member
Member DIN
S128
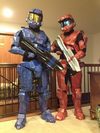
This is a commission from a friend to build a Halo 4 Venator (Assassin) variant helmet and I will be doing it all with Pepakura.

20160208_192832_zpsxfhfythl.jpg
Helmet Completed


I like to catalog my work for my own records, but I am hopeful that others may find it helpful too.

Current Stage (+time):
Rejoicing

Painting & Detailing
-- (9 hours)

Bondo/Shaping
--(8 hours)


Resining & Fiberglass
--(2 hours)


Pepping
--
(19 hours)
Scaling and Measuring (0.5 hours)


Materials & Tools Used (so far):
Fabric Measuring Tape
Pepakura Designer 3 (free)

16pages of 110lb Cardstock
.05 ball point Pen
#1 Xacto knife (+2 blades #11)
Self-healing Cutting Board
Metal/Cork Ruler
Mini Low-temp Hot Glue Gun (+15 glue sticks)
Polyester Resin and Catalyst (19oz)
Respirator
1" and 2" paintbrushes (3 of each)
Acetone (20oz)
Small Space Heater
Clear Plastic Cups (17)
Popsicle Stick for mixing (3)
Fiberglass cloth (about 2 square feet)
Paper Towel soaked with Acetone for cleaning up
Disposable Gloves (22 pair)
Body Filler and hardener (14 golf-ball sized clumps)
Dremel (with several attachments)
Safety Glasses
8" Rasp
8" Bastard File

File Cleaner Brush
Krazy Glue (1.5 gram)
Straight Razor Blade (2)
2" Putty Spreader (4)
Oscilating Tool (Sonicraft) with sanding attachment
Sanding Pads (5@60grit, 2@80g, 2@120g, 2@180g, 1@220g)
Rag for dusting
Small Files (triangle, half round)
4 1/2" PSA Sanding Roll (2ft@320grit)
Wood and Nails for Painting Stand
Rustoleum Gray Spray Primer
Rustoleum Flat Metallic Silver Spray Paint
Rustoleum Advanced Flat Iron Metallic Spray Paint/Primer
Rustoleum Advanced Matte Robin's Egg Paint/Primer
Rustoleum Satin Black Enamel (not recommended)
Krylon MAXX Flat Crystal Clear Acrylic
Painter's Tape (2yds)
Masking tape and plastic bags
Military Helmet Pads (7pc set)
Velco (6" x 1 1/2")
(5) 5mm White LEDs with Resistors (unspecified)
(4) 5mm Metal LED Holders
Red and Black solid .07 Wire
Quick Release Wire Connectors (4)
Wire to 9 volt battery connector (2)
On/off Switch (2)
12V Cooling Fan - 60mm x 15mm
Wire Cutters
Soldering Tool with Flux and Solder
Electrical Tape
Black Duck Tape
Sm. Clear Plastic Storage Container (visor)
Silver mirror Window Tint (20% dark)
Credit Card (for smoothing window tint)
Spray Bottle
Epoxy


The image below is for reference.
Armor Color: Dark Steel (main) Frost White (secondary)
Light Color: White
Visor Color: Silver
Emblem: from in-game model
halo_4_armor_suit___venator_by_josheh_photo-d5s8se4.jpg


To New Members: Before asking general building questions please do some research. There is a lot of information on this site, most questions have already been answered. Start with the New Recruit Sticky found here and click on the first few links. To get an idea of what kinds of materials you may need to get started on a Pepakura build check out this old, but helpful list found here. Also, keep reading as I will try my best to document what I do step by step. Good luck and happy building!

To Veterans and Intermediates: If you have inputs on where my advice or techniques could be improved please share! And thank you for paving the way!


halo_4_armor_suit___venator_by_josheh_photo-d5s8se4.jpg


20160208_192832_zpsxfhfythl.jpg
 
Last edited by a moderator:
Re: Duke's Halo 4 Venator Pep Build *WIP (1st suit) +photos!

To start I would like to thank all of the people on this site for your incredible skills, insight and determination to bring dreams to life. Corny as it may be, it is a childhood dream of mine to be the Master Chief that I am close to realizing about 16 years later.

Foremost, daviduffy who's build thread was the first I was drawn to after doing a google image search on halo suits and laid eyes to his beautiful creation. His thread was a nice concise tutorial extension of Spitfire22V 's build which was also very helpful. Cereal Killl3r needs to be mentioned for his amazing YouTube video tutorials along with LongShot X who is an inspiration to us all I do believe. Credits aside, let's begin.

I have done the scaling using Method #1 provided by Xtreme TACTICS 101 in his tutorial found here. The guy I am making this suit for is currently 15 years old. Xtreme mentions in his tutorial that he is also still growing and typically adds 5-10cm to his height before scaling to account for the fact that the armored figure is wearing boots and a helmet, along with his own potential growth by the completion of the suit. I've taken the height of my friend who is 68 3/4" (174.6cm) and added 10cm, then divided by the printed character 19.25cm to get a scale of 9.59x.
20151215_121545_zpscuejayv1.jpg

My question to those of you who have made a suit for growing individuals ... is 10cm enough? My friend has expressed that he would like to be able to wear this suit as an adult, as well as now. He is already fairly tall so I don't think it is unreasonable provided the suit is made well enough to hold up to time. I am willing to go by Xtreme's suggestion, but as a method that is now 5 years old I thought someone might have a more recent real life example of this working/not working. My best guess so far is make it a tad larger than the 10cm and use larger padding, then slim the padding as he grows. Thanks for reading and I hope to start pepping soon!
 

Attachments

  • 20151215_121545_zpscuejayv1.jpg
    20151215_121545_zpscuejayv1.jpg
    191.4 KB · Views: 557
Re: Duke's Halo 4 Venator Pep Build *WIP (1st suit) +photos!

Thanks bran3nbusby117 ! I'm gonna need it. :D

I'm ready to start pepping! I've altered the file as shown in the photo below (for my own reference, HEIGHT = 315mm). And I'll quickly run through the steps I take when printing a pep file...

Helmet%20Altered_zpsdzc2m2gy.png
Steps for printing Pepakura:
1. Set Scale > change one measurement to my best guess.
2. Use the measuring distance option to see if openings are going to be wide enough.
3. Once I'm happy with the size, I check and change the "Paper and Printer Settings"
~a. Make sure paper size is correct for me, Letter=U.S and A4=Europe.
~b. Make top and side margins the minimum at 5mm
~c. Make sure Bitmap print is selected and transparency is set at 0%
4. I like to edit the tabs and fold lines as well.
~a. Change tab height from 5 to 3
~b. Change the fold line dashes to Mountain = 1.5 and Valley = 0.5
5. Move the pieces around or cut them in half to make them fit on the pages. I try to keep it as close to the original arrangement as possible for reference when I go to put it together (since I can't save the file).
6. Go to: 2D Menu > Check Overlapping Parts to make sure that nothing will get cut off when printing (highlighted in red).
7. Go to 2D Menu > uncheck Show Edge ID , the numbers can really get in the way of small fold lines.

And I also always print one page first just to check that everything is working.

Next I'll be pre-scoring every page before cutting. I like to use a .05 pen for the mountain folds (since there are more of them) while at work and then just before cutting them out I score the valley folds with the back of my Xacto knife.

Helmet%20Altered_zpsdzc2m2gy.png
 
Last edited by a moderator:
Re: Duke's Halo 4 Venator Pep Build *WIP (1st suit Step-by-Step) +photos!

Looks like you've got this all planned out. Since I'm only 17 I'm grown a little since I made all of my armor so definitely adding 10cm is probably a good idea for you. I like what you are doing with the scaled down drawing of your friend and the armor, that probably helps out a lot when peping since with foam you can just cut off some or add a little more on apart depending on the area.

Great job so far keep it up!
 
Re: Duke's Halo 4 Venator Pep Build *WIP (1st suit Step-by-Step) +photos!

My suggestion is to make the armor pieces modular. In stead of a full torso, front and back piece that is attached, do 2 separate pieces attached to a harness that can be removed/re-positioned. Velcro or backpack clip buckles can help w/ this. This will give the freedom of growth. Eventually you will be able to permanently attach both pieces together. Make each piece a little bit bigger that normal as well. If there is too much room, use under-padding or a baggy under-suit. For arms and legs........not much can be done about lengthening pieces. You may just have to oversize them as well. He'll grow in to it eventually w/o outgrowing it. Looking forward to seeing your work.
 
Re: Duke's Halo 4 Venator Pep Build *WIP (1st suit Step-by-Step) +photos!

Looks like you've got this all planned out. Since I'm only 17 I'm grown a little since I made all of my armor so definitely adding 10cm is probably a good idea for you. I like what you are doing with the scaled down drawing of your friend and the armor, that probably helps out a lot when peping since with foam you can just cut off some or add a little more on apart depending on the area.
Great job so far keep it up!

Thanks Amir! I don't know if I have it quite planned out, but I definitely have been doing my reading. Subsequently, I am going to document my process in as much detail as I can in case someone else may find it helpful. As for the scaling method, I can't take credit for it. I linked to the original creator's thread in my last post, but I agree that it is pretty cool and does save a lot of pepping time. Thanks for your input!

My suggestion is to make the armor pieces modular. In stead of a full torso, front and back piece that is attached, do 2 separate pieces attached to a harness that can be removed/re-positioned. Velcro or backpack clip buckles can help w/ this. This will give the freedom of growth. Eventually you will be able to permanently attach both pieces together. Make each piece a little bit bigger that normal as well. If there is too much room, use under-padding or a baggy under-suit. For arms and legs........not much can be done about lengthening pieces. You may just have to oversize them as well. He'll grow in to it eventually w/o outgrowing it. Looking forward to seeing your work.

That is a very interesting idea.. my only hesitation is that it sounds like more work. lol. Normally, I would be fine with that, but since it is not for me then I would like to keep my effort and time frame as small as possible while still producing a hi-quality piece. I am definitely going to keep your idea in mind and will try to apply it in different places throughout the suit. I'm going to be using motorcycle gear :) under the pep pieces and combined with padding under the pep pieces there is going to be plenty of room to reduce over the years. The difficult part, I imagine, will be maintaining good "visual proportions" throughout those years. Thanks again though.
 
Re: Duke's Halo 4 Venator Pep Build *WIP (1st suit Step-by-Step) +photos!

Hey, all play and no work, doesn't get the suit built.......
 
Re: Duke's Halo 4 Venator Pep Build *WIP (1st suit Step-by-Step) +photos!

Hey, all play and no work, doesn't get the suit built.......

Yeah, yeah. You know that this is already going to be about a 100 hours of work right? :p
 
Re: Duke's Halo 4 Venator Pep Build *WIP (1st suit Step-by-Step) +photos!

Ooo, I wanted to take a quick post to thank my younger twin brothers too. They are not part of the 405th, but they found the Halo .pdo Wiki page and built the low def Halo 2 MC suits earlier this year with very little help from anyone. No fiberglass, just resin and did it in one month. They have no intention of posting on here so I thought I would share..

Austin%20and%20Brian%20Halo%202_zpsv0zgg6du.jpg


The orange splatter is Hunter blood. :D
They are 18 this year and are currently working on Clone Trooper helmets to wear to the Star Wars premier.
 

Attachments

  • Austin%20and%20Brian%20Halo%202_zpsv0zgg6du.jpg
    Austin%20and%20Brian%20Halo%202_zpsv0zgg6du.jpg
    124.9 KB · Views: 499
Re: Duke's Halo 4 Venator Pep Build *WIP (1st suit Step-by-Step) +photos!

Oh boy, I think my fingers need a break. After several hours, I have finally scored all fold lines for all 16 pages of the helmet.
20151223_201926_zpsksgjumoj.jpg

Tomorrow after work, I will be cutting and gluing. I've taken different approaches for this step on my other helmet attempts, as far as where to start, and I haven't settled on one yet for this build. I do know that I will be using Pepakura designer to analyze each piece before I glue it. There is a setting (button) that will highlight the corresponding tab when you hover over an edge on the 2D model. Then, by using the mouse to change the view of the 3D model, you can get an exact idea of where and how a piece should go. (Note: you can zoom in on the 3D model with the mouse wheel and you can move the model by holding both left and right mouse buttons at the same time, as well as spin it by just holding the right mouse button.)

That's all for tonight. I hope that the Holidays treat you and your family well this year!
 

Attachments

  • 20151223_201926_zpsksgjumoj.jpg
    20151223_201926_zpsksgjumoj.jpg
    205.6 KB · Views: 493
Re: Duke's Halo 4 Venator Pep Build *WIP (1st suit Step-by-Step) +photos!

the same to you and your family as well. Looking forward to seeing your build.
 
Re: Duke's Halo 4 Venator Pep Build *WIP (1st suit Step-by-Step) +photos!

Nice work! That's a lot of cutting and scoring in your future. Lol at 100 hours :p
 
Re: Duke's Halo 4 Venator Pep Build *WIP (1st suit Step-by-Step) +photos!

Nice work! That's a lot of cutting and scoring in your future. Lol at 100 hours :p

Well, that Pipboy took me 40 hours... Guessing moderately and adjusting for already getting some of the learning curve out of the way I figured 100 hours was close for the full suit (not including mounting straps and padding)... are you saying its going to be a lot more? I also count hours of actual work, not the time I'm distracted from it. Meaning, if I pep for 4 hours in front of the TV, I only count that as 2 working hours (or less depending on how interesting the show was). :)

And thanks for the compliment!
 
Re: Duke's Halo 4 Venator Pep Build *WIP (1st suit Step-by-Step) +photos!

Tips on assembling Pepakura:
1st (and foremost) Take your time! If you rush this you'll either throw away your project or you'll spend more time trying to fix it.
2nd Develop a system, or systems. This not only will speed you up, but will make you less prone to making mistakes and missing things.
----- There are several steps to assembling a pepakura: cutting, scoring, folding and gluing. First is to figure out the order you would like to do those things in. Next I'll give you tips on each of them in the order I like to use.

Score-
- I like to score every printed pieces before cutting them out, this makes it easier to hold them in place. Also by doing all of them first, I don't have to switch between scoring and cutting. Saves time.
-Make sure your lines are straight! If you find scoring was crooked or wavy, score it again and try to keep it straight! Most importantly the beginning and the end of the score need to be dead on the line. Use a ruler if necessary.
-Use a rigid, but not overly hard surface for support. I find that if I use metal or wood I tend to have a harder time. Whereas, using a self healing cutting board it lets me draw the score line smoothly.
-Remember to have a system! Mine is blue for mountain folds and the back of the Xacto knife for the valley folds. (some people use red for valley, but I'm cheap!)

Cut-
-In order not to miss cutting a line and then pulling the piece out only to rip it... make a system.
My system is:
1. Cut all the long edges of the tabs (Tabs are not critical so you can cut them fast and not worry if you're getting on the line or not)
2. Cut all of the non-tab edges. (These lines are very critical, if you start to veer just make sure you get back to the line before the edge runs out. You're going to be using the corners of this edge and the corners of the folded tab to line up the piece for gluing.)
3. Cut all angles of tabs. (again, quick cuts here are fine.)
-Before cutting a piece out I make sure it is the piece I want. Check the computer model. Make sure you have the right piece and you know the orientation.
-Sometimes I write on the back of it with little notes, like an arrow for orientation or L for left side.
-Don't get too far ahead of yourself. Cut a few pieces out then glue them. Otherwise, you risk getting lost and overwhelmed.
-If you're getting frayed edges on your cuts it's time to replace the blade. Don't cut yourself!

Fold-
-It may seem easy, but there is a little to it.
-You're working with paper, don't force it. If you warp the piece, try to straighten it out by folding along the edge again like an envelope.
If you're having trouble making the folds here's a couple extra tips:
1. Check out the second post on my Ghost build, I show a technique I use for folding thin pieces. I've started to use this more and more, especially when the tabs are particularly long, when the tabs are bigger than the non-tab part or when there are fold close together.
2. Before you cut the piece out you can actually do some folding. This will help greatly if the piece once cut is small and difficult to work with. What I do now is prior to cutting any piece and after I've scored everything, I go through and cut the tab edges of every Valley fold and fold them up while still on the paper. This has sped up my pepping tremendously.

Glue-
-Once you know exactly what piece you need and where it goes get the hot glue gun ready. You can use other types of glue, but I find that hot glue works really well, gives it a little strength and can be reheated to undo any mistakes.
-Start with the edge that is visually most important (generally the closest to the front). The first tab is most important so take your time.. Use a little bit of glue along the tab and line up the corners of the edge with the tab to the corresponding edge without a tab and press them together. The hot glue tends to want to slip so you have a few seconds to make sure they are lined up.
-When gluing a long strip to something, try starting in the middle. Find some fold lines that line up really well to a tab somewhere in the middle of your cut out piece. This will help eliminate those times of getting to the end and finding you are several millimeters too short... whoops.
-Don't force the shape, if your cuts are clean and straight and you are always gluing the corresponding edges completely parallel, then the pepakura piece will pull itself into the correct shape (it may not happen until you glue more pieces together).
-If you didn't get the pieces completely flush together it is okay, just don't glue an edge crooked.
-If you need to undo a glued tab, take the "nose" of the glue gun and wedge it between the two pieces, as you push it along it will reheat the glue holding them together. Alternately, you can just squeeze out a bunch of hot glue on the backside of that glued tab and it will heat the glue underneath the tab. The second method is more challenging, messy and hot, but it is quicker.
-To avoid the need to fix, work slowly and one tab at a time. It may take awhile, but I never have good luck when I try to do more than two tabs at a time (unless they are really tiny tabs).
-Lastly, work symmetrically. If you do a couple pieces on the left side, do the same ones on the right next. This will help you keep the piece even as you work and not wind up with a leaning tower of helmet.
-Remember, you're probably not going to get it 100% perfect so don't get frustrated. As you get closer to the end you can start leaving gaps or pinching it a little to fix some of the tension problems. Don't hesitate to cut something away or add a tab. There is going to be plenty more work to do so don't get hung up on the paper being perfect.


So where do you start?


With this particular helmet, I decided to start with the front face part of the helmet, being that the middle of the face part seems to be the most important. This way I'm able to make sure that the center line stays true and I can hide any skew mishaps as I move my way to the back of the head. You also want to think about hand space, when I get to the end am I going to be able to easily glue it?

20151224_212741_zpsdkljae1y.jpg

20151224_233244_zpssekrq1s9.jpg
Domino is not sure how he feels about it, but he hasn't tried to eat it yet so there is hope. All things considered it seems to be coming along alright. Santa should be rolling by in a few minutes so I should be getting to bed! :)

20151224_212741_zpsdkljae1y.jpg


20151224_233244_zpssekrq1s9.jpg
 
Last edited by a moderator:
Re: Duke's Halo 4 Venator Pep Build *WIP (1st suit Step-by-Step) +photos!

I updated my previous post to include a quick overview of building a pepakura model.

Now onto my progress:

I worked more on it this weekend, but not yesterday as it was my birthday! (PS The Force Awakens was amazing!) Here shows the underside "chin" part.
20151226_144020_zpsnjdnb0si.jpg

Now that I've done the full front of the helmet I'm going to work my way back. Here I've almost reached the ends of the side.. I'm starting to get a little worried that I made it a tad too big... but we were wagering on the side of big due to growth so I'm going to go ahead and follow through with completing the pep and then test for size.
20151227_145046_zps0cu1afxl.jpg

My next step, I'm going to set what I've done aside and start doing the middle top and the back of the helmet. When the helmet gets to a certain size it becomes hard to work with, so if I make another piece I can then connect the two together. The sides of the helmet almost form little wings and I think this would be a good place to work the seem between the two larger pieces. I should have this done before the new year.
 

Attachments

  • 20151226_144020_zpsnjdnb0si.jpg
    20151226_144020_zpsnjdnb0si.jpg
    205.4 KB · Views: 508
  • 20151227_145046_zps0cu1afxl.jpg
    20151227_145046_zps0cu1afxl.jpg
    190.5 KB · Views: 455
Re: Duke's Halo 4 Venator Pep Build *WIP (1st suit Step-by-Step) +photos!

Great work your doing here. I like to build pieces together in sections then glue them to the main piece. This way I'm not trying to glue little tabs while holding a big part of the helmet. Love your work and you definitely inspire me to do better. Thanks for the posts. Stay calm and pep on............
 
Re: Duke's Halo 4 Venator Pep Build *WIP (1st suit Step-by-Step) +photos!

Your bros are cool! :D Red and blue, haha.
Wow, you're gluing it with hot glue. x_X I try to avoid hot glue, but you're doing it very smooth. Great work so far and I'm looking forward to more progress photos. :D
 
Re: Duke's Halo 4 Venator Pep Build *WIP (1st suit Step-by-Step) +photos!

Great work your doing here. I like to build pieces together in sections then glue them to the main piece. This way I'm not trying to glue little tabs while holding a big part of the helmet. Love your work and you definitely inspire me to do better. Thanks for the posts. Stay calm and pep on............
Thanks man! You're helmets are coming along pretty great too. Almost all three done in a month or so seems pretty good. Doing sections is totally fine, but I would encourage to still work symmetrically. Do a section on the left and then do the same section on the right, that way any mistakes you made on one side are still fresh in your mind. Like if there was a tab that ended up having a bit more of a gap then I intentionally try to recreate it on the other side. Looking forward to seeing that Deadeye helm! And I'm very curious to see how the hardening stage goes for you. The guy I mentioned first, daviduffy, I am pretty sure was from somewhere up by you and finished his suit in the dead of winter. Sounds challenging, but doable! Good luck!

Your bros are cool! :D Red and blue, haha.
Wow, you're gluing it with hot glue. x_X I try to avoid hot glue, but you're doing it very smooth. Great work so far and I'm looking forward to more progress photos. :D

They are pretty cool. Being twins, we have always dressed one in blue and one in red their whole lives to tell them apart. They are also big fans of the popular web series. :)

Thank you and yes hot glue. I think the biggest downside is all of the stringy stuff from moving the gun back and forth. There is also the occasional burning sensation I get to feel on my fingertips. :facepalm It's a pretty forgiving method though and I like that. (I don't have a printer at home so I can't just reprint a piece if I mess up). Really great stuff you've done there with your extremity pieces, best of luck in the finally stages on your helmet! It's so exciting!!


Update:
Almost done with the pep work. Just need to glue the sections together. Note: On this Venator helmet, the data chip slot (circle part on back) was really confusing. Particularly, the bottom part of it (shown in the picture as the top), I still don't understand how the tabs fit together. I ended up just globing hot glue in there and forming it into shape as it dried. Didn't turn out quite symmetrical, but nothing that can't be fixed later.
20151230_230841_zpsnosybfwd.jpg
 

Attachments

  • 20151230_230841_zpsnosybfwd.jpg
    20151230_230841_zpsnosybfwd.jpg
    342.6 KB · Views: 439
Status
Not open for further replies.
Back
Top