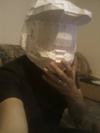
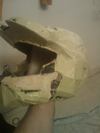
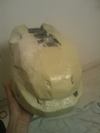
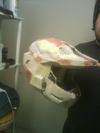
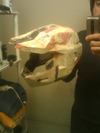
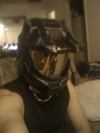
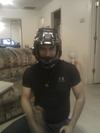
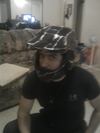
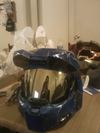
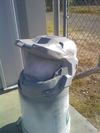
Check my MKVI helmet WIP.....first attempt

Status
Not open for further replies.

oversight1

New Member
Here are some pics on the progress of my suit.....helmet is almost done....just need to add some leds and a little more paint detail.
pepakura finished.
MOBILEPICS176.jpg
rondo added.
MOBILEPICS201.jpg
MOBILEPICS202.jpg
sanded down
MOBILEPICS205.jpg
MOBILEPICS203.jpg
painted...needs visor
MOBILEPICS216.jpg
MOBILEPICS215.jpg
90% done...visor installed
MOBILEPICS220.jpg
MOBILEPICS217.jpg
 

Attachments

  • MOBILEPICS176.jpg
    MOBILEPICS176.jpg
    30.4 KB · Views: 223
  • MOBILEPICS201.jpg
    MOBILEPICS201.jpg
    40.4 KB · Views: 209
  • MOBILEPICS202.jpg
    MOBILEPICS202.jpg
    31.8 KB · Views: 232
  • MOBILEPICS205.jpg
    MOBILEPICS205.jpg
    43.5 KB · Views: 203
  • MOBILEPICS203.jpg
    MOBILEPICS203.jpg
    48 KB · Views: 220
  • MOBILEPICS217.jpg
    MOBILEPICS217.jpg
    42.5 KB · Views: 199
  • MOBILEPICS220.jpg
    MOBILEPICS220.jpg
    38.5 KB · Views: 198
  • MOBILEPICS215.jpg
    MOBILEPICS215.jpg
    41.6 KB · Views: 220
  • MOBILEPICS216.jpg
    MOBILEPICS216.jpg
    42 KB · Views: 202
Not quite sure what your trying to post pictures with, but if you upload it to a site like photobucket and copy paste the IMG code in we will all be able to see what you've done so far.
Looking forward to it and if you have any questions about using the IMG code just PM me, I'll be glad to help.

Omega
 
Sorry for the haitus....lots of work lately...anyway, I am reworking my helmet....i wasnt too happy with the end result...i will have pics posted soon....as well as progress on the rest of the armor.
 
Not too bad, though for constructive criticism:

Try a re-hash with supports on the sun-peak next time. It's warped way up where it should be nice and flat with the rest of the helmet. Also, go easy on the Bondo, it's always easier to add than to remove.
 
for a "rookie" (dare i use that word?) that bondo is applied perfectly, most people (including me) cake it on like anyones business.
 
So noted, I didn't wish to imply that anything was wrong with the Bondo on this attempt - it's just for future reference. I've burned through a good few quid buying sandpaper and new mouse-sander pads before learning my lesson in this regard - it's easier and cheaper to build it up in smaller layers than it is to slap it on like cake icing and then sand down that huge amount and find you've gone too far.
 
Here's a small update on the new paintjob for the helmet...
Primed
IMAG0120.jpg

Blue Metallic paint job... Used Krylon
IMAG0125.jpg

IMAG0124.jpg
 

Attachments

  • IMAG0124.jpg
    IMAG0124.jpg
    50 KB · Views: 205
  • IMAG0125.jpg
    IMAG0125.jpg
    53.5 KB · Views: 206
  • IMAG0120.jpg
    IMAG0120.jpg
    143.7 KB · Views: 204
Going with the same color as me eh... EH?!

Blue is awesome though, are you just doing black detailing?

If you look at mine (shameless promotion of a poor-ish product XD) I've used gold to accent it...

Also, what are the vents made out of, I wasn't pleased with how mine turned out and though your blurry pictures are blurry it looks a bit better than mine...

Looks pretty sharp so far though, keep up the good work.

(oh yeah, do you have working lights?)
 
@ Omega thx for the comments
as for the vents i just used the dremel to drill them in....but ill be some ribbed pipe to make it look a little more authentic.
i am still trying to put lights....i burned out the last ones i put...i used the wrong resistor...but now i think i figured it out...should post up soon with working lights and fan
 
Wow, I really really like this! I love the paint job.
Although, the one thing I've always hated with scratch paint jobs is that it makes it look a little tacky and used. But since thats the look you went for I think it is awesome. Have you used Rondo before? If not then this is an awesome job of it and I hope when I do my first build that it comes out as good as yours. Anyways, brilliant work and I hope to see more in the future.
 
Status
Not open for further replies.
Back
Top