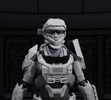
Like Nate mentioned, Halo helmets, like many video game and CGI helmets, don't correspond well to actual human anatomy. The Reach helmets are especially notorious for this. That is the reason that for several sellers of resin Cast Reach helmets, they often come with the "Back Off" mod built in, where a portion on the back of the helmet around the neck is cast as a separate piece, either also in resin or in flexible rubber, and then attaches with magnets, Velcro, or another fastening method.
So, I would recommend doing a similar “Back Off” approach on your 3D printed helmet. I would scale it so it looks more proportional, and less overly large. You could then take the helmet file into your slicer program of choice and remove the portion around the back of the neck, and print it as a separate piece from the helmet. You could then finish and smooth both pieces independently, then work on your attachment system after. If you are very skilled in your slicer program of choice, you could possibly even add in mounting points for magnets between the neck piece and the helmet. You might also be able to find another member here with more experience who could take on these modifications to a file for you.
Another option is to go ahead and proceed with printing the helmet as one piece. Once the helmet is finished, then go in with a jewelers saw/file, a mini hack saw, or an exacto, and cut off the lower portion of the helmet by itself. Again, you could do this pre or post sanding and smoothing.
The Back Off mod is very popular with Clonetrooper helmets from Star Wars, as they were also CGI creations and as such don’t work with human anatomy when scaled to the movie proportions. There are several tutorials out there about this method for Clone buckets that could be applied to what you want to accomplish here.
Movie Realistic Episode III Helmet Tutorial - Imperial Surplus


