EOD helmet

SpartanMech1

New Member
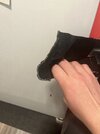
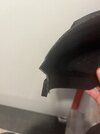
I have been working on an EOD helmet for the past few months and only now realized the is doesn’t want to hold together because I printed it too thin and the glue has very little material to grab onto, is there a way to fix this or should I try reprinting the helmet with thicker walls??
 
Its done. Don't invest $100 to fix $30 in reprint.

Also... This is why in my FAQ, I recommend starting on smaller things until you learn the art+science that is 3d printing. Then after that you start armor down at the feet with helmet last. Figuring out your settings, strengths and so on over half a dozen helmets is going to be expensive and time consuming. Learn on learning models, then small props, then bigger props, and the very specialized genre of wearable armor after you level-up your printing and scaling skills.
 
Hey there, do you mind posting a couple pictures of the walls so we can see if its salvageable? Also got couple questions for you
1) Which files are you using?
2) Did you further split up the helmet, or did you print it as it came?
 
Would love to get some photos, itll help better evaluate what can be done with the helmet. If it isn't salvageable for "wearing" it can always be a tester piece!
 
Hi! Welcome to the forum! While chances are it isn't worth dumping more money into it, it is most definitely a good test for size etc. Definitely post some photos so everyone can give you specific info.
 
Hey there, do you mind posting a couple pictures of the walls so we can see if its salvageable? Also got couple questions for you
1) Which files are you using?
2) Did you further split up the helmet, or did you print it as it came?
Huh, that’s weird there we’re supposed to be pictures attached, let’s fix that
1) I’m just using some free files I found on the internet
2) The helmet was split into eight different chunks for printing and as I was a little too excited to get started on this project I didn’t realize that the wall thickness was too thin
 

Attachments

  • IMG_7856.jpeg
    IMG_7856.jpeg
    1.5 MB · Views: 18
  • IMG_7855.jpeg
    IMG_7855.jpeg
    1.5 MB · Views: 17
They used too but then they warped somehow. A couple of them also warped during the print process but I didn’t want to reprint it at the time because it seemed like an easy fix
 
If it's a minor misalignment, you could easily flush out the seams with bondo or resin and plenty of sanding. If it's an issue where the parts have a sizeable gap in-between them, unfortunately you might need to reprint some parts with thicker walls.

For future reference if you're ever gluing to parts together I find it pays dividends to use a bit of extra filament or metal clips to weld the parts together. This tutorial by Frankly Built is what I've used in the past and have worked out pretty well, especially for my Mirage Chest plate.
I’ll be sure to look into that tutorial and I am definitely going to be retrying this as it is too far gone with sizable gaps and walls to thin for much gluing or welding to take place. Thanks for all the recommendations guys!
 
If nothing else you got a nice print to practice painting techniques on! I had some forearms from a MKVb build that were a little too large. However I sanded, primed, and painted them as practice for the real thing.
 
Yeah, I don’t know how though because they were inside. Wouldn’t be too surprised if the sun got to them through my window though
I saw a photo one time of a guy driving to a convention. Long 1980's station wagon with two R2 astromech droids in the back. So clearly air conditioning going, some of that flowing toward the back of the car while driving.
He gets to the hotel and opens the back... The droid on the sunny side of the car looks like a candle in the sun. The other droid was on the shade side of the car, and its fine.
So yeah, sun through a window even in a fairly normal situation could be a problem.
 

Your message may be considered spam for the following reasons:

If you wish to reply despite these issues, check the box below before replying.
Be aware that malicious compliance may result in more severe penalties.
Back
Top