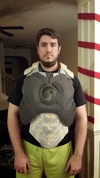
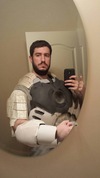
Halex's Iron Man Mk IV

Status
Not open for further replies.

Halex

Jr Member
Hey 405th!

So, it's been quite awhile since I've posted anything new. Ended up being a little burned out after finishing my Halo 3 build and never got very far into Reach before that dreaded request from my girlfriend... "Could you make something that we can do a couple's costume with?" Try as I might, I couldn't convince her to be Kat, so after some thinking I ended up on Iron Man.

After finally getting the helmet right, I decided it was time to make a thread here to help keep me motivated. Without further adieu, here's the story of the helmet:

--

Once upon a time, some guy in Atlanta decided that Iron Man was awesome and he needed a suit too. First, he made the helmet.

20131109_200828.jpg


It was a little on the large side, but he was sure it'd be okay, since everything looks huge until the shoulders are done. So, on he went, hardening it with a round of rondo.

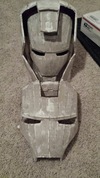
Once it had solidified and cooled down, he tried it on and came to the simple realization that should have been obvious earlier. It was freaking huge. Not to be deterred, a second helmet was built. Still too big! It seemed that using the measurements from Halo helmets didn't work too well, so it was time to take more drastic measures. A third was glued together over the course of a week, this time several centimeters smaller. Still. Too. Big.

One last effort was made to get a helmet the right size. This time, success! Sadly, in his haste to harden and wear this one, it wasn't braced as well as it should have been and ended up warping badly. Well, he'd already made four. What's one more helmet at this point... Twenty hours of work (over three days) later, he finally met with success. Looking back over the previous attempts, he pondered making a set of Iron Man nesting dolls...

20141008_214700.jpg


20141008_223128.jpg


... but it seemed like too much of a niche market.

The fifth one was braced and reinforced like crazy and finally met with success.

20141001_192829.jpg


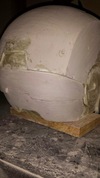
The sanding began and the shape got clearer, bit by bit.

20141004_113405.jpg


20141008_213829.jpg


20141008_213910.jpg


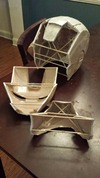
He also built some other parts along the way, between helmets one and two:

20140324_231346.jpg


2014-03-24%2B23.13.12.jpg


That about wraps up storytime for now! I'll keep the thread updated as I have time, but that's in short supply lately. Anyone who followed my last build might remember that I'm terrible at updating when I promise to do so, heh.

The helmet has a long way to go before it's ready, as I'd like to mold/cast it if possible. Given the difficulty in getting this one right, it'd be a shame to have anything happen to it and have to start all over again... again.

'Till next time!
 

Attachments

  • 20131109_200828.jpg
    20131109_200828.jpg
    31.2 KB · Views: 274
  • 20141008_214700.jpg
    20141008_214700.jpg
    161.6 KB · Views: 290
  • 20141008_223128.jpg
    20141008_223128.jpg
    99.7 KB · Views: 292
  • 20141001_192829.jpg
    20141001_192829.jpg
    82.2 KB · Views: 284
  • 20141008_213829.jpg
    20141008_213829.jpg
    138.2 KB · Views: 283
  • 20141004_113405.jpg
    20141004_113405.jpg
    151.3 KB · Views: 258
  • 20141008_213910.jpg
    20141008_213910.jpg
    85.9 KB · Views: 281
  • 20140324_231346.jpg
    20140324_231346.jpg
    82.6 KB · Views: 289
  • 2014-03-24%2B23.13.12.jpg
    2014-03-24%2B23.13.12.jpg
    82.6 KB · Views: 303
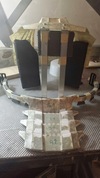
Quick update... got to spend a little time on the helmet last night and was able to take care of one significant issue I had been irritated with before.

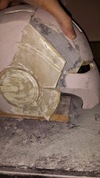
When the faceplate was in the lowered position and sitting on the rest of the helmet, there was too significant of a gap between the two pieces. I started by taking painter's tape and placing it over the edges of the helmet I wanted to keep intact, in this case the "head" portion where it met the faceplate. Once the tape was down, I slathered the upper side of the taped edges with bondo hair (for strength and resistance to chipping/cracking), then held the faceplate in place while the bondo set. With the thin tape barrier keeping the two pieces separate, I was able to easily pull them apart and remove the excess bondo, leaving a very nice clean edge behind.

20141014_213758.jpg


The faceplate slipped a little bit when I was taking the picture; when it's positioned correctly, the small vertical gap between the two pieces isn't even visible. I have yet to repeat the process on the upper edges, but in that case I think I'll add to the base instead of the faceplate. More shaping to do before that point, though.

With the pieces fitting together a bit better, I thought it was time to place the jaw portion in and see what it looked like as a single entity.

20141014_220212.jpg


Have yet to touch the jaw since hardening, but it seems to fit well and hasn't warped. Hopefully it'll be a fairly smooth process and will need minimal work, but that'll be the last piece to be finished.
 

Attachments

  • 20141014_220212.jpg
    20141014_220212.jpg
    216.6 KB · Views: 280
  • 20141014_213758.jpg
    20141014_213758.jpg
    109.8 KB · Views: 273
Looking real good man!

Thanks man, appreciate it! Glad to see another Iron Man build going on, too!

--

Got a little more time to work on the helmet over the weekend. Doesn't look like much, but spent another five hours or so sanding down parts I wasn't completely happy with and finishing some more of the edges between the faceplate and the body of the helmet. It's especially visible in the last picture in my previous post... the top edge was horrifically uneven and the forward "prong" of the helmet was too low and not aligned to the faceplate. I used the same process for the edges as I did along the sides, but this time with pictures!

First, tape off the edges that are "cleaned up" and essentially finished (I intentionally broke off the prong; more on that later).

20141018_163804.jpg


Place some bondo hair (or strong bonding agent of your choice), then fit the pieces together as you would want them to fit in the end. I've been adding extra hardener, then physically holding the pieces together until the bondo sets, just to ensure that everything lines up. The results looks something like this (note the :

20141018_165700.jpg


Once it's set, sand away! Tape usually comes off during the sanding, but whatever's left once it's separated can be easily removed. After a bunch of sanding, you end up with a nice clean edge between the two parts.

20141018_213538.jpg


In the above shot, the prong is superglued in place and positioned much better. Reinforced it with some bondo hair in the gap that was created underneath when I raised it, then sanded down the edges of the faceplate to match.

20141020_222045.jpg


Finally, I started a bit of detail work and added back the lines that were lost when I was applying bondo to the sides of the helmet.

20141020_224408.jpg


It's coming along. The detail lines need a lot of cleanup and there's still a lot of smoothing to do on the base, but the faceplate is nearing primer stages. Really looking forward to getting some primer and/or glazing putty on there and seeing what it looks like.

More to come!
 

Attachments

  • 20141018_213538.jpg
    20141018_213538.jpg
    110.9 KB · Views: 268
  • 20141018_165700.jpg
    20141018_165700.jpg
    124.2 KB · Views: 277
  • 20141018_163804.jpg
    20141018_163804.jpg
    139.4 KB · Views: 283
  • 20141020_224408.jpg
    20141020_224408.jpg
    107.2 KB · Views: 299
  • 20141020_222045.jpg
    20141020_222045.jpg
    124.6 KB · Views: 267
Nice job on that clean edge man!
That being said, how are you going to separate it again for the moving faceplate and maintain the clean line?
 
They're already two separate pieces. Once the top is sanded down, the tape barrier lets you peel the two apart pretty easily. I'll grab a pic of it tonight and add it to this post so the inside is visible as well.
 
Excellent work on this so far! :D

Thanks vshore, really appreciate it!

Nice job on that clean edge man!
That being said, how are you going to separate it again for the moving faceplate and maintain the clean line?

Have a few more pics to add so I'll just post the promised one here instead:

20141021_201247.jpg


That's the end result once the tape is removed and the edges cleaned up a bit.

--

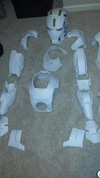
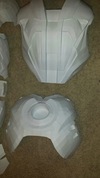
Felt like a little update was worthwhile tonight. Manged to get my duct tape dummy (aka JARVIS) partially repaired and functional again, so I threw a few pieces on it to get an idea how the body was fitting together. Overall not too bad.

20141021_204524.jpg


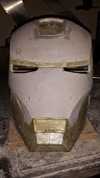
Also got a nice shot of the helmet now that the faceplate is a bit smoother and all the gaps have been filled.

20141021_211353.jpg


In the end I think the prong ended up being slightly crooked, but I'm hoping that it's at least partially an optical illusion that'll go away once everything is primed. If not, I'll just have to live with it. Speaking of primed...

20141021_213530.jpg


Couldn't wait any longer to see what it looked like; turned out pretty well! Needs the expected sanding/cleanup but overall I'm pretty pleased with it.

Also, would like to pose a question to those who are familiar with casting and molding... would a three-piece helmet be done best as one piece, then cut apart later, or as three individual pieces?

Thanks to everyone who's been looking in and following along, it means a lot to me. Hope to be back soon with more good stuff!
 

Attachments

  • 20141021_204524.jpg
    20141021_204524.jpg
    95.1 KB · Views: 273
  • 20141021_201247.jpg
    20141021_201247.jpg
    124.3 KB · Views: 274
  • 20141021_211353.jpg
    20141021_211353.jpg
    87.8 KB · Views: 287
  • 20141021_213530.jpg
    20141021_213530.jpg
    157.8 KB · Views: 278
looking good my friend! i'll be taking your advice on mine.
Quick question do you just pull the pieces apart after cleanup?
Im just wondering if there is any resistance i should expect.
 
Once the seams are sanded down there should be minimal resistance. Sometimes a bit of bondo gets over the tape on the bottom, or you may have it fill in a bit of a concavity behind the tape, but for the most part the pieces pull apart pretty easily.
 
Dude this is super clean!! I have seen some nice peps before but nothing quite like this. I am working on a couple of helmets right now and should have a new thread up within a week or so.
 
Thanks man! Been taking my time and trying not to rush it at all.

--

Not much time to work on anything lately, but did manage to get a bit more sanding/shaping done the last few days. Also figured it was time to prime the rest of the helmet and see how it came out.

20141024_174002.jpg


Overall pretty good, though as always it helped show the small defects. After the spot putty was applied, I began sanding again, this time with 100 grit instead of 60. Decided it was time to fit it all together and start working on it as more of a whole, so I added the jaw portion.

20141028_203517.jpg


All fits together nicely! One thing I noticed that was a bit off from the reference pictures I had was the areas where the jaw met the body of the helmet had a bit of a raised section on them. A little bondo and some more sanding later, the current product...

20141028_212226.jpg


Still so much to do, but it's come so far already! Should have a good amount of time to work on it in the coming weeks... I've managed to not use vacation time thus far this year, so I'll be taking the rest of the Fridays off =D

'Till next time!
 

Attachments

  • 20141028_203517.jpg
    20141028_203517.jpg
    239.5 KB · Views: 264
  • 20141024_174002.jpg
    20141024_174002.jpg
    204.4 KB · Views: 285
  • 20141028_212226.jpg
    20141028_212226.jpg
    213 KB · Views: 281
Well, two weeks on from the last post I wish I had a bit more to show, but progress has been slow. Keep getting caught up doing that work stuff... good thing I like my job or I'd be more upset about it taking up so much Iron Man time.

Before the pictures, I'd like to take a minute to share a few things I learned while wearing the Halo suit and what I'd like to do to remedy them in this build.


  • Boots
These were one of my least favorite parts of the suit. Hastily made on the last days, they were just downright uncomfortable.
Issue(s): Inflexible soles and a bad ridge on the back that dug into my heel.
Solution(s): Take more time in breaking apart the pep model and align those points/sections with the movement of a foot while walking. Making the model flex in as natural of a way as possible will alleviate a lot of the problems I was having with it.​


  • Thighs
Next to the boots, these were the least pleasant to wear for any period of time.
Issue(s): Too much restriction around the knees and a tendency to rotate on the thigh.
Solution(s): Be more careful when scaling the model so as to allow better movement and provide a structure that's built into the piece to keep it on straight.​


  • Torso
While the piece came out looking pretty good, it suffered from... falling apart.
Issue(s): Despite using strong magnets, the torso pieces insisted on separating frequently, often when I took a breath. I feel like the root causes of this were part attachment issues, part scaling issues, and part love of pizza.
Solution(s): Pizza isn't going anywhere, so the torso needs to be more flexible. The Iron Man armor is naturally more modular, so the key becomes letting it flex without falling apart or losing connection. Having a good support system in place will allow the pieces to somewhat "float" and move around without losing connection.​

Now that I've said my piece, onto the pictures! The week hasn't been completely without progress, and I was able to get a third coat of primer onto the helmet. Slowly but surely it's getting smoother with fewer and fewer defects. Focus has shifted more from the overall shape to specific areas now, with the ear-dome-things being the current leader for work needed. They still need a fair amount of smoothing to be truly round instead of the polygonal shape that pep models tend to have. Had I been thinking ahead more I would have made them as separate parts and attached them later, but c'est la vie...

20141110_225411.jpg


20141110_225457.jpg


20141110_225558.jpg


Overall I'm very pleased with how the helmet is turning out. The raised areas on the jawline came out better than I had hoped, and the rear portions are almost fully smoothed out.

Major items to go:
  • Sides still need smoothing below/around the ears
  • Jaw needs a moderate amount of smoothing and shaping
  • Seams between the parts also need some finish sanding
 

Attachments

  • 20141110_225411.jpg
    20141110_225411.jpg
    80.2 KB · Views: 275
  • 20141110_225457.jpg
    20141110_225457.jpg
    97.6 KB · Views: 288
  • 20141110_225558.jpg
    20141110_225558.jpg
    74.3 KB · Views: 296
Hey everyone, back with a bit more progress to show. In the ongoing battle to get the helmet looking right, I figured it was time I took 30-40 minutes to clean up around the ear-dome-things, as mentioned in the previous post. Three hours later, I was ready to prime it again and see what progress had been made. Came out well, though I'm not sure that I'm done with this particular piece yet.

20141123_220258.jpg


They're... almost round. Almost.

With the helmet getting closer to being ready for molding, I started to need other stuff to work on as well. Decided to take the approach of working from the inside out, since infrastructure is such an important part of this suit. Using the chest/shoulder brace as a starting point, I built a small frame from aluminum that will hold other parts of the suit together; I like to call it "The Cage." It consists of two strips along the back that run between a horizontal aluminum piece and the brace, attaching to it via a pair of hinges. These allow a bit of movement while still maintaining a strong, fairly rigid frame. The slides at the front of the horizontal piece hold an adjustable velcro strap that keeps everything in position and sits just below my ribcage.

20141118_225505.jpg


Temporary foam padding has been attached with masking tape to keep spacing correct; actual padding to be added later. The top of the four connected rear plates will attach directly to the frame, with the lower ones hanging from it by elastic. The sides of the midsection will be made from the typical EVA foam, with the top edge of each foam piece attaching to The Cage. The abdominal plate will be suspended in the front with attachments to both the velcro strap and the foam sides. Exact method/attachments TBD, but the ab plates are hardened and ready to go when I find the right way to get it all together.

20141123_220007.jpg


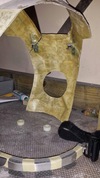
The front of the brace is removable and held together by magnets. When I get farther along in the process, I'll add the vinyl spacers sitting on the workbench to the magnet attachment points, as their inside diameter matches that of the magnet and will serve to reliably hold the two pieces together in the same position.

20141123_220037.jpg


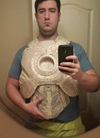
With all this going on, I had to try the current parts together and see how they fit. It's sitting a bit low since the brace itself isn't padded up yet, but overall not a bad test fitting.

20141122_121048.jpg


Hoping to get some more quality time spent working on it over the upcoming long weekend, so maybe I'll be back with another update before too long!
 

Attachments

  • 20141123_220258.jpg
    20141123_220258.jpg
    151.3 KB · Views: 285
  • 20141118_225505.jpg
    20141118_225505.jpg
    91.7 KB · Views: 279
  • 20141123_220007.jpg
    20141123_220007.jpg
    242.7 KB · Views: 269
  • 20141122_121048.jpg
    20141122_121048.jpg
    64.5 KB · Views: 264
  • 20141123_220037.jpg
    20141123_220037.jpg
    105.6 KB · Views: 273
Back with more progress shots! It's been slow going, mostly since every round of sanding on the helmet takes at least an hour, usually closer to two. Making good progress though, and it's down to smaller and smaller details each time.

20141201_205714.jpg


20141201_205743.jpg


Apologies for the graininess but I didn't have great lighting for these shots and the camera phone doesn't do so well without it. I'll get some better ones once I've completed the more of the sanding and filled in the remaining gaps with some milliput. Despite having the edges nicely aligned before, they've gotten sanded and primed so many times that they're not as flush as I'd like anymore. Milliput is much easier and cleaner to work with than bondo, and should be a good filler to fix them up before molding.

Been working on the body parts too, since some nights I don't have time and/or energy to get into a full round of helmet sanding. In staying with my previously mentioned strategy, the chest brace was given a couple coats of bondo and a layer of primer (black) to get it to a workable state, then the collar plates were attached (grey). After going back and forth about several overly-complicated methods to attach the collar plates, I decided running a bolt through them would be just fine, especially since it's not visible with the back piece attached. So much easier!

After those pieces were attached to one another, I had to pick the next in line. The chest plate has long been my standby piece for using up extra bondo, so that was a natural point to continue with. I also reinforced and sanded/trimmed down the ab plates so they fit together better. More buckles and elastic are on the way, so hopefully this weekend I can get them fastened to the brace.

20141201_213530.jpg


Last but not least, the back piece. I bought a heat gun last week so I could soften up some of the existing fiberglass and manipulate the piece a bit. It worked, and I was able to get three braces into the back "channel" to keep it from collapsing as it had the first time.

20141201_213554.jpg


With those in place, it fits very nicely over the cage. Looks crooked in the picture, but that's a combination of an odd angle on the photo and my duct tape dummy starting to collapse... again. The back is only halfway hardened, since I'm waiting to make slightly more progress on the foam sides before I finish it up. They've been cut and prepped with velcro to attach to the cage, but they're not exactly the right size or shape yet.

More to come!
 

Attachments

  • 20141201_205714.jpg
    20141201_205714.jpg
    134.1 KB · Views: 282
  • 20141201_205743.jpg
    20141201_205743.jpg
    120.2 KB · Views: 273
  • 20141201_213530.jpg
    20141201_213530.jpg
    146 KB · Views: 274
  • 20141201_213554.jpg
    20141201_213554.jpg
    132.3 KB · Views: 283
Well, unfortunately the millput gap-filling idea turned out pretty badly. I'm not sure if it was due to inadequate surface preparation , using too much putty, or just using the wrong material, but it didn't come out anywhere near what I was hoping for. Should have taken some pictures, but I angrily peeled the badly cracked and crumbling material away, then re-taped the helmet and did it again with bondo. Results to come...

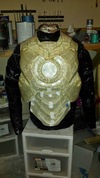
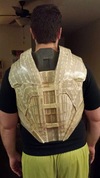
On a happier note, made a lot of progress on the chestpiece and got the first layer of fiberglass on the back, which fits pretty darn well.

20141208_230229.jpg


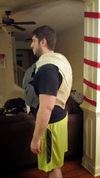
It's sitting slightly low, but so far not restrictive at all and fairly comfortable. From the side things are also shaping up...

20141208_230219.jpg


And lastly, the front view.

20141208_230448.jpg


Can you tell I hate having my picture taken? =D Photographic unpleasantness aside, I've discovered a few flaws in the connection system, but otherwise it's actually coming along really well! The magnets I have in place holding the two pieces of the brace together aren't strong enough to hold up with the ab plate hanging from it, as well as the chestplate mounted. I'll most likely move the attachment point for the abs onto the chest piece, then add some form of connection from there to the upper part of the brace and/or collar plates to keep everything held together.

Once the structure is firmed up a bit more and the torso pieces are all somewhat smoothed out, I'll move onto the arms before finishing any of them. Normally I'd prefer to finish a part rather than leave them all in a half-done state, but with this particular project I feel like everything should be lined up and allow for proper movement before I go ahead and try to finish any of the parts, in case I need to redo one of the sections.

Should be back with pictures of the helmet near completion by next week.... hopefully!
 

Attachments

  • 20141208_230229.jpg
    20141208_230229.jpg
    73.8 KB · Views: 267
  • 20141208_230219.jpg
    20141208_230219.jpg
    70.9 KB · Views: 271
  • 20141208_230448.jpg
    20141208_230448.jpg
    73.8 KB · Views: 302
Cool build how long did it take

This one tends to go in spurts... right now it's on hiatus until molding supplies arrive and I find a better way to keep all the pieces together. Most of the pep work was done about a year ago, everything beyond that stage has happened in the last 4-5 months.
 
Okay okay, I know I'm super inconsistent, but c'est la vie.

Been back on the Iron Man kick for a few months now after making some good headway on the suit; still aiming for Halloween 2015. Without (much) further blah blah blah, pictures!

--

Helmet Molding


Being this is my first attempt ever at molding anything, I did some fairly extensive research beforehand and decided on DragonSkin 10 Medium for the silicone and Smoothcast 321 for the urethane resin. The DragonSkin was perfect and the 20-minute pot life was great, especially in the early coats when I wasn't as familiar with how it works. If/when I order more resin I'll definitely get the Smoothcast 320, as the 7-minute pot life on 321 is excessive for the hand-casting I was doing on these parts. I'd also recommend getting the smallest sizes of all of the additives, even with the gallon size silicone. I went through half a bucket of the silicone, but no more than a few ounces of any of the additives.

MgceddjFZTikg5OIjAdei0Cq3cSRvLpHmyWdEGGPMrw=w2048-h1152-no.jpg


I decided on a three-piece mold as I couldn't get all three pieces separated by enough distance to do them as one piece with an offset without mis-aligning one of the three. I still waver on whether this was the right call or not, but regardless, my execution of this was flawed. More details below on that step, but for now I built out the cereal-box cardboard to give a bit of distance around the part itself. Low-temp hot glue was used to seal the edges.

Y0t-H5MBtIKFqCEYL5nVwBX72gUoC0Qnl2LlT4Vdlv0=w2048-h1152-no.jpg


I started with a thinned coat of silicone as a base, then followed with two more brushed coats. I added blue pigment to the third so I could tell where I had gone previously.

Jsv6S8086KfjDNfUkv1uxiN_GZ-VbthJghEBVIh4WKE=w2048-h1152-no.jpg


After that I added a layer of thickened silicone and the registration keys.
Mistake: Keys were rounded, making them very hard to fiberglass the outer shell around. I figured it out on the last couple keys, but using something like an ice cube tray would have made it much easier.

3kU0NAfhy1EfoN_pJwj0a_MzDmvzPmxkCzyXdMULuhc=w2048-h1152-no.jpg


Last layer of silicone, bringing the total to five (one thinned, two regular, two thickened). Yes, I like blue.

PwX1LrZW8lPW-FkOTB38XzM2DQXPZLa_7hymTcWRa4Y=w2048-h1152-no.jpg


Mohawks added, with foil for flair.
Mistake: On the far left, you can see the front of the helmet is still plain cardboard. This should have been siliconed as well, even though it's not part of the finished product, in order to have the mold maintain its shape. While it still came out decently well, there are a few alignment issues between pieces and I'm sure this contributed.

Nr6BumPsXOgrr0EFey0isInyHoYslyAg92MPKKQu_78=w2048-h1152-no.jpg


Added 2-3 layers of fiberglass over the silicone.

9KmZBoEEmnaglKTAmxrze81PPO1t-e4_trtMoWld5xE=w2048-h1152-no.jpg


Mother mold was then trimmed and drilled, installing 4-5 machine screws with wing nuts on each piece.

After that, first pull!

uQumPxG-BUrCzGWgRQF76qNcePpKrTHTBsVJvTvEpXI=w2048-h1152-no.jpg


Cleaned up a bit.

jE2wtFj0426y7B_Tww6Z9ZMzKtvharX_skL5prfgn0s=w2048-h1152-no.jpg


You can see one of the little alignment bits between the side of the helmet and the faceplate, but I'm hoping that with some sanding/bondo/heat I can reshape and/or rebuild it to be closer to the original. Overall it took about 12 hours to create the mold and another 3 for each of the castings. Using a different resin will help the casting time significantly, but overall the mold wasn't too bad. If materials allow I'll most likely be molding the rest of the symmetrical parts of the suit to save time. Right now that would cover forearms, handplates, and boots.

Upper Body


I'd love to include more detail about the various attachment points here for different pieces, but I haven't finalized anything yet... I'll take some in-progress shots tonight to illustrate the current concept, but until then here's a shot from a few months back showing the (then) current status.

PVIz956-GZ811oFFfkEqenYxttsar4aK9dO-jDkyPsg=w763-h1355-no.jpg


Upper Body


This last weekend I decided to take a bit of time away from the helmet and work on the leg. I'd finished the pep work the week prior but hadn't had a chance to test it as a unit. Plus it looked absolutely monstrous, but as I'd learned prior, it's hard to tell for sure until you get it on. I'd gone through the same process with the forearms and biceps, so I withheld judgement until a test fit.

The leg, all put together.

9LzAqiLfsps7f1WKxafEzeJx42EEpVIugIonDVGOAJY=w2048-h1152-no.jpg


And that same leg, but it bends!

0Opt9KkhHabUlmfmWeRC_YiVRs-i_Nxs-7suMrcjENo=w2048-h1152-no.jpg


Despite the significant number of fiberglass spines remaining at this point in the assembly process, I was able to slip the leg on and walk around the house a bit. The calf is still giant, but for once it won't be a complete bear to put on. The thigh looks even bigger, but fits absolutely perfectly. Getting into and out of it is a bit tricky, since it's a single piece. I'm contemplating hinging the back part of the thigh so I can open it and basically stand up into it, then close the door and go on about my day... otherwise it'll be a bit rough, though I'm sure my co-workers at the office Halloween party would enjoy the spectacle of me putting on rigid pants that only bend at the knee...

The boot is completely pepped and about ready for hardening, but it looks... too tall. At 27.5 scale, it's literally 6+ inches tall and seems like it would rub on the Achilles area. As with the other pieces, I'm not going to judge it too harshly prior to hardening, but it's something I'll be looking at closely.

--

That's about it for now. I'll try to remember to get some detail shots and a new upper-body shot tonight, as I was working on some final adjustments to the shoulder bells and arm attachments last night. Pep work is ongoing on the remaining leg, and the search for helmet motorization materials is ongoing.

Thanks for looking, and I'm happy to answer any questions anyone has about what I went through with the molding process. There are far more knowledgeable people on these forums, but as someone who recently went through it for the first time I'd be glad to share!
 

Attachments

  • MgceddjFZTikg5OIjAdei0Cq3cSRvLpHmyWdEGGPMrw=w2048-h1152-no.jpg
    MgceddjFZTikg5OIjAdei0Cq3cSRvLpHmyWdEGGPMrw=w2048-h1152-no.jpg
    389.2 KB · Views: 210
  • Y0t-H5MBtIKFqCEYL5nVwBX72gUoC0Qnl2LlT4Vdlv0=w2048-h1152-no.jpg
    Y0t-H5MBtIKFqCEYL5nVwBX72gUoC0Qnl2LlT4Vdlv0=w2048-h1152-no.jpg
    406.2 KB · Views: 214
  • Jsv6S8086KfjDNfUkv1uxiN_GZ-VbthJghEBVIh4WKE=w2048-h1152-no.jpg
    Jsv6S8086KfjDNfUkv1uxiN_GZ-VbthJghEBVIh4WKE=w2048-h1152-no.jpg
    405.2 KB · Views: 219
  • 3kU0NAfhy1EfoN_pJwj0a_MzDmvzPmxkCzyXdMULuhc=w2048-h1152-no.jpg
    3kU0NAfhy1EfoN_pJwj0a_MzDmvzPmxkCzyXdMULuhc=w2048-h1152-no.jpg
    365.2 KB · Views: 217
  • PwX1LrZW8lPW-FkOTB38XzM2DQXPZLa_7hymTcWRa4Y=w2048-h1152-no.jpg
    PwX1LrZW8lPW-FkOTB38XzM2DQXPZLa_7hymTcWRa4Y=w2048-h1152-no.jpg
    466 KB · Views: 224
  • Nr6BumPsXOgrr0EFey0isInyHoYslyAg92MPKKQu_78=w2048-h1152-no.jpg
    Nr6BumPsXOgrr0EFey0isInyHoYslyAg92MPKKQu_78=w2048-h1152-no.jpg
    610 KB · Views: 208
  • 9KmZBoEEmnaglKTAmxrze81PPO1t-e4_trtMoWld5xE=w2048-h1152-no.jpg
    9KmZBoEEmnaglKTAmxrze81PPO1t-e4_trtMoWld5xE=w2048-h1152-no.jpg
    520.7 KB · Views: 210
  • uQumPxG-BUrCzGWgRQF76qNcePpKrTHTBsVJvTvEpXI=w2048-h1152-no.jpg
    uQumPxG-BUrCzGWgRQF76qNcePpKrTHTBsVJvTvEpXI=w2048-h1152-no.jpg
    249.7 KB · Views: 215
  • jE2wtFj0426y7B_Tww6Z9ZMzKtvharX_skL5prfgn0s=w2048-h1152-no.jpg
    jE2wtFj0426y7B_Tww6Z9ZMzKtvharX_skL5prfgn0s=w2048-h1152-no.jpg
    338.9 KB · Views: 189
  • PVIz956-GZ811oFFfkEqenYxttsar4aK9dO-jDkyPsg=w763-h1355-no.jpg
    PVIz956-GZ811oFFfkEqenYxttsar4aK9dO-jDkyPsg=w763-h1355-no.jpg
    89.2 KB · Views: 180
  • 9LzAqiLfsps7f1WKxafEzeJx42EEpVIugIonDVGOAJY=w2048-h1152-no.jpg
    9LzAqiLfsps7f1WKxafEzeJx42EEpVIugIonDVGOAJY=w2048-h1152-no.jpg
    340.7 KB · Views: 195
  • 0Opt9KkhHabUlmfmWeRC_YiVRs-i_Nxs-7suMrcjENo=w2048-h1152-no.jpg
    0Opt9KkhHabUlmfmWeRC_YiVRs-i_Nxs-7suMrcjENo=w2048-h1152-no.jpg
    327 KB · Views: 191
Status
Not open for further replies.
Back
Top