You are using an out of date browser. It may not display this or other websites correctly.
You should upgrade or use an alternative browser.
You should upgrade or use an alternative browser.
Foam A Certain “Sport” ODST Now (Completed)
- Thread starter Zackurai
- Start date
Been making some progress, trying to do this with as little seams as I can make, which means a lot of angle cuts behind the main “face” of my foam or the front, but pictures speaks better than words.


So I get a nice edge without a seam, this piece connects on the lower corners or the chest
Also got the back plate pretty much done, even made some cuts on the back, but haven’t glue them together until I get all the shoulder straps and lower, I guess hip strap plate things, but is those.


Nothing special, just used 3 different thickness of foams and glued them up then scored the back so it can fold in those areas once the straps and stuff are attached.
I’ll post those puppies in the next post. Hope that might clear some things up for future foamsmiths peeps.


So I get a nice edge without a seam, this piece connects on the lower corners or the chest
Also got the back plate pretty much done, even made some cuts on the back, but haven’t glue them together until I get all the shoulder straps and lower, I guess hip strap plate things, but is those.


Nothing special, just used 3 different thickness of foams and glued them up then scored the back so it can fold in those areas once the straps and stuff are attached.
I’ll post those puppies in the next post. Hope that might clear some things up for future foamsmiths peeps.
Alright, so these are the straps, I printed out the pepa file, then tape the outer edges to try to make an accurate-ish piece, since these pieces have like a raised 2mm-ish on the middle areas, but figure I do it like this and then cut it and transfer it later, might do that today.


So I’ll trace the full template onto my foam, then cut area the orange tape areas, and trace it onto the foam, then trace it onto some 2mm foam and glue it up, pretty easy, anyone can do it, and my tape of choice is varying modelers tape, stuff is amazing, I use a lot on my models!
Oh and here is where I’m at with the straps and stuff, I haven’t traced the outlines yet, which I will do after this post, hope you guys like some sexy foam straight edges:


Pretty decent progress so far, I might be back later with the final straps and things, well actually did another piece you guys might like, I’ll post that up in a minute.


So I’ll trace the full template onto my foam, then cut area the orange tape areas, and trace it onto the foam, then trace it onto some 2mm foam and glue it up, pretty easy, anyone can do it, and my tape of choice is varying modelers tape, stuff is amazing, I use a lot on my models!
Oh and here is where I’m at with the straps and stuff, I haven’t traced the outlines yet, which I will do after this post, hope you guys like some sexy foam straight edges:


Pretty decent progress so far, I might be back later with the final straps and things, well actually did another piece you guys might like, I’ll post that up in a minute.
Anyway figure I do somewhat a step to step of how I normally try to tackle angle pieces.
There are two ways I will tackle angles, trace the lines to be cut on the front and back, then score the back lines and make the cut to the left or right at and angle to get well an angle that’s goes to the left or right, pretty simple, like this:


Which is fairly easy, but been doing this for like 14 years now, so maybe my experience makes it look easy, anyway here is another one I do it, especially if the piece is suppose to look thicccccc, I will trace whatever the base template be on the 10mm foam, then trace the angle piece on some 6mm, cut the angles then glue it on the 10mm.
But make sure to leave like a 10mm space around the main template so you can cut both and make a clean, sexy piece of foam, most of the armor will be done like this.


Then you will get this, looks nice and clean, I cut the angles then use my dremel and some 400 grit sandpaper to make it smoother, like this, insert some type of celebration sound in your head:

Anyway, now back to tracing and planning, later guys!
There are two ways I will tackle angles, trace the lines to be cut on the front and back, then score the back lines and make the cut to the left or right at and angle to get well an angle that’s goes to the left or right, pretty simple, like this:


Which is fairly easy, but been doing this for like 14 years now, so maybe my experience makes it look easy, anyway here is another one I do it, especially if the piece is suppose to look thicccccc, I will trace whatever the base template be on the 10mm foam, then trace the angle piece on some 6mm, cut the angles then glue it on the 10mm.
But make sure to leave like a 10mm space around the main template so you can cut both and make a clean, sexy piece of foam, most of the armor will be done like this.


Then you will get this, looks nice and clean, I cut the angles then use my dremel and some 400 grit sandpaper to make it smoother, like this, insert some type of celebration sound in your head:
Anyway, now back to tracing and planning, later guys!
Morning, everybody, made a lot of progress last night and this morning, all very simple, but effective stuff, guess I will start where I left off from my last post!
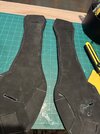
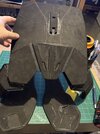
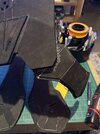
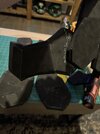
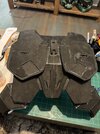
Nothing too crazy, just attach the 2mm foam to 10mm, then glued it all together, came together nicely, I have started on the chest, it’s cut out and beveled, but I make a new post for that specifically.
See you guys there


Nothing too crazy, just attach the 2mm foam to 10mm, then glued it all together, came together nicely, I have started on the chest, it’s cut out and beveled, but I make a new post for that specifically.
See you guys there
So this is the chest, not sure how accurate I will go with this, since the ODST chest will cover most of it.
I will have a little seem when it gets done, but again, that should be covered up by my ODST chest, but I will go step by step.
So here, I traced my template, then added a 10mm border around to account for the bevel to make it look thick, an optical illusion of sorts
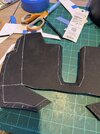
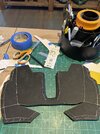
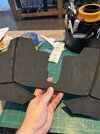
Also bevel the back side of course, really hate trying to cover seems.
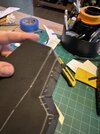
After that, I then rough cut an 45 degree angle on that 10mm edge border I gave the chest, sort out f like this, I saw KaeSpoon do something similar to her chest piece and looked like some thicc armor, and loved that.
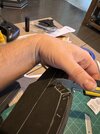
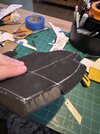
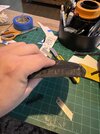
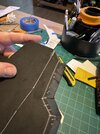
I know it looks rough right now, but took these outside 30 minutes ago with my dremel and smoothed it out, this is the result that of that
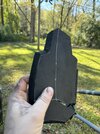
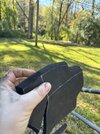
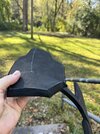
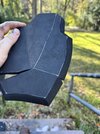
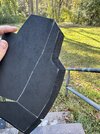
Then I moved the edge to see if I would get that thicc result like I wanted and yeah, I did.

Now about to smooth the edges further with some 600 grit and get it glued up, so until then, have a nice day
I will have a little seem when it gets done, but again, that should be covered up by my ODST chest, but I will go step by step.
So here, I traced my template, then added a 10mm border around to account for the bevel to make it look thick, an optical illusion of sorts


Also bevel the back side of course, really hate trying to cover seems.
After that, I then rough cut an 45 degree angle on that 10mm edge border I gave the chest, sort out f like this, I saw KaeSpoon do something similar to her chest piece and looked like some thicc armor, and loved that.


I know it looks rough right now, but took these outside 30 minutes ago with my dremel and smoothed it out, this is the result that of that


Then I moved the edge to see if I would get that thicc result like I wanted and yeah, I did.
Now about to smooth the edges further with some 600 grit and get it glued up, so until then, have a nice day
Thanks! Mostly been using your build for referenceCan't wait to see how this turns out!
Afternoon guys, just some photo dumps on the progress, nothing special here just glueing layers of foam and attaching to stuff.
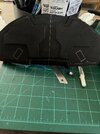
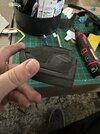
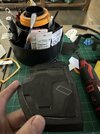
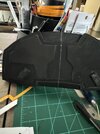
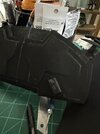
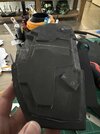
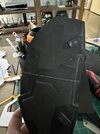
And got the chest attached to the overall torso, didn’t bother with extra details because the ODST chest will cover it up, but that’s done too.
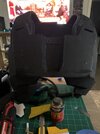
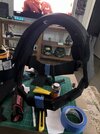
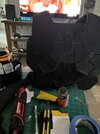
Also got the base gasket/vest undersuit kinda built, working on adding those details now, but coming along kinda smoothly.
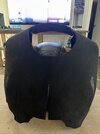
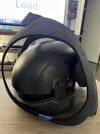
That’s about it for now, feel free to like.


And got the chest attached to the overall torso, didn’t bother with extra details because the ODST chest will cover it up, but that’s done too.


Also got the base gasket/vest undersuit kinda built, working on adding those details now, but coming along kinda smoothly.


That’s about it for now, feel free to like.
- Member DIN
- S241
im interested to see how this turns out, I feel like the collar bit of the suit thats in some of the reach renders might hinder head movement. But thats some good foam work on the chest piece
adodolllll
New Member
Hey man, it's great suit that u build,I'm wondering about how tall is the platform of the shoe will be
im interested to see how this turns out, I feel like the collar bit of the suit thats in some of the reach renders might hinder head movement. But thats some good foam work on the chest
Thanks, yeah, thinking of scavenging an old 1/4 zip bru for the collar instead of foam, made more progress just haven’t posted it yet.
Sorry friend, not sure I understand what you meanHey man, it's great suit that u build,I'm wondering about how tall is the platform of the shoe will be
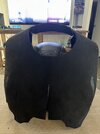
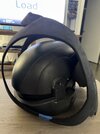
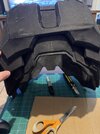
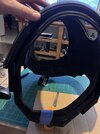
The original vision has changed for this build in favor for a “sport” than an accurate version, so this is the current final version, maybe one day I’ll make an in game one, I have wore it about 11 times so far and decided to ditch the shoulders and gauntlets for more flexibility and motion, but this is a Sean Bradley kit from Etsy, sure everyone here know what that is.


The visor is latched on, I can seperate it and put in my mesh one for the new role of this armor, works very well, but this build is finished. Sooo on to other things!
The visor is latched on, I can seperate it and put in my mesh one for the new role of this armor, works very well, but this build is finished. Sooo on to other things!
Similar threads
- Replies
- 14
- Views
- 2,901

