Build-A-Spartan with OFiveTwo!

What armor do you want to see me make?!

  • Mk. VII

    Votes: 8 12.1%
  • MK VI

    Votes: 4 6.1%
  • MK V(b)

    Votes: 19 28.8%
  • MK IV

    Votes: 7 10.6%
  • MIRAGE

    Votes: 7 10.6%
  • ODST

    Votes: 16 24.2%
  • RAKSHASA

    Votes: 5 7.6%

  • Total voters
    66
  • Poll closed .
Can do! I'll start off with breaking down my scaling process

405th folks, whats the word with talking about the Halo Archive? Basically using blender models as references, not sure if that's taboo. I've got other methods as well.
100% One of my biggest issues with my prints is my scaling always seems a bit off. I look forward to hearing from the master Jedi on how to correct my issue!
 
As much as I love MK VI (my beloved), I gotta admit it´s a bit overdone. Knowing what you are capable of: I would love you to alocate resources on something new or far more interesting, and for such I cast my vote for Rakshasha (tho I feel it´s the best core for a ODST-type of build, while also looking like a Spartan).

Can´t wait to see what you end up doing! Love your videos and reels.
 
Can do! I'll start off with breaking down my scaling process

405th folks, whats the word with talking about the Halo Archive? Basically using blender models as references, not sure if that's taboo. I've got other methods as well.
As far as I´m concerned: it´s not an issue. In fact the most tools, the better. The Archive is very welcoming with 405th members too, so I would say: go for it.
 
052 with the cat ears? Say less, we need to see it happen! I did my part, vote for #MkVIIgang
 
Alright Spartans... lets do this..

After what feels like YEARS.. 3 actually. I am finally going to try and join the ranks with actual armor! I have been slowly trying to put a suit together for a while now but I have decided that it is time to go all in and build a suit alongside y'all!

I have been painting and customizing helmets for a while and I hope that I can translate that into the full armor. I have already gotten the handplates printed and ready to be sanding and painted, as well as the gloves to go with them. The hardest part for me is the scaling and printing of the suit itself. I have tried to start another suit about a year ago and got stuck on the first piece, that kind of fit but was slightly oversized and made the part uncomfortable. I have also printed multiple pieces that were just slightly to small. So BROTHER HELP ME! PLEASE! Now below is the armor that I will be attempting to build, it is kind of a mashup of the Mark V (b) from reach and the Mark VII. I have also thought about messing with putting the knee cover onto the shin like in the Mark V (b) but with the Mark VII pieces. Also... some of the pieces are still a little oversized after looking at this picture..

Armor Concept.jpeg

Halo Infinite 3_5_2024 2_44_30 PM.png


If anyone has any suggestions to help me improve the armor please feel free to let me know!

So lets get this party STARTED!:lol:

halo GIF
 
3/8/2024
It’s already been a week, hasn’t it!

Welcome back Spartans! Last week was the beginning of our Great Journey in costume making and a basic introduction to the process, so if you haven’t read it yet….well, I don’t know how you got here. Go read it.

Anywho, your assignments from the past week are due, and though I have no means of ACTUALLY grading anything, I can see in the forum thread that many of you have taken some awesome initiative!! It seems across the board most people following along have secured their 3D printers, and we’ve even got some designs that have been rolling in! Thank you guys for posting in here! I make sure to shout y'all out in the video on YouTube!

Along with the stellar suit designs coming in, quite a few of you guys have requested advice on properly scaling the suits prior to printing. Since I kind of skimmed over Armorsmith last time, I figured that would be a good place to start this episode!

But before we get into the “fine-tune scaling” we’ve got some VERY important news to attend to!
THE VOTES ARE IN
THE WINNING SUIT THAT I WILL BE MAKING FOR THE TUTORIAL ISSSSSSSS….

The Mark V (B)!
IMG_3320.JPG

It started with a clear lead, and even stayed ahead of the ODST suit! This is actually really nice, because it had always been a dream of mine to create my OG suit from Halo Reach, and now I have an excuse to make that a reality! For this, I’ll be using a hodge-podge of files, but the main base will be InstinctCreative3D's models, which I’m really excited to try out.

Thank you guys for voting, and don’t worry if your armor didn’t get picked! If you know me at all, you know that at one point or another, I’ll end up making each of these anyway!

Hahaha, I will never own a home.


[SCALING]

Scaling your armor is one of the first things done in the building process, and one of the easiest things to mess up. There are ways to really dial everything in, but at the end of the day, it comes down to what you’re happy with and what is comfortable on your body.

Remember that. That’s what we’re aiming for, is armor that feels good for YOU.
Now right off the bat, we already have challenges we need to address:

Firstly, Halo armor looks as cool as it does because it’s literally built for superheroes. If you actually take a second to look at the proportions of the in-game models, they’ve got much longer legs than anyone would normally have, along with longer necks and smaller heads. You have to keep in mind that we’re dealing with video game characters; it’s nearly impossible to look EXACTLY like the chief because chances are, you aren’t a seven foot giant with legs long enough to hurdle small children.

That being said….we’re gonna try to do just that.

[BLENDER]

No we’re not talking about making smoothies. Blender is a FREE, open source 3D creation suite (yes I pulled that right from their website, what do you want from me), and also a MONSTER of a program. People use it for 3D modeling, painting textures, making videos, making VFX FOR those videos, creating renders, creating game assets, doing mo-cap, making avatars -

You get the picture.

Thankfully, we don’t need to know about ANY of that junk! We’re just going to use it for references! You can actually take a model ripped from the game, export it as an .stl, SCALE IT UP, and use it for suit sizing! However, this will also involve some SECRET STUFF.

There is a place called the Halo Archive Discord Server, a collection of game rips and files done pro-bono by people who just want to make Halo art! It’s an incredible database, but you have to use it responsibly. That means NO SELLING THE STLS YOU GET. Seriously, 343 is really nice to allow a community of people to make art with their game assets, do NOT ruin it for the community to make a quick buck. It will make me very sad. It will make JAMIE SAD.

LOOK AT HER. LOOK IN HER EYES. DO YOU WANT TO MAKE HER SAD
IMG_5004.jpg

So once you’ve joined the Discord Server, you’re going to look for the blender file you need! They’ll most likely be at the bottom under the tab “Asset Packs” or “Community Upload”. Now I know there’s going to be a LOT OF GAME ASSETS TO GRAB BUT STAY FOCUSED, WE’RE JUST HERE FOR THE ARMOR, FIND THE FILE THAT YOU NEED, DOWNLOAD IT, AND CLOSE OUT OF DISCORD DO NOT DOWNLOAD THE PROMETHEAN KNIGHTS FILE IT IS A SIREN CALL YOU CAN COME BACK TO IT LATER

Now, take your downloaded file and open it up in Blender (which hopefully you’ve downloaded by this point). You should see a set of armor that looks like this with a set of tabs over to the right side. These are all the different armors attached to this file, and you can mix and match to really get your Spartan exactly how you want it!
IMG_5009.jpg

You can even change the colors and textures, but I don’t want to get into that mess right now soooo MOVING ON

Once you’ve got your Spartan how you like ‘em, drag your mouse over the view of the armor! It should all light up with an orange outline. Then go to export, select .stl, and click “Selection Only”. Trust me, you MUST click this, otherwise you’re going to get an amalgamation of every helmet, shoulder, and chest armor in the game.
We call that….the Thing..

Once exported, open up the file in 3D viewer just to verify it looks how you want! It won’t have any color as .stls don’t carry that data, but that's ok. Take that .stl and import it into your Armorsmith build! Place it on the middle attachment point of the torso; it’ll be easier to move and adjust later. The file is going to be tiny, so scale it up by 600% and try to size it uniformly to your height, plus a little extra for shoe thickness and padding. This will be our baseline for determining how tall to make out armor pieces!
IMG_5010.jpg


Now listen, this is not going to be exact. People are not built like video game characters. They’re built like people. You probably won’t look like this game render, and that is 1000% ok. Spartan armor is made for the Spartan that wears it, full stop.
Don’t worry if you think your head is too big, or your hips are too wide, the armor isn’t for them: it’s for you, and you alone.
If you ever feel bad, just remember I’ve broken every butt plate I’ve ever had due to my overcompensation in the cake department. Seriously, don’t sweat it.

As far as width and thickness of the pieces, air of the larger side. It's much easier to add padding to something that runs a bit big vs looking for pieces to trim away on a forearm that doesn’t fit. If you’re worried about fitment, use a free program like Meshmixer to cut a small slice at one of the ends. Print that slice, and check to see if you can fit your arm, leg, or head through it, depending on what piece it's for.

I’ve also got a secret tip for you guys. You know how I was talking earlier about the legs of Spartans being WAY too long? Well, we can actually replicate that to some extent! When planning your boots, add 1-2 inches of space to represent boot thickness, then adjust your thigh and calf pieces to be spaces relative to the boots. This will GIVE you the appearance of having longer legs in proportion to your body, as well as giving you an actual height boost! I’ve seen people add five inches to their height with the right boot setup, but if this is your first suit, I’d recommend opting for shorter, more comfortable shoes.
IMG_5011.jpg


Keep an eye on your joints during this process. We all have an image of doing awesome actions scenes and sprinting full speed in our suits, but the game models have yet again cheated us with this idea. Armor in the game often clips through other pieces, and unfortunately due to the fundamental principles of the universe we don’t have that luxury. Your knees, hips, elbows, and shoulders are all going to need a good amount of space to move properly, so make sure not to fit your armor too tightly together.

Hopefully that answered some of your questions, and HOPEFULLY you’ve got your armor design finalized!! Now LET'S GET PRINTING!!

[THE FIRST PRINT]

I know you’re tempted to start with the helmet (as some of you already have), but I’d like to take us in a different direction. When I started 3D printing and decided I would make a Halo suit, the very first thing I printed were the forearms. The first one I printed was actually WAY too small cause I didn’t know about scaling yet, but the next two turned out perfect, and I literally wore them for three years cause they turned out so well.

I want us to start with the forearm because it's something you can see and use immediately; as soon as it’s done printing, you can take it off the printer, remove the supports, and try it on to see how it feels. It’s not too big of an investment in time or material, AND it has a good chance of fitting on your build plate in one go. If it doesn’t, use that Meshmixer program I mentioned earlier to cut it in half! You’ll have to attach the halves later, but we’ll be learning how to do that anyway for the larger parts of armor.

You’ll want to set the layer height to 0.2mm, the walls to 2-3, and the infil between 15 and 20 percent. The higher the numbers, the stronger the pieces, at the expense of more material used. If you have the option, I highly recommend turning on Tree supports and at least a brim, however since this is your first major print, play around a little bit to see if certain settings work particularly well on your setup! I sliced the two pieces of my first forearm, and the final time came to three days, ten hours, and nineteen minutes, so get comfy!
IMG_5012.PNG

This’ll be your homework for next week: print ONE forearm! If you’re feeling ambitious, print the second one, and also the hand armor! Post any questions, comments, or complications in the thread, and we’ll troubleshoot them together for next Friday!
Otherwise, happy printing! You’re on your first step towards a finished suit, and while it may seem like a small step, I promise that little by little, everything will come together. In the meantime, good luck!

And try not to stare at your printer for too long.
 

Attachments

  • IMG_5011.jpg
    IMG_5011.jpg
    303.2 KB · Views: 22
  • IMG_3320.JPG
    IMG_3320.JPG
    398.2 KB · Views: 29
3/1/2024
So, you want to make a Halo suit, huh? Well, you've come to the right place!!

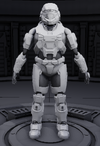
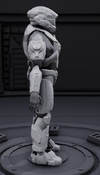
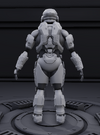
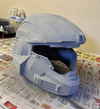
My name is OFiveTwo, and over the past three years, I’ve spent A LOT of time making the iconic Spartan armor from the Halo games. There's something about the sci-fi aesthetic, the armored defender of humanity that keeps pulling me back again and again. I’ve spent hours studying the form, analyzing different components, styles, and samples across all the Halo media I can get my gloves on.
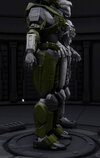
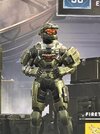
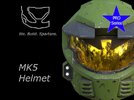
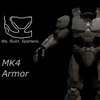
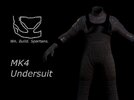
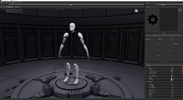
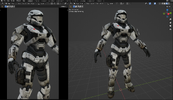
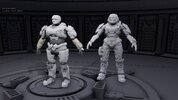
View attachment 343162View attachment 343163View attachment 343164View attachment 343165

You could say I know a thing or two about Mjolnir.

But for as long as I’ve made armor, People have asked me one question more frequently than any other:
How do you do it?? How do you make Halo armor?

Well fear not, my little lieblings, the time has come. I’m gonna show you.
However, I’m not aiming for this to be a normal tutorial. There are quite literally DOZENS of other cosplay and 3D printing tutorials, all which can take you through the steps efficiently and quickly. They’re all brilliant in their own right, but I’ve found that sometimes they can be a bit..
…hard to chew.

Our approach is going to be collaborative. I can tell you the process from start to finish, but if you get bored halfway through, then the whole thing is a wash. Instead, we’re going to do this in chunks. Each week, on Friday, I’ll be uploading the next part of this tutorial with a realistic goal of something YOU can do over the next seven days.

But OFiveTwo, how are you gonna to make sure it's a realistic time frame? The voices ask

Well, silly voices, I’ll be making a suit alongside you. I’ll be following the exact same steps, running into the exact same problems, within the exact same timeframe. Every success, solution, and failure will be real, and I aim to help you guys as you stumble across issues that I couldn’t even anticipate!

So get excited! Because it doesn't matter what point you find this tutorial, you’ll be able to make your armor alongside me, week by week, until you have a finished suit that even the Chief himself would be proud of.
A bonus of this is what I’m calling the “Bob Ross Method”. For those of you guys brave enough to be following this tutorial in REAL TIME, each week I’d like to give you a chance to showcase your work! This thread is dedicated to facilitating this, and I encourage you to post questions, comments, and photos of your progress here! I'd like to showcase people's progress each week, so if you post here, chances are you'll make it in the video!
Starting the tutorial a bit late? Don’t worry! Any progress is progress, and I’m happy to add anyone following along to the next episode.

Still with me? Good. Let’s gets get started.
CONCEPT AND CREALITY
A rather large part of this tutorial is going to be focused on 3D printing, which is the process of melting plastic along a path layer by layer, until it results in a 3-dimensional object. Don’t worry, I know that sounds intense, but it’s really pretty simple. You download an .stl file which holds the data for a digital 3D object, put that file into a program called a slicer which turns the .stl into language a 3D printer can read. The 3D printer then takes this, and using some filament, turns that language into a real-life object!
I’m explaining the individual parts of the process to answer some of the “whys” that might come up soon, but in reality 3D printing is isn’t too challenging as long as your willing to problem-solve! You’ll need to get comfortable with some basic tools and troubleshooting, but hey, I graduated with a theatre major.
If I can do it, I KNOW you can do it.

“But OFiveTwo, what kind of printer should I buy? I literally know nothing about 3D printi-”

PRINTER

The 3D printer you choose is going to be your workhorse for a lot of this project, and there are a TON of options. Recently, there's been an explosion of printer improvements, which is ultimately good for us, but can make picking out the right printer for you a bit more challenging. I’ve got a few recommendations that have worked for me, but I encourage you to read reviews and ask around! Usually there's a pretty good consensus across the board on what a good starter printer is, but if you’re up to the challenge, I’ve found that being ambitious can ultimately pay off.
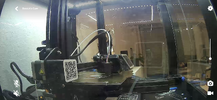
My first printer was my Creality CR10s. I got it in 2019, upgraded the heck out of it, and I have run it almost day and night for the past four years.

It has a build volume of 300x300x400mm, which notably is big enough for most helmets and armor pieces to be printed in one go.
Note: this is NOT necessarily better. Printing larger things takes more filament and more investment, and no matter what, there will ALWAYS be something that can’t fit on your printer in one piece. I love this printer, and it’s served me well over the years, but experience has shown me that my favorite printers have actually been the smaller, more consistent machines.
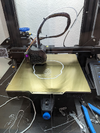
For example, the machine that I will GLADLY be using for this tutorial is the Bambu Lab P1S. If you know anything about 3D printing, you’re probably familiar with Bambu Labs taking the market by storm. With actual automatic leveling and stupid high print speeds, I really have had few qualms over the past 6 months I’ve used this printer. Certainly smaller than the CR10s, what it lacks in size it makes up for in ridiculous consistency. Some of the best prints I’ve ever had have come from this machine, which took a shocking fifteen minutes to set up and run.
You'd think they'd sponsor me for this post! :lol:

SO, my official suggestion for a starter 3D printer?! It’s tried, tested, and best of all, FAMOUSLY inexpensive for people looking to explore the hobby.

What is this mystery printer? Say it with me! THE ENDER 3!

Seriously, if you’re looking for something to get you started, I cannot recommend this enough. While certainly on the slower side compared to recent printers, the Ender 3 is truly the little machine that could. As long as you're fine with a little more “hands on tinkering” you’ll snag a fantastic printer at one of the lowest prices you can find: Microcenter often have Ender 3’s listed for 100 bucks in-store.

FILAMENT

All 3D printers use plastic-based filament as raw material, and the most common and easy to use material is PLA! PLA stands for Polylactic Acid. I don’t know what that means, but I do know PLA is literally the cheapest and most widely available filament for 3D printing use. It’s also biodegradable (under the right conditions) and doesn’t emit toxic fumes like some other plastics (stares menacingly at ABS).
For just starting out, definitely get a kilogram spool of 1.75 PLA This is the filament’s diameter, and it’s very important. There are different diameters of filament, and not all of them fit into standard printers. Trust me, the last thing you want is to try and fit something into a hole it has no business fitting into. Hehe.

A good thing to keep in mind for PLA is melting temperature. PLA is a strong plastic, but is a little more sensitive to temperature than other plastics like PETG or ABS. I’ve seen parts left inside cars in the summer warp from the heat, so take care not to leave any loose armor pieces out on a sunny summer's day.
Whatever printer and filament you end up getting, don’t be worried if you don’t get a perfect print right away! The hobby of 3D printing is all about tinkering, so don’t shy away from problems that show up! There are literally SO MANY VIDEOS on YouTube that can help you fix problems, so believe in yourself and do some research! You got this.

COMPUTER

…just…just get like any computer. Mine is nine years old and sounds like a turbo jet.

Here’s where we come to your first bit of homework! Yes, you’re getting homework for this. No it’s not graded, but if no one does it, I will slowly slip into a deeper and darker mental state, wondering what my life has amounted to bring me to a point where my main purpose in life is to act like a glorified mascot while ocean levels continue to rise and I sit in my desolate room doing nothing of significance-

…get a printer. Your homework is to get a printer.
And some filament.
…and maybe give me a hug.

—-------------------------------------------------------------
DESIGN
Now onto the REALLY fun stuff!
Chances are you already know EXACTLY what kind of armor you’d like to make. However, we gotta take those ideas in your head and make them a reality! To do this, we’re going to be looking for .stl files of the armor parts you want! These are 3D files you can view on your computer, and what your new 3D printer will use to actually make things!
There’s TONS of files out there, many of them free! If you click on the *Forums* tab above, you can navigate your way to the 405th's Free 3D Model Index, where there is a HUGE collection of free armor and prop files that people have generously made for the community. Make sure if you use these you thank the author of the files for their hard work!

Seriously. MoeSizzlac has worked TOO DAMN HARD not to get some recognition.

If you’re finding yourself not being able to find the exact file you want, there are also quite a few modelers who sell files on Etsy! InstinctCreative, Titlewave design, and so many others make just absolutely GORGEOUS files. And remember, if you can’t find something specific, just ask! There are TONS of people on the 405th forums who are eager to help, some of whom will even take model requests!

Liiiike STREET VIPER YES I KNOW ITS WEIRD DONT YELL AT ME

So you’ve got your files, you’ve got your printer, guess we load the files up and start printing, right?-
WRONG. DONT YOU DARE, DONT YOU EVEN THINK ABOUT IT. IF I FIND OUT THAT YOU PRINTED YOUR ARMOR WITHOUT CHECKING THE SIZING, I WILL DROP THROUGH YOUR ROOF AND MAKE YOU SAND ARMOR PLATES FOR TEN HOURS STRAIGHT

Chances are, unless you had custom files made specifically for you, the files you now have are NOT scaled to your body. Scaling 3D files is ESSENTIAL to not only have a good looking cosplay, but also a comfortable one! You can do this by taking some measuring tape and trying to eyeball it, but there's a program that is gonna save you SO much time.

—-------------------------------------------------------------
Armorsmith. It’s awesome. It’ll tell you exactly what measurements it needs, generate a little mannequin of you, and you can import and SLAP armor pieces onto it to really finetune not only the sizing, but also the overall design! Think of it as the customization screen for your real life armor! It’s really nice for helping you visualize what you’re working on. Create your mannequin, import the files into Armorsmith, slap them on your digital self and adjust the sizing to make it look nice! Word of warning though, if you’re the kind of person who spends HOURS in the customization menu, this is going to be very dangerous for you.
Thought you’d just get away with ONE homework assignment?! YOU FOOL! Now it is time for PART TWO!
Pick out your armor! Yeah I know you were gonna do it anyway, but I want to see what ya’ll are coming up with! Do your measurements, find your files, arrange your armor and take a screenshot! Post them in this thread, and you might have a chance of being showcased in next week's video!

—-------------------------------------------------------------
Before we wrap up on our first Tutorial post, I have two things to add:

Firstly, this tutorial is by no means a perfect process. There will always be things that I can do better, ways that I can improve my technique and craft. This series is simply my best effort to showcase my build process as it currently exists. If I make mistakes, let me know! If you have questions, ask away! There’s always room to improve and to push ourselves, and growing from our mistakes is part of that. Thank you in advance for your patience and support, I really couldn’t do this without you.

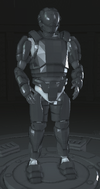
Secondly, as you may have seen in the poll at the top, I have several suit designs loaded up and ready to go SPECIFICALLY for this series! Now, against my better judgment, I’m going to leave it up to all of YOU to pick which suit you want to see me make!
Here are your options:
Mk VII
MK VI
MK V/b
MK IV
MIRAGE
ODST
RAKSHASA

Thank you guys so much for joining me on this journey. I’m really excited to see all the amazing armor you create.
Mk VII!!!
 
I started this with you last week and have been struggling to decide on a finalized set of files.
I will be painting this suit to mirror Texas from Red vs Blue.
My Spartan name is Georgia (where I'm from) and my AI is Madison (my penname)

I have decided on a MK IV Suit with an MK V helmet.
I bought the files from TitleWaveDesigns on Etsy.

I will be using TPU to print the under suit and PLA + to print the outer suit.

I have an Ender 3 S1 Plus.

This is my first time making armor or something I need to scale to wear. Armorsmith is an enigma to me. I don't know how much space I need in the gap between the armor piece and my model for it to fit once printed.
I am also trying to figure out the best way to secure the armor pieces to me to make it easier to remove the bottom half if I have to ...so bio things during a convention.
I don't know what kind of fabric actual soft gear to wear under the whole thing since I will be wearing two layers of suit.
I feel a bit too insecure to share my armorsmith model just with it being scaled the way it is without the armor. Once it has the armor layers on it, I will post a photo. Tomorrow, I will start printing the first forearm piece.
 

Attachments

  • il_794xN.5764872591_k1be.jpg
    il_794xN.5764872591_k1be.jpg
    91.3 KB · Views: 22
  • il_794xN.4717969438_64hu.jpg
    il_794xN.4717969438_64hu.jpg
    103.2 KB · Views: 24
  • il_794xN.4512298483_ceme.jpg
    il_794xN.4512298483_ceme.jpg
    53.8 KB · Views: 23
Damn I will be on a business trip until the next Tutorial, so I won't be able to print my arm, but will definitely do my homework as soon as possible. Really appreciate the guides so far ♥️
 
Hello! I was so excited to see that you're doing a tutorial and can't wait to get started. Unfortunately, it looks like I've hit a snag early on. While trying to setup my avatar, the torso section just disappeared! I have tried restarting the application, adjusting measurements, and even creating a whole new avatar, but I can't get it to show up. Has anyone run into anything like this? If so, any tips? Thanks!
 

Attachments

  • armorsmith error 1.PNG
    armorsmith error 1.PNG
    1.9 MB · Views: 14
So, changed my mind on the ODST and am joining the Mark V(B) bandwagon! Onto trying to figure out how to cut up the forearm for scaling test.
 

Attachments

  • Capture02.PNG
    Capture02.PNG
    1.6 MB · Views: 37
  • Screenshot.jpeg
    Screenshot.jpeg
    272 KB · Views: 39
So I tried to print a forearm scaling test and it ended being a spaghetti monster (which is fine). My issue right now is the following: The SPI forearm is kinda bulky and has a different radiuses (is that a word?) all across it, so I probably end up printing it a little to large and fill it up with some foam or sponge, just to make it fit right. At least that's the idea.
Also, since it's too large for my printer, I had to split it up into two parts, which I'll need to glue later. That will be fun.

Well anyway, one half is printing for now and the other will join on Thursday, as soon as I get back home. Fingers crossed that the first one won't turn into hot mess while I'm away.

Edit: I also finally settled down on my final design. Mostly SPI, Classic MarkV Belt and the Reach version of Security Helmet. Thought about the H3 one, but the slicker one fits the whole thing a little bit more.
 

Attachments

  • 1710114891699.png
    1710114891699.png
    3.4 MB · Views: 33
  • 1710114859549.png
    1710114859549.png
    2.1 MB · Views: 22
  • 1710112763808.png
    1710112763808.png
    2.1 MB · Views: 36
  • 1710136822275.png
    1710136822275.png
    426.1 KB · Views: 33
Last edited:
Hello! I was so excited to see that you're doing a tutorial and can't wait to get started. Unfortunately, it looks like I've hit a snag early on. While trying to setup my avatar, the torso section just disappeared! I have tried restarting the application, adjusting measurements, and even creating a whole new avatar, but I can't get it to show up. Has anyone run into anything like this? If so, any tips? Thanks!
Did some more poking around and eventually managed to fix it! For anyone else who may run into disappearing body parts, here is what I found and how I fixed it:
Turns out the waist was somehow scaled in the -2,000,000,000s. (Easily explaining how I couldn’t see it lol) I was for some reason not able to edit that scale without it resetting itself back to those crazy numbers. I reset the avatar and then quit Armorsmith using the in-app quit button, vs closing the program with the X or close window button in windows. Upon opening it again everything was reset.

On to armor scaling!
Sorry for not getting to this, but nice problem solving! For some reason Armorsmith has a weird habit of throwing measurements off during creation, but once you save your Avatar it should stick
 
I'm a little late buuuut I'm super excited that the MkV (B) armor was chosen! I happen to be in the beginning of making my own MkV (B) armor as my first set and already have some progress but have been slow to actually get work done. I'm hoping that the whole weekly video thing helps me stay on top of it. I have everything scaled in armorsmith, my helmet is almost done being smoothed out, and I'm currently printing the last part for my chest piece. I've got the bits that I do have taped together currently in order to make sure that it would fit me lol- I'm definitely gonna have to keep the front and back separate and put magnets in because I forgot to consider the fact that my head had to get through the neck hole, but otherwise it seems to fit pretty good.

Also, I've got a question- does anyone know what to do about the codpiece/belt area with Moesizzlac's files? It seems to me that it only goes around to the sides and then stops. I'd love to have the full belt and I'd rather not purchase the files for a whole set of armor when I only need one part.
 

Attachments

  • 1710277727213.png
    1710277727213.png
    652 KB · Views: 35
  • 1710277743939.png
    1710277743939.png
    381.2 KB · Views: 28
  • 1710277764725.png
    1710277764725.png
    540.6 KB · Views: 24
  • 1710277835224.png
    1710277835224.png
    2.3 MB · Views: 28
  • 1710277857396.png
    1710277857396.png
    881.9 KB · Views: 37
Have a question for those who have printed their armor before. What would a general ball park estimate be for how many rolls of 1kg filament used for a full set of armor?

Progress update, my first forearm peice is about 2/3rds done and the last bit should be done sometime during the night.
 

Your message may be considered spam for the following reasons:

If you wish to reply despite these issues, check the box below before replying.
Be aware that malicious compliance may result in more severe penalties.
Back
Top