Afrousjojo's ODST armor

Status
Not open for further replies.

Afrousjojo

Jr Member
Hello everyone!

first of all, i'm reaaaaaaaaaly proud to be there. realy.The 405th community looks very nice.
secondly, i'm french (bisoux de France!), and i'm wondering if there is any French people around there? Anyway, let's get to the point!


A few time ago, i started my own ODST armor, because those dudes are realy cool.

So, i took some Pep refs, and for now, i did this!
they are scalled, and, because of my busy schedule, i can't (for now) do a piece by day.


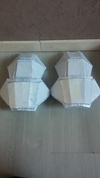
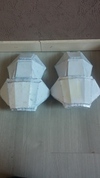
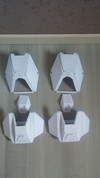
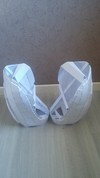
These are the shoulders armor
20150612_024422_zpsffroofmu.jpg

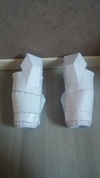
the biceps armor

20150612_024410_zpsuin5h2lr.jpg

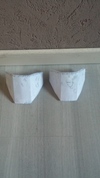
aaaaand the gauntlets
20150612_024436_zpsneflcv7k.jpg

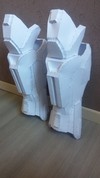
i'm curently working on the shins. Then i will apply some acrilyc resin, and fiberglass inside. after that, i will work on the torso and all the stuff around (hips plate,croch plate ect ect)

I've read many tutos, guides, and posts on this forum and on others.
But, if you have any suggestion,critique,or tips, fell free to tell me, i will take it with grattitude :)
 

Attachments

  • 20150612_024422_zpsffroofmu.jpg
    20150612_024422_zpsffroofmu.jpg
    621 KB · Views: 334
  • 20150612_024436_zpsneflcv7k.jpg
    20150612_024436_zpsneflcv7k.jpg
    633.8 KB · Views: 348
  • 20150612_024410_zpsuin5h2lr.jpg
    20150612_024410_zpsuin5h2lr.jpg
    639.9 KB · Views: 320
Update!

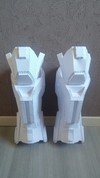
I've finished to assemble the shins armor!

here they are:
20150619_165217_zpsvkz5k4wc.jpg


20150619_165001_zpsaea9j5tw.jpg

20150619_165032_zps28jwhrjb.jpg

also, i've notice something..my shoulder armor don't look right. i think i have to redo it

(here the shoulders)
20150612_024422_zpsffroofmu.jpg

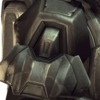
and it should look like this:
Sans%20titre_zps8o5aq8jd.png

so i wonder, where does my shoulders armor come from? i mean, from wich game???
 

Attachments

  • 20150619_165001_zpsaea9j5tw.jpg
    20150619_165001_zpsaea9j5tw.jpg
    147.9 KB · Views: 334
  • 20150619_165217_zpsvkz5k4wc.jpg
    20150619_165217_zpsvkz5k4wc.jpg
    123.6 KB · Views: 406
  • Sans%20titre_zps8o5aq8jd.png
    Sans%20titre_zps8o5aq8jd.png
    544.7 KB · Views: 351
  • 20150612_024422_zpsffroofmu.jpg
    20150612_024422_zpsffroofmu.jpg
    621 KB · Views: 336
  • 20150619_165032_zps28jwhrjb.jpg
    20150619_165032_zps28jwhrjb.jpg
    108.2 KB · Views: 417
Your shoulders are halo 3 ones. nothing wrong with them just different game variant.
 
Glad to see another ODST. Parts look pretty good, but I agree with redoing the shoulders. The game Halo 3 ODST is the best for reference by far.
Keep up the good work, and keep is posted. No worries if real life slows down your progress. I've been working on mine for over a year.


Sent using Tapatalk
 
UPDATE!

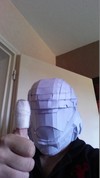
instead of doing the torso, like i said, i've decided to create....THE HELMET!
and it's not a fail, i'm really proud of it :)

Picture%202_zpsqhpcw2p0.jpg


Picture%201_zpswpmq6zgh.jpg

next step, shoulders armor again.
 

Attachments

  • Picture%202_zpsqhpcw2p0.jpg
    Picture%202_zpsqhpcw2p0.jpg
    111.6 KB · Views: 345
  • Picture%201_zpswpmq6zgh.jpg
    Picture%201_zpswpmq6zgh.jpg
    108 KB · Views: 340
Looks good dude! There's another French user on here but I can't recall his username, he makes top notch stuff though if I remember correctly.
 
If you're not feeling up to working on a particular step, no shame in switching to another part. Progress is progress. I've got some shoulder straps staring me in the face, so I'm working on the gauntlets the last few days.


Sent using Tapatalk
 
Small update!

Shoulder armor are redone, they look WAYYYYYYYYYYYYY better.

I think i will apply a first resin layer before stick the parts together.

20150625_200520_zpsvm26vohr.jpg

Next step, Thighs!
 

Attachments

  • 20150625_200520_zpsvm26vohr.jpg
    20150625_200520_zpsvm26vohr.jpg
    106.3 KB · Views: 340
Oh man those are so much better. Well done. All of those parts are looking pretty sharp now.


Sent using Tapatalk
 
It is tiiiiiiiiiime ...
FOR AN UPDATE!

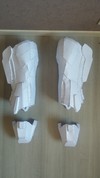
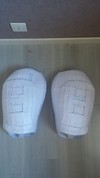
i've finished the thigs!

it was surprisingly easy.

i will do the black part with foam, after i've resined it.

Here are the pics!

20150627_180523_zpsyuzxhpxq.jpg
20150627_180502_zpsd4cin1hw.jpg


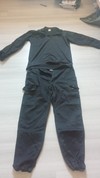
Oh, and i've found how to do the undersuit. I will use my SWAT-like clothes that i use for airsoft.

20150627_181315_zpsie7d6lzg.jpg

I think it will look like an actual ODST undersuit, don't you think?


and remember kids, be carefull with a cutter!

20150627_180551_zps3gdoe0ct.jpg

nex step, body armor!
 

Attachments

  • 20150627_180551_zps3gdoe0ct.jpg
    20150627_180551_zps3gdoe0ct.jpg
    117 KB · Views: 318
  • 20150627_181315_zpsie7d6lzg.jpg
    20150627_181315_zpsie7d6lzg.jpg
    99.7 KB · Views: 335
  • 20150627_180523_zpsyuzxhpxq.jpg
    20150627_180523_zpsyuzxhpxq.jpg
    87.3 KB · Views: 324
  • 20150627_180502_zpsd4cin1hw.jpg
    20150627_180502_zpsd4cin1hw.jpg
    120.9 KB · Views: 334
Looking good. I am using airsoft clothes too, but having trouble ordering pants in the right size from Amazon. Might have to do some local shopping so I can try them on first. And congrats on your first battle scar. I've got a few of my own.

Sent from my Nexus 7 using Tapatalk
 
Update!

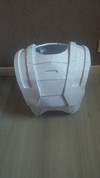
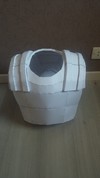
I've finished the Core chest!
i'm thinking right now on how i will attach it., maybe sone hinges on the shoulders..I will see

BTW here are the pics!
20150630_180224_zpsjmi65ms0.jpg20150630_180212_zpsn1b0ut9i.jpg

I bought some acrylic résin on internet, i will start the resin work once i have it.

next step; the chestplate!
 

Attachments

  • 20150630_180224_zpsjmi65ms0.jpg
    20150630_180224_zpsjmi65ms0.jpg
    94.6 KB · Views: 329
  • 20150630_180212_zpsn1b0ut9i.jpg
    20150630_180212_zpsn1b0ut9i.jpg
    98.6 KB · Views: 342
eyh guys!

small update!

I've finished the chest core!
20150710_165837_zpsix6jpns9.jpg


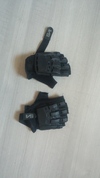
also, i've found the glove i was using for airsoft, they looks perfect for the suit!

20150710_163904_zpsfgvurqll.jpg
20150710_163928_zpscypsbjw6.jpg

I began to apply acrilyc resin on the pieces i have created, but...well, it's not very perfect...i think i will use some polyester resin, even if it is reaaaaally difficult to use, but it will be better for the first hardening...

finally i am thinking about the stripping of the suit...i will post my ideas here later...
 

Attachments

  • 20150710_163928_zpscypsbjw6.jpg
    20150710_163928_zpscypsbjw6.jpg
    160.7 KB · Views: 330
  • 20150710_163904_zpsfgvurqll.jpg
    20150710_163904_zpsfgvurqll.jpg
    549.3 KB · Views: 313
  • 20150710_165837_zpsix6jpns9.jpg
    20150710_165837_zpsix6jpns9.jpg
    181.7 KB · Views: 321
EYH GUYS!!!
Big update!

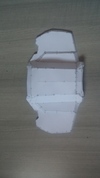
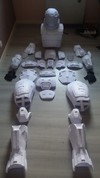
i've finished to pep all the files!

so here's the belt
20150711_200915_zpsntyad5f2.jpg

the rib plates
20150711_200943_zpshfhgxn7q.jpg

the hip plates
20150711_200927_zpsltfjjzrb.jpg

the back plate
20150711_200906_zpsm7h6b9bj.jpg

and the front plate!
20150711_200859_zps7w6qo83c.jpg


and all of the files, i've juste realised hom many parts it makes :eek:

20150711_200843_zps6jxcbntk.jpg


next step, resining!!!
 

Attachments

  • 20150711_200859_zps7w6qo83c.jpg
    20150711_200859_zps7w6qo83c.jpg
    206.4 KB · Views: 321
  • 20150711_200843_zps6jxcbntk.jpg
    20150711_200843_zps6jxcbntk.jpg
    115.1 KB · Views: 315
  • 20150711_200906_zpsm7h6b9bj.jpg
    20150711_200906_zpsm7h6b9bj.jpg
    199.7 KB · Views: 330
  • 20150711_200927_zpsltfjjzrb.jpg
    20150711_200927_zpsltfjjzrb.jpg
    159.3 KB · Views: 330
  • 20150711_200943_zpshfhgxn7q.jpg
    20150711_200943_zpshfhgxn7q.jpg
    169.5 KB · Views: 334
  • 20150711_200915_zpsntyad5f2.jpg
    20150711_200915_zpsntyad5f2.jpg
    218.4 KB · Views: 321
small update!

Due to a huge problem with the acrilyc resin, my previous helmet was destroyed...too bad.

BUT, i've downloaded another model (hugh's one) and i've added some parts of the previous model
here it what it looks like

Picture%204_zpsaxkiosrb.jpg
Picture%203_zpss9uut7ci.jpg

i will resin all the stuff this week end
 

Attachments

  • Picture%204_zpsaxkiosrb.jpg
    Picture%204_zpsaxkiosrb.jpg
    108.3 KB · Views: 336
  • Picture%203_zpss9uut7ci.jpg
    Picture%203_zpss9uut7ci.jpg
    104.6 KB · Views: 320
Status
Not open for further replies.
Back
Top