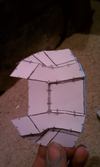
Another Kat Build

Status
Not open for further replies.
That looks great so far. I've never tried the pepakura thing but that looks about on par with what I've seen others do. Keep it up. :)
 
Looks good so far. Here's a trick I think you may find useful. Open the Pepakura viewer or designer and look at how the pieces go together. Determine which pieces are rounded. Don't bend/fold these pieces. Your end product will look much nicer and hopefully you don't have to do much bondo on the round pieces.

I've done the ODST chest pieces in my thread. You can see that they are much cleaner. I will upload my ODST helmet shortly without the bend.
 
Thanks for the suggestion! yeah i think thats what killed my samus project. She was so angular that i spent wayyyy to much money on bondo and ended up scraping the project to save my money
 
here is some female Spartan 3 files^^ Hope they help:D Im looking forward to see more progress;)
 
Awesome! Kat always seems to come out great looking. Im sure yours will fit right in!
 
Very clean folds, Good work so far. I love the armor for Kat. So i will be following this thread. Keep up the good work :)
 
yah very good so far like everyone else has said, nice clean folds and pep so far :) keep up the good work
 
Whoops, sorry i disappeared everyone! Damn real life likes to get in the way, Anyways I have recently been able to pick it back up and I actually have the two shoulder bells fiberglassed, bondo'd and primed (note: one of them i got alittle excited with the dremel, so I decided to add scratches on that one. It will be the one i have on her robotic arm, so maybe it'll show that once apon a time she took some damage there like when she lost her arm) :
IMAG0081.jpg


Damaged:
IMAG0082.jpg


Handplate:
IMAG0080.jpg
 

Attachments

  • IMAG0081.jpg
    IMAG0081.jpg
    59.5 KB · Views: 107
  • IMAG0082.jpg
    IMAG0082.jpg
    56.4 KB · Views: 113
  • IMAG0080.jpg
    IMAG0080.jpg
    25.9 KB · Views: 112
Great job! the pieces that are done look great. and i love the scratches, some of the best ideas come from incredible screw ups :p cant wait to see the finished armor
 
Alright, time for a noob question XD:
I am failing soooooo hard at scaling, is there like a magical way of doing this? Or do i have to keep on printing and scrapping the chestplate?
 
Alright, time for a noob question XD:
I am failing soooooo hard at scaling, is there like a magical way of doing this? Or do i have to keep on printing and scrapping the chestplate?

I'm kind of having the same issue. The last piece I have to scale, print, and pep is the chest piece, and I really want to get it correct the first time so I don't have to remake it!

Good job on the build so far, and great idea with the "damaged" shoulder piece.
 
Okay well I tried the formula that was posted and printed it out and I can already tell that its too small. There must be something that im doing thats wrong
 
Okay well I tried the formula that was posted and printed it out and I can already tell that its too small. There must be something that im doing thats wrong
The formula in the thread that Hyper gave you was meant for the male torso. I came up with it before the female torso model was released. But I did some calculation for another member here a couple of days ago and you can find it in this post.
 
Status
Not open for further replies.
Back
Top