Baby's First Vacuum Forming Machine

KocourUS

Jr Member
After weeks and weeks of trying to lay my hands on a vacuforming machine, I said screw it and decided to build my own. I have no clue what I'm doing and I'm working with chemicals and electricity, so lets try not to mess it up too badly!

My frame is going to be made of aluminum angle. Considering that the sheets of plastic I'm working with are 12" square, I found that a 4" length, cut on ONE side every 10.5", created a large enough square frame to hold each sheet. Don't forget to make 2 of these frames!
1723787219973.png


Now, welding aluminum is a pain in the neck and anyway welders are expensive, so we're gonna use the old shade tree mechanics friend, JB Weld (its not like we don't have a bunch of bondo laying around and enough spraypaint to kill a Bond girl...)

I cannot stress this enough, we are working with a binary chemical agent that welds metal, proper PPE is a requirement. Gloves, respirator, eye protection.
1723787392920.png

1723787338450.png

1723787427796.png


1723787451889.png


Now, we've got about 6 hours to pass until that JB Weld sets... Time to become a carpenter...

1723787519487.png


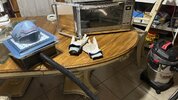
Cut two chunks of 2x4 to 10 1/2", and two more to 7 3/8", because 2x4s aren't actually 2x4, then glue and clamp. We're going to screw this all together later, but the glue needs to cure. While you're doing that, cut a 10 1/4" square of pegboard, and a 12x10 chunk of some MDF.

1723787693787.png

Remember that your actual working space is going to be smaller than this overall surface, but I'm making this based on the size of the sheets of material I bought on Amazon, so go with it. Glue the MDF to your box frame and put a big heavy weight on it.

1723787792722.png


Then go to bed because you're an adult who exists under capitalism and its bed time.
 
Awesome! I too decided on a metal frame for my material holder. I used corner brackets paired with 45 degree cuts opposed to JBWeld. Make sure your frame fits over your vac box! Great work!
 

Attachments

  • IMG_7418.jpg
    IMG_7418.jpg
    618.8 KB · Views: 24
Awesome! I too decided on a metal frame for my material holder. I used corner brackets paired with 45 degree cuts opposed to JBWeld. Make sure your frame fits over your vac box! Great work!
Yeah, that JB Weld did *not* hold and my attempts to remake the frame out of steel also failed, so its back to Home Depot for more aluminum angle!
 
Alright, before you screw down your platen, cut a chunk of some MDF to fit at angle inside the vacuum chamber. This will cut down on the amount of dead air you have to move, and help reduce the pressure drop towards the back of the platen. Make sure to not only use wood glue on every possible seam, but fill every seam and gap with silicone caulking. Again, we're trying to maximize performance by creating the best seal we can under and around the platen. So seal the seams between the 2x4s, inside and out, seal around the angled plate as best you can, drill a 2" hole for your vacuum flange and seal around that, too! Anywhere you can, try to make this as air tight as possible.
1724021647767.png
 
For my actual vacuum, I'm using a Ridgid 5hp shopvac. You can get these at Home Depot for not terribly much money, and they're incredibly useful just to have around the shop to boot! Now, the main issue is, the hose is 1 7/8" and good luck finding a hole saw that size, so that answer is to make your own because apparently no one I could find has every published an adapter flange, so here, have a file.


1724021953058.png


1724021971967.png


1724021998591.png


Now that you've let the glue and silicone set, run a bead of silicone along the top edge of your vacuum chamber, seal the platen down over the top of it, drill a couple of pilot holes and then drill the platen down on top of the frame. Use a couple of pan head screws to hold the adapter flange to the front of your vacuum chamber, seal with more silicone, run more silicone along the outer edge of the platen and every single hole on the platen that isn't a part of the working space. You'll notice I drew a square for my working space, and even added extra holes. We want to move as much as possible as quickly as possible.

Here's a pro tip, before the silicone has fully set, take a sheet of cardboard, drop it down on top of your platen, and run the vacuum. This should help the silicone to get into all the little nooks and crannies, improving the final seal.

You now have a vacuum chamber large enough to make a visor.

For our next trick, we're voiding warranties and trying not to burn the house down.
 
Now, for this next step, speaking of safety, I cannot stress this enough...

YOU ARE ABOUT TO VOID A WARRANTY WHILE WORKING WITH ELECTRICITY.

THIS MACHINE IS MADE OF WOOD, AND WILL BE USED TO WORK PLASTIC.

IT IS A FIRE HAZARD.

YOU SHOULD NOT ATTEMPT THIS NEXT STEP UNLESS YOU OWN AND KNOW EXACTLY WHERE YOUR FIRE EXTINGUISHER IS.
 
Anyway, standard "please don't blame me when you burn your house down" disclaimer, this next step involves a space heater. You can get a 1500W one for about $30 at Home Depot. Cut the warranty sticker in half, undo 4 screws, and take it apart. Discard the front and rear casings, you won't need them where we're going.

1724022534638.png


1724022558479.png


What you'll be left with is an extremely confusing tangle of wires and a basically three components. The heating element, a fan, and a control panel.

I got no pictures of this next process because the hyperfixation kicked in, but basically you're going to mirror the process you used to make your vacuum chamber. For the uprights, I cut some 2x4s to about 13" inches. This gives plenty of room inside the uprights for your frame to slide down. It'll make sense when its done. Cut a fairly large oblong hole in the front of the top section to mount your control panel to.
VERY CAREFULLY disconnect a few things, making sure to take lots of pictures of where each terminal connects and what those connections look like. This is very important. Take lots of photos. You will not remember what it looks like, and you should never guess or rely on memory when it comes to a machine that will burn your house down. Take a couple dozen pictures of every connection, and rely heavily on them when putting things back together.


Cut a hole in a sheet of MDF large enough for the fan box and heater to have uninterrupted airflow. Attach the fan to the top, and the heater to the bottom, basically mirroring the way they were installed from the factory. Don't do what I did and cut the wires running from the fan to the control panel, this adds extra labor and introduces more points of failure. Make sure not to remove the tilt switch, we'll need that later and anyway we're rolling enough dice here without intentionally disabling safety features. Make sure to keep as much of the wiring ABOVE the dividing section of MDF as possible, to avoid the risk of shorts and melting wiring.

1724023056290.png


1724023090301.png

Leave the tilt switch intact and hanging for now, and once you're confident you have every connection wired up safely and securely, do a test. Holding the tilt switch with your thumb, plug the machine in, and set the fan and heater to the lowest set. Verify the power light turns on, the fan spins freely, and the heating element starts to warm up. Once you've verified the heater is heating, release the tilt switch, and everything should immediately turn off. Attach the control pane to the front, and now you have a 90% complete vacuum forming machine.

1724023223437.png


1724023281752.png
 
So, I kinda missed a few steps in the photography process because yay, hyperfixation!

One issue you might run into with a heating element this size is that it tends to focus the heat directly on the middle of the sheet, which isn't exactly ideal. So we're going to incorporate a heat spreader mechanism. For this, we're going to use aluminum automotive mesh, which will provide good flow-through of air while still forcing some restriction, which will help to spread the heat from the heating element, in addition to the natural conductive properties of aluminum. We don't want it to soak all our heat, but we need to spread it around.

We're also going to line the heat chamber with aluminum tape, which will help to reflect heat towards the heat spreader, and prevent the wood frame from soaking as much heat. The goal is efficiency. Make sure to use some aluminum tape to protect the wiring from heat as well, no good melting wires.

1724439827372.png


You'll notice, in the front left corner, we've incorporated our tilt switch mechanism, using a 2x2 chunk of MDF and a 3/8" wooden dowel, with a fairly wide pan head screw on the top to stop the dowel from dropping through. Not gonna lie, I kludged this together out of scrap I had laying around. Make sure the dowel engages the switch at the top of its travel, and drops freely. Tack down the heat spreader but make sure you'll be able to remove it later, if we need to repair anything.
 
Now what you're going to do is, try to rush a test run of this thing, run out of hands, and try to run a 1500W space heater and a vacuum off the same circuit. This will cause all the lights to flicker just before you trip all the breakers and plunge your house into silent darkness. You'll know when the test ends because your wife will yell at you. So our next step is a better means of holding the frame, and some extra switches with a GFCI plug, so atleast you don't upset the spouse when you fail.
 
Yeah, that JB Weld did *not* hold and my attempts to remake the frame out of steel also failed, so it’s back to Home Depot for more aluminum angle!
Try braising rods for aluminum. It’ll hold great and all you need is a blowtorch. They’re usually by the blowtorches or welding equipment.
 

Your message may be considered spam for the following reasons:

If you wish to reply despite these issues, check the box below before replying.
Be aware that malicious compliance may result in more severe penalties.
Back
Top