Double ODST build, codename: Practice Round

ajiajiaji

New Member
Hi 405th!
My wife (RunsOnStories ‍) and I were at C2E2 (Chicago Comics & Entertainment Expo) this past weekend, and met a handful of y'all in the process. You were such an exuberantly inviting bunch , despite her never having played Halo and my not playing since Halo 1 (last in...2002?), we signed up to join this community right away.

I've got a lot of experience as a maker, some cosplay mixed in with a long list of various harebrained schemes. RunsOnStories however, hates crafting with a firey passion. Just not her thing. Until she met the 405th-- seriously it was a powerfully fun and welcoming group.

In that vein, we have started out first Halo build! We're using Andrew DFT's ODST armor as a starting point, but I've got some upgrades I'm eyeing already (starting on the next project before the first one's done...sounds like me ).

Foam is a fairly new material for me (used to do paper + fibreglass + bondo but who wants to deal with fibreglass if they don't have to) and brand new for RunsOnStories, so we're expecting a learning curve as we go through the process, but looking forward to growing our skills and iterating on the suit rather than try for perfection right out of the gate.

Interestingly, our difference in skill level and crafting comfortability means we're taking different but adjacent paths ️ for some of the build steps ️. Most notably at the outset, she's using hot glue to bond the foam and I'm using contact cement. Starting from where we're comfortable and only adding in the necessary new skills so as not to overwhelm ourselves . I'm interested to see how the techniques either continue to vary or converge, having such direct comparisons to make decisions with .

It's code named Practice Round, because we're (trying) giving ourselves license to make mistakes and learn, ready to shout "practice round!" any time something doesn't come out right, ready to try again (with better results ).

We're not far along in the process yet, but the Halo show and Red vs. Blue kept us company last night as we started...
IMG_5042.jpeg


..and apparently the forum doesn't like unicode emoji, so my typical :cool:-laden writing style is filled with extra spaces :lol:
 
Last edited:
Welcome to the 405th trooper.
Using Andrew DFT's templates plus his build tutorials is a good place to start for foam beginners.
I like that you are willing to play around with your project and learn the ins and out of the medium. A lot of people make the mistake of trying to be perfect right off the bat and get very discouraged because the are not happy with what they have created.
If you ever have a questions or need help just ask. There are many members here who would be more than happy to help.
 
Welcome to the 405th! So glad you had a great time meeting us at the C2E2 booth. Congratulations on your first ever cut of foam! Very exciting. Best of luck on you new suits! If you have any questions at all please do not hesitate to ask. We're always happy to do our best do assist.

Calling this project "practice round" is actually such a great idea to remind yourself that mistakes are just learning experiences. Funny thing is- pretty much all of my projects are practice rounds in one regard or another (≧▽≦) There's always a new thing to learn. I think you'll find that it will be well worth learning making the armour from foam as it's lightweight and comfortable to wear. Maybe I'll see your new suit at C2E2 next year!
 
Something you could do is build a piece out of cardstock first, harden/reinforce it with cardboard + hot glue, then repeat the process but with thin foam sheets covering the piece along with details. I found it to be a good "middle ground" because foam tends to warp easily but with reinforced cardboard/stock it holds nicely.
 
build a piece out of cardstock first, harden/reinforce it with cardboard + hot glue, then repeat the process...
I'm really enamored with the idea of doing "cardboard cosplay," that being armor and props that someone can make with only recycled material and cheap adhesives like hot glue. The only thing stopping me from going all in on this idea has been that I can't find a good way to finish the props so they don't just look like hot glued cardboard. Foam, fibreglass, 3d prints, can all be finished to such a high level.
 
I'm really enamored with the idea of doing "cardboard cosplay," that being armor and props that someone can make with only recycled material and cheap adhesives like hot glue. The only thing stopping me from going all in on this idea has been that I can't find a good way to finish the props so they don't just look like hot glued cardboard. Foam, fibreglass, 3d prints, can all be finished to such a high level.
Check out Spiceythaidesign on Instagram. All the armour bits of his Witch King is done with cardboard.
He managed to hide it by finishing it with glue or modpodge and tissue paper and it gave it an amazing texture.
 
I'm really enamored with the idea of doing "cardboard cosplay," that being armor and props that someone can make with only recycled material and cheap adhesives like hot glue. The only thing stopping me from going all in on this idea has been that I can't find a good way to finish the props so they don't just look like hot glued cardboard. Foam, fibreglass, 3d prints, can all be finished to such a high level.
right, but if you cover the cardboard piece in thin foam then seal and paint the foam layer it can look pretty good
 
Hi 405th!
My wife (RunsOnStories ‍) and I were at C2E2 (Chicago Comics & Entertainment Expo) this past weekend, and met a handful of y'all in the process. You were such an exuberantly inviting bunch , despite her never having played Halo and my not playing since Halo 1 (last in...2002?), we signed up to join this community right away.

I've got a lot of experience as a maker, some cosplay mixed in with a long list of various harebrained schemes. RunsOnStories however, hates crafting with a firey passion. Just not her thing. Until she met the 405th-- seriously it was a powerfully fun and welcoming group.

In that vein, we have started out first Halo build! We're using Andrew DFT's ODST armor as a starting point, but I've got some upgrades I'm eyeing already (starting on the next project before the first one's done...sounds like me ).

Foam is a fairly new material for me (used to do paper + fibreglass + bondo but who wants to deal with fibreglass if they don't have to) and brand new for RunsOnStories, so we're expecting a learning curve as we go through the process, but looking forward to growing our skills and iterating on the suit rather than try for perfection right out of the gate.

Interestingly, our difference in skill level and crafting comfortability means we're taking different but adjacent paths ️ for some of the build steps ️. Most notably at the outset, she's using hot glue to bond the foam and I'm using contact cement. Starting from where we're comfortable and only adding in the necessary new skills so as not to overwhelm ourselves . I'm interested to see how the techniques either continue to vary or converge, having such direct comparisons to make decisions with .

It's code named Practice Round, because we're (trying) giving ourselves license to make mistakes and learn, ready to shout "practice round!" any time something doesn't come out right, ready to try again (with better results ).

We're not far along in the process yet, but the Halo show and Red vs. Blue kept us company last night as we started...
View attachment 347519

..and apparently the forum doesn't like unicode emoji, so my typical :cool:-laden writing style is filled with extra spaces :lol:
I like the idea that you guys call it Practice Round and allowed yourselves to make mistakes and learn. I like it a lot. I'll have to keep that in mind when I start making my armor and allow myself to make mistakes and learn from it.
 
Y'all... I was not ready for the the rollercoaster of emotions of a build process; I should've been, though, it's extremely similar to the one I experience daily as a software developer by day: The excitement when something goes according to plan is often (always) followed by the crushing suspicion of, "did I forget how to use a glue gun?!"

PRACTICE ROUND! :cool:

Anyway, progress update!

Day 2:
We're making our helmets together, but I was slow so ajiajiaji is also making a Magnum at the same time? :lol:

IMG_5043.png


Day 3:
We've got helmet shapes! We realized today the different downsides to each of our chosen adhesive. My hot glue skills have created a hot mess, both on the seams and in web form all around me. I'm also seeing how much glue I'm wasting because of overflow. Aji's contact cement method left theirs a little narrow/small; the working theory there is that Andres DFT's template accounts for a bit of added material as his tutorials are using hot glue, and contact cement seals the pieces together more closely. ¯\_(ツ)_/¯

IMG_3243.png
IMG_5048.png
IMG_5046.png


IMG_5045.png
IMG_3247.png
 
Y'all... I was not ready for the the rollercoaster of emotions of a build process; I should've been, though, it's extremely similar to the one I experience daily as a software developer by day: The excitement when something goes according to plan is often (always) followed by the crushing suspicion of, "did I forget how to use a glue gun?!"

PRACTICE ROUND! :cool:

Anyway, progress update!

Day 2:
We're making our helmets together, but I was slow so ajiajiaji is also making a Magnum at the same time? :lol:

View attachment 347669

Day 3:
We've got helmet shapes! We realized today the different downsides to each of our chosen adhesive. My hot glue skills have created a hot mess, both on the seams and in web form all around me. I'm also seeing how much glue I'm wasting because of overflow. Aji's contact cement method left theirs a little narrow/small; the working theory there is that Andres DFT's template accounts for a bit of added material as his tutorials are using hot glue, and contact cement seals the pieces together more closely. ¯\_(ツ)_/¯

View attachment 347670 View attachment 347671 View attachment 347672

View attachment 347673 View attachment 347674
It's good to see you guys are making progress. Keep it up. I get those days as well when things go according to plan then something happens.
 
It's code named Practice Round, because we're (trying) giving ourselves license to make mistakes and learn, ready to shout "practice round!" any time something doesn't come out right, ready to try again (with better results ).
This is genuinely my favorite thing I love it haha. It was so nice meeting you both at C2 and I'm excited to see y'all build and have fun!

I'm really enamored with the idea of doing "cardboard cosplay," that being armor and props that someone can make with only recycled material and cheap adhesives like hot glue. The only thing stopping me from going all in on this idea has been that I can't find a good way to finish the props so they don't just look like hot glued cardboard. Foam, fibreglass, 3d prints, can all be finished to such a high level.
We've actually had tahu505 and spitzkitz build fully cardboard spartans and they looked like a ton of fun to build!

I'm going to start yelling practice run now every-time I stump myself. :lol:
 
I'm really enamored with the idea of doing "cardboard cosplay," that being armor and props that someone can make with only recycled material and cheap adhesives like hot glue. The only thing stopping me from going all in on this idea has been that I can't find a good way to finish the props so they don't just look like hot glued cardboard. Foam, fibreglass, 3d prints, can all be finished to such a high level.
For the cardboard armor that spitzkitz and I made, we purposely left it with a cardboard finish. We refered to it as Vardboard Evolved. Every armor piece and Spitz's assault riffle prop was made out of cardboard that we cut using modified foam templates from the armory and a laser cutter. We hot glued two full suits together in maybe two nights.

While we wanted the cardboard look, we did discuss how to hide it if we ever wanted to. You could try using fiberglass resin on the outside. Just the resin itself and not the fiberglass. That plus Bondo spot putty and sanding was how traditional pepakura and cardstock armor was finished. Once you have that done, you could paint and weather the armor.
 
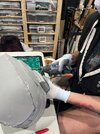
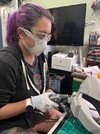
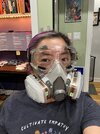
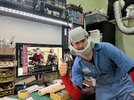
We were away in Detroit (ooh la la) for a work thing, so we had a pause, but after RunsOnStories ’s first Dremel-ing ever, we’ve completed construction on the helmet. A little kwik seal or foam clay to smooth it up here and there maybe left, but all told went pretty well!

I think we both want to make ‘em again a little larger, we’ll come back around to it when we’ve made a few more mistakes and gotten some of the skills leveled up.

Going to have to check the foam supply level before deciding to go on to video #2 and the chest pieces or something else first.
 

Attachments

  • IMG_3292.jpeg
    IMG_3292.jpeg
    974.9 KB · Views: 67
  • IMG_3295.jpeg
    IMG_3295.jpeg
    1.1 MB · Views: 63
  • IMG_3299.jpeg
    IMG_3299.jpeg
    971.4 KB · Views: 69
  • IMG_3300.jpeg
    IMG_3300.jpeg
    1.3 MB · Views: 59
This thread is more than 4 months old.

Your message may be considered spam for the following reasons:

  1. This thread hasn't been active in some time. A new post in this thread might not contribute constructively to this discussion after so long.
If you wish to reply despite these issues, check the box below before replying.
Be aware that malicious compliance may result in more severe penalties.
Back
Top