Duke's Haunted Pilot helmet (or How I Learned to 3d Print)

Status
Not open for further replies.

PerniciousDuke

Sr Member
Member DIN
S128
It seems that despite years of 3d printers helping our members produce high quality props and armor they still seem to take flack for being "the easy way out"

I've spent 500 hours crafting a fully Pepakura Spartan, 200 hours making a foam and fabric Marine and 200 hours on a leather Skyrim cosplay. Just like those builds I'll document everything here and we'll find out together if this 3d printing really is easy or not. Granted, I am only making a helmet here and not a full suit, but hopefully my credentials show I can make an accurate analysis.


**Let's also be real clear for a minute. This thread is just for fun and potentially educate someone who wants to know the differences and similarities between 3d printing and other methods. No one method should be called better or worse than another. We are all here for one thing: to have cool Halo stuff. It shouldn't matter what a member makes or how they make it, we should always encourage people to push through challenges and try new things.


The Goal:
ncda46w7h2821.jpg


*RESERVED FOR FINISHED PHOTO*


Materials/Tools:

- printing -
Haunted Helmet STL file - $28
Armorsmith - $20
Cura Slicer - free
Creality Ender 5 plus 3d Printer - $600
PLA+ Filament - $24


- assembling -
Pliers or screwdriver
Box cutter or utility knife
Round and square files
deburring tool
Sandpaper
 
Last edited:
Comparison:
Learning the Medium


Pepakura and foam have been done inside and out on this forum. 10+ years of example posts, trail + errors, tutorial, help threads, buying guides. It took me months to learn those methods, but I did it by reading and watching YouTube videos mostly on my own, building off what others had posted.

3d printing has not been around as long so there was less information on this site for me to just absorb. The popularity of printing also means that there is a TON of information out there, but when there are thousands upon thousands of youtube videos to watch it almost makes it worse. Luckily I'm part of a super helpful and kind costuming group called the 405th! I was able to get real time help and advice and I stumbled my way through understanding this technology. A lot of the real time help came from posting in the Facebook group, the #3d printing channel on our discord and PMing specific people that had offered to help. I would say, just like the other methods, it has taken me months to learn. And I'll still likely learn a lot more as I encounter problems.

I'll also say that the frustration of failures was much more overwhelming during my learning to 3d print. When I'd mess up gluing paper during Pepakura I'd just glue the paper differently, it's just paper! When I'd mess up here I felt like I had absolutely zero knowledge of how to fix it. They did not teach me how to speak to robots in high school! Whereas I've been gluing paper together since kindergarten. I definitely had to push myself out of depression slumps multiple times caused by troubleshooting while learning how to 3d print.


Comparison:
Planning the build


This stage was pretty similar for both, I sized up the models and made sure the helmet would fit me just like I did with Pepakura. The biggest difference I'd say is that I paid for the 3d modeled helmet, whereas the Pepakura files I downloaded for free out of the 405th Armory. At first I was frustrated about this.. Just cause it's new, people are trying to make money off their fellow Halo costume builders? But, I've since tried my hand at both and I now understand the difference.

I should explain that I am not putting down PDO unfolders. I have unfolded many costume and prop pieces in Pepakura and on top of that I LOVE doing it! Seriously, ask me to unfold an OBJ and I'll do that **** today. It's like doing a digital puzzle in reverse. So cool. I can tell you it is no where near as much work as 3d modeling an STL for printing. STL requires so much more detail, patience, computing power. I could convert this Haunted Helmet OBJ to PDO in three to four hours tops with a 15 year old computer. Maybe TurboCharizard could tell us how long he spent modeling this Haunted Helmet for STL?

Point is I've come to be very okay throwing 20 bones at these guys for putting in some serious work creating high detailed models that we can turn into real props. (That said, there is a free model Index that members have graciously donated to on this site, as well as the ever expanding thingiverse)


Comparison:
Base Construction


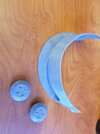
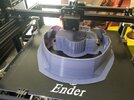
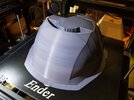
It's no secret, you can tell I'm leaning pro-3d printing right now. But, I haven't finished construction yet so we'll see. I'm currently about 65% of the way through printing this helmet. The smaller pieces done. Half the back done.

20210810_100659.jpg20210811_172734.jpg20210812_154045.jpg

We've come to the biggest divide so far. To get to this part of the base construction in Pepakura or Foam I would have spent about 10-15 hours hunched over my desk cutting paper or foam. Instead I've spent a hundred moments within the last three days running over to my printer at every strange sound praying it's not something I'll have to fix. I will take this slight mental exhaustion over the definite carpal tunnel and back aches.

I also know that I'm far from done. Just like with Pepakura I'll need to take steps to make the 3d print more sturdy and also smooth out the lines so it will look like real armor.
 
Last edited:
Comparison:
Learning the Medium


Pepakura and foam have been done inside and out on this forum. 10+ years of example posts, trail + errors, tutorial, help threads, buying guides. It took me months to learn those methods, but I did it by reading and watching YouTube videos mostly on my own, building off what others had posted.

3d printing has not been around as long so there was less information for me to just absorb. Luckily I'm part of a super helpful and kind costuming group called the 405th! I was able to get real time help and advice and I stumbled my way through understanding this technology. A lot of the real time help came from posting in the Facebook group, the #3d printing channel on our discord and PMing specific people that had offered to help. I would say, just like the other methods, it has taken me months to learn. And I'll still likely learn a lot more as I encounter problems.

I'll also say that the frustration of failures was much more overwhelming during my learning to 3d print. When I'd mess up gluing paper during Pepakura I'd just glue the paper differently, it's just paper! When I'd mess up here I felt like I had absolutely zero knowledge of how to fix it. They did not teach me how to speak to robots in high school! I definitely had to push myself out of depression slumps multiple times.


Comparison:
Planning the build


This stage was pretty similar for both, I sized up the models and made sure the helmet would fit me just like I did with Pepakura. The biggest difference I'd say is that I paid for the 3d modeled helmet, whereas the Pepakura files I downloaded for free out of the 405th Armory. At first I was frustrated about this.. Just cause it's new people are trying to make money off their fellow Halo costume builders? But, I've since tried my hand at both and I now understand the difference.

I should explain that I am not putting down PDO unfolders. I have unfolded many costume and prop pieces in Pepakura and on top of that I LOVE doing it! Seriously, ask me to unfold an OBJ and I'll do that **** today. It's like doing a digital puzzle in reverse. So cool. I can tell you it is no where near as much work as 3d modeling an STL for printing. STL requires so much more detail, patience, computing power. I could convert this Haunted Helmet OBJ to PDO in three to four hours tops? Maybe TurboCharizard could tell us how long he spent modeling this Haunted Helmet for STL?

Point is I've come to be very okay throwing $20 bones at these guys for putting in some serious work creating high detailed models that we can turn into real props. (That said, there is a free model Index that members have graciously donated to on this site, as well as the ever expanding thingiverse)


Comparison:
Base Construction


It's no secret you can tell I'm leaning pro-3d printing right now. I haven't finished construction yet so we'll see. I'm currently about 65% of the way through printing this helmet. The smaller pieces done. Half the back done.

View attachment 308832View attachment 308833View attachment 308834

We've come to the biggest divide so far. To get to this part of the base construction in Pepakura or Foam I would have spent about 10-15 hours hunched over my desk cutting paper or foam. Instead I've spent a hundred moments within the last three days running over to my printer at every strange sound praying it's not something I'll have to fix. I will take this slight mental exhaustion over the definite carpal tunnel and back aches.

I also know that I'm far from done. Just like with Pepakura I'll need to take steps to make the 3d print more sturdy and also smooth out the lines so it will look like real armor.
As someone who does more 3d printing than pep or foam this is super interesting to read a new perspective! Also don't worry, you'll still spend plenty of time hunched over post processing the print (filling and sanding) haha. But that time can vary depending on the layer height you choose to print at. Overall really excited to see how this build goes!
 
Love to see your perspective as you dive into 3d printing too! Jealous of your Ender 5 Plus (maybe someday).

OctoPrint with a webcam is what it took for me to stop running to check on printers at most strange sounds. Welcome to the world of printing all the things and an ever-growing unfinished prints pile.
 
As others have said - it is really cool to see an "outsiders" perspective to the 3D printing world. I also really love how you listed the cost of the printer in your materials. :p (That would make it one expensive helmet)

As someone that has north of 300 days of printing time across two printers, I can say that you never stop learning. Even just last week I found a new and better way to do supports for certain pieces.

I can second what Fallen said about remotely monitoring your printer. Though - if you want to go for a more low tech way I've simply setup a WYZE camera and a WYZE smart plug on each printer. I can spy on them anywhere with internet / cell connection via my phone, and remotely power them down if something is going really wrong.
 
Thanks guys. I'm glad you're enjoying it so far. I was worried it wouldn't be well received. I don't want people to think I have an agenda here (other than always working towards building up the community). Like tahu505 said, I too just find it interesting and thought I'd share what I find.

I'm happy to hear any suggestions you all have along the way about 3d printing. The camera sounds like a cool idea, but might be a ways off.

Zach 009 - I've only been recommended one printer Creality Ender 5 plus 3d Printer - $600. I bought it direct from the manufacturer through that site with a coupon for $50 off. I am liking it so far. The Ender 3 is also very popular. The 5+ has a few more bells and whistles and an impressive printing capacity.
 
Update:
I've finished printing all the helmet pieces at 110% the original file size and have determined that is too big. Not a huge loss, but still disappointing. I used 1kg spool at $23 including the failed prints. I can still assemble this print and use as a display piece or sell it to someone bigger than me. I've purchased another spool and will print at 105%. If all goes well, I have about 4 more days of printing before I can move on.


Comparison:
Remaking


It is not uncommon in props and costumes to have to remake part or all of a project due to it being the incorrect size. Sometimes this is due to gaffs, other times you try your best guess which just wasn't close enough. In Pepakura and Foam you make a little as you go which means you can often catch a size issue before you're done constructing. With a helmet you could start with the neck hole to test if it fits over your head. Then move on to the "face" to make sure eye holes line up. Unless you are a printing wizard, with 3d prints you just have to wait until the whole piece/part is done before you can check it and that part can take one or two days to finish. This does not feel like a quick process right now.

Another note is that I don't feel like I'm getting better. With re-glueing paper or re-cutting foam pieces, there was this feeling of "I've done this exact part before, I can go twice as fast this time." With the printer, it goes the speed it goes. On top of that my number of failed parts is reaching the same for the remade 105% as there were for the 110% helmet. The printer is just so finicky, I really don't feel like these failures are my fault though they probably are.


TIPS:
Slicing/Printing


At first I wasn't going to put these steps down as "part of the work process" because they are quick and easy, what's 5 minutes?.... but now that I've had to do each section of the helmet 10 times as I scrap the code, reload the program start over because the print is not coming out the way I want it. Maybe I need to change the plate adhesion, or the supports, or the speed or the orientation.. 5 minutes x 10 attempts on 2-3 parts... That's a couple hours work.

1. Boot up Slicer program (ie. Ultimaker Cura)
2. Load in STL file (ie. Helmet front)
3. Scale the file (ie. 105%)
4. Rotate the file, then select "Lay Print Flat on Bed"
5. Double check any setting changes that need to be made
6. Slice (my home computer takes 5 minutes for a 1 day print)
7. Preview (my home computer takes another 5 minutes to preview)
8. Inspect the supports and adhesion to be symmetrical.
9. Save to thumb drive and insert drive into printer
10. Check bed levels
11. Wait for printer to heat up
12. Watch printer as it prints its first lines.
13. Start over or trouble shoot when you don't get the results you want.
 
Last edited:
Another note is that I don't feel like I'm getting better. With re-glueing paper or re-cutting foam pieces, there was this feeling of "I've done this exact part before, I can go twice as fast this time." With the printer, it goes the speed it goes. On top of that my number of failed parts is reaching the same for the remade 105% as there were for the 110% helmet. The printer is just so finicky, I really don't feel like these failures are my fault though they probably are.
This one is probably the hardest part of printing. You can get better at designing parts. You can learn to optimize settings. You can get really good at maintenance and spotting issues early on. You will always have to just let the machines do their thing and run the full amount of time and sometimes failures just happen. Risk mitigation is the name of the game.
 
This one is probably the hardest part of printing. You can get better at designing parts. You can learn to optimize settings. You can get really good at maintenance and spotting issues early on. You will always have to just let the machines do their thing and run the full amount of time and sometimes failures just happen. Risk mitigation is the name of the game.

Which is surprisingly hard for me to cope with. I need things to get better all the time. I have an insatiable need to improve. If I hit a wall I will work at overcoming it. If I determine the wall is too high and not worth the effort then I will abandon it and move on to something else. So this really has been a challenge for me to push through. It's like 3d printing is made up entirely of walls... huh, see what I did there?
 
Don't let the failures pull you down! It does take time and it may feel like a waste of money after resizing everything, but it's worth it, especially with more detailed parts and the unlimited possibilities of prints! I'm still resizing my pilot helm and possibly the EOD.
 
Which is surprisingly hard for me to cope with. I need things to get better all the time. I have an insatiable need to improve. If I hit a wall I will work at overcoming it. If I determine the wall is too high and not worth the effort then I will abandon it and move on to something else. So this really has been a challenge for me to push through. It's like 3d printing is made up entirely of walls... huh, see what I did there?
You may not be able to physically improves skills, like the finesse when it comes to foam smithing, but you definitely learn more - every mistake is a chance to figure out what can be done to avoid/improve it in the future. So even if you don't feel your hands on skills are improving, you're for sure getting smarter ;)
 
I just re-stumbled on this thread. Any updates Duke? (Turbo posting about the spooky helmet made me think of this - blame him)
TurboCharizard 'S HELMET TURNED OUT SO GOOOD! No surprise though really.

No, after about 5 failed attempts to print the aft section at the new size I gave up. I still have intentions to finish, but I need to figure out how to dial it in. I can't afford to keep having this many failures... financially and mentally.

I appreciate you keeping tabs though MrJamin!
If there's one part that's giving you troubles just let me know and I can run it off for you. We found a collection of things that were supposed to go into your truck when you last visited and I need to send a parcel anyway :p
 
I just started printing my helmet in pla and realized my extra spool is petg.. -_- i dunno, i think i find pep and resin the better option in a way. its definitely cheaper to make mistakes and probably takes about the same amount of time. accuracy suffers a bit though.
 
If there's one part that's giving you troubles just let me know and I can run it off for you. We found a collection of things that were supposed to go into your truck when you last visited and I need to send a parcel anyway :p
Lol! You are too kind my friend. I think we're in "give a man a fish vs. teach a man to fish" waters now. I'm so close to cracking it! I'm pretty sure I just need to figure out my ideal initial layer height for premium adhesion. Until them I'm thinking just printing smaller parts so at least if they fail it is not such a big blow.

Maybe save the parcel for a potential WA visit. :)
*I think we opened our borders finally.


BUT ROBOTS Electraknite !!!
Coho resumes sailings on November 8th!
 
Status
Not open for further replies.
Back
Top