- Member DIN
- S128
Happy Pride month Spartans!
Been chipping away at this still!
I've managed to get all the armor pieces coated in a voluptuous layer of spot putty (about 2 to 2-1/2 tubes) then sanded with 320 grit by hand. A skinny layer of spot putty (about 1/2 tube) and another 320 grit sanding. I did all this on my third floor balcony.
I'm pretty fortunate that I can use my work to do painting, so this weekend I brought all my pieces. First I'm lucky enough to use a compressed air tank to blow off all the putty dust from my pieces. (if not I would have used a soft cloth and bottle of rubbing alcohol). This will help the primer stick.
Here's all my pieces:

Then I used Primer Filler 2in1 to lay a nice thick layer that auto levels the surface of all the pieces. (took about 2 cans). I let this fully cure and cane back 24 hours later.
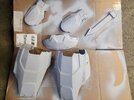
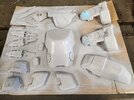
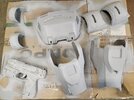
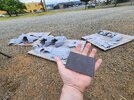
Today I took those pieces and wet sanded them with 400-600 grit sandpaper. So smooth! I even got my wet sanding pajamas out for this one. I was also very pleased with the sanding sponges I got. (will update with the link) This one little piece did all my armor and probably could have done a bit more.
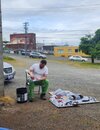
Lastly, for the little bits. I did the Triple Thick Glaze and Chalk paint trick (from our tutorial index).
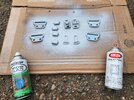
I hit all my bigger pieces with another layer of primer filler (only one can this time) and I will be back tomorrow to wet sand with 800-1000 grit.
Been chipping away at this still!
I've managed to get all the armor pieces coated in a voluptuous layer of spot putty (about 2 to 2-1/2 tubes) then sanded with 320 grit by hand. A skinny layer of spot putty (about 1/2 tube) and another 320 grit sanding. I did all this on my third floor balcony.
I'm pretty fortunate that I can use my work to do painting, so this weekend I brought all my pieces. First I'm lucky enough to use a compressed air tank to blow off all the putty dust from my pieces. (if not I would have used a soft cloth and bottle of rubbing alcohol). This will help the primer stick.
Here's all my pieces:
Then I used Primer Filler 2in1 to lay a nice thick layer that auto levels the surface of all the pieces. (took about 2 cans). I let this fully cure and cane back 24 hours later.


Today I took those pieces and wet sanded them with 400-600 grit sandpaper. So smooth! I even got my wet sanding pajamas out for this one. I was also very pleased with the sanding sponges I got. (will update with the link) This one little piece did all my armor and probably could have done a bit more.


Lastly, for the little bits. I did the Triple Thick Glaze and Chalk paint trick (from our tutorial index).

I hit all my bigger pieces with another layer of primer filler (only one can this time) and I will be back tomorrow to wet sand with 800-1000 grit.
