Farris 3D Print Infinite Build log

Quick update: I've printed down through 1 full shin. Everything fits so far. 2nd shin is printing now and should be done tonight/tomorrow morning. Then just the boots and I'll have a full set of armor!

For piecing together/reinforcing the seams I've decided to do some chemical welding using MEK substitute.

Current plan: Print out sets of 50mm wide, .4 mm thick "bandages" with a small hex pattern. Cut to length, cover a face in MEK substitute, and place over the seam to reinforce them. Especially thinner walls like around the back.

These strips should be wide enough to provide plenty of surface area while also being thin enough to flex with the interior walls of the suit.

This should make the whole suit pretty solid while adding minimal weight.

I'm starting to think this is going to happen
 
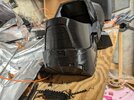
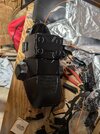
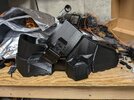
I'm finally reaching the end of this print. First boot is printed and 2nd boot will be done tonight.

My only concern at this point is that I intended on putting a shoe inside the boot. However, the length and width does not seem large enough since my foot is taking up almost all of the space. Perhaps something thinner than I planned will work. I attempted to get it pulled together get a picture of what I'm describing, but didn't feel like taping things so that fell apart. There's plenty of height, so maybe my foot is just in the wrong spot.

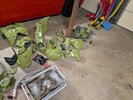
But pictures of the boot! Apologies for the disaster of a workbench. I'll clean it up tomorrow.

PXL_20240804_121543295.jpgPXL_20240804_121525311.NIGHT.jpgPXL_20240804_121516953.jpg
 
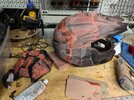
Alright...first piece primered. A few abrasions/seams visible. Pretty sure nobody will notice besides me.

A few rounds of sanding done on the helmet. Filled in the last major imperfections and waiting for that to cure. One more sanding round and then I'll primer it.

First cost of spot putty on the shoulder.

Strategy is sort of evolving as I'm going along. As of right now, the current flow is:
1. Use workbench as a backer for sandpaper and sand flat edges
2. Assemble parts with CA for initial hold
3. Apply PETG/MEK "bandage" (experimenting with that tomorrow)
4. Apply initial glaze coat and WALK AWAY because I'm impatient and want to immediately sand. Wait for it to cure.
5. Sand, evaluate, revisit 4 until it's "good enough"
6. Primer
7. Lay down black base
8. Mask what I want to stay black and paint green

I'm hoping to be done with all of this next weekend, hence the "good enough" mentality. As long as it holds together and comes close enough, I'll be happy.

PXL_20240804_160748232.jpg
 
Bandage experiment notes:
This morning I took a stab at applying/reinforcing the back piece with some 3d printed strips. I attempted with both solid and intentionally porous. I'm chemical welding with MEK substitute.

Method:
Very similar to laying fiberglass. Brush chemical onto the piece, lay the bandage, brush more chemical on top, press into place. It can take a couple of minutes so just keep going back and forth pressing.

I did find that the porous ones worked better for me because they won't trap air bubbles and brushing on extra was easier because it soaked into both the bandage and the part.

Pros:
1. It does work and bond relatively well
2. The reinforcement does work.

Cons:
1. This does smell. Do this in a ventilated area
2. It will leak everywhere and is not very viscous. Definitely rotate your part so the area you're reinforcing is at the bottom.

Would I use this method for general assembly? Absolutely not. It's way too slow and CA works just fine for that purpose. Does it give me peace of mind on thin parts? Yes.

Picture below. Still needs some trimming but enough to get the idea

PXL_20240805_134104049.jpg
 
Progress is being made. Almost everything is assembled and all but one shin and the codpiece have their first base coat of paint.

Most parts are a tight fit but livable, but the codpiece was way too tight So I scaled it up 6% and it will be done printing tonight.

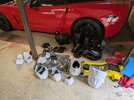
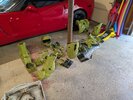
Picture of most parts before I got the first base coat on all of them. It's pretty humid so I'm giving the parts until tomorrow to finish curing before I mask for the green.

Hope to be able to spend next weekend weathering and strapping.

PXL_20240818_152443071.jpg
 
One more update for the day.

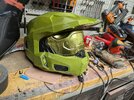
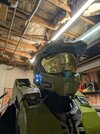
Went ahead and painted the helmet and put details in. The visor is temporarily attached for the picture. I'm happy with how it is turning out.

Just need to add lights, padding, and touch up where my masking wasn't great.
PXL_20240818_232733885.jpg
 
4 days from con. Everything is painted except for the codpiece. Still need to do weathering/black wash, touch ups, and strapping. Most of that will be done by tomorrow.

PXL_20240824_175148943.jpg
 
Weathering part 1 done. Took a sponge brush loaded with metallic silver spray paint and went to town. It is really making my garbage paint job start to look mediocre. Once I add the black acrylic wash, I'm hoping to get up to passable.

PXL_20240825_135736460.jpg
 
Good news: Finished weathering today. Started some strapping.
Bad news: Went to test fit all the parts with the undersuit parts and the codpiece doesn't fit.

I've scaled up and started a new print and it will be done tomorrow. I've also hacked away at the one I have. If all else fails, I can attach the parts to a belt and have some gaps in between. Life will go on.

PXL_20240825_191632685.jpg
 
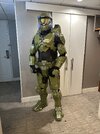
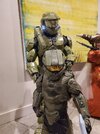
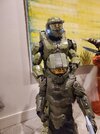
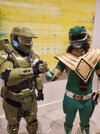
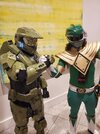
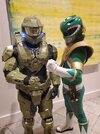
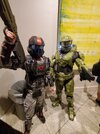
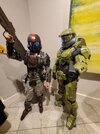
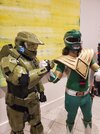
Con update: Repairs happened. Strapping adjustments happened. Went out in the suit for about 1 hour.

A couple torso points popped off, but nowhere visible in pictures. Foot/boot interaction is better. A little bit of foam will probably fix it completely. I need to replace a couple of Velcro connections with buckles. Strap changes held up well. Probably just want to add another strap across my chest.

Overall, great success.
 
This thread is more than 3 months old.

Your message may be considered spam for the following reasons:

  1. This thread hasn't been active in some time. A new post in this thread might not contribute constructively to this discussion after so long.
If you wish to reply despite these issues, check the box below before replying.
Be aware that malicious compliance may result in more severe penalties.
Back
Top