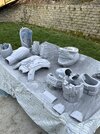
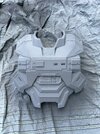
First Build - Halo Reach Armor

Printing printing so much printing! I’ve probably done about 400 hours in the last four weeks, running this thing nearly non-stop. Progressing slowly through everything but thankfully hitting less sizing snags.

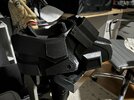
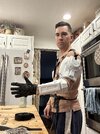
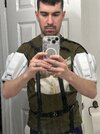
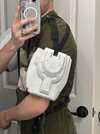
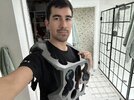
Speaking of sizing, I cut up the torso pieces and printed them at 0.3mm draft settings, 5% infill, and chopped off all the details so I could make a sizing skeleton. It took about 20 hours for the test pieces versus 24+ per piece when I do them in detail. Here is the result!

IMG_9487.jpeg

IMG_9488.jpeg

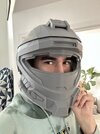
Miiiight be a little too big still, but I also think I welded the pieces together wrong which is making a little bit more of a gap than it should be. Putting this over my head was VERY exciting though and it’s great to get a hit of dopamine after the boring progress of printing. Also I imagine this is what the inside of Noble-6’s armor looked like at the end of Reach.

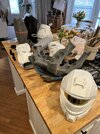
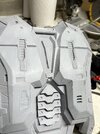
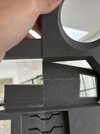
I also tried my hand at welding the PLA with a soldering iron and holy crap was that a roaring success. I was sitting here with glue and clamps and waiting and thought “well this is a draft I should try a new skill.” I’ve never touched a soldering iron in my life (and grabbed the hot part once) but this was SO easy and SO fast! I watched that one guy’s YouTube video and wore a respirator just in case. I didn’t bother making them pretty especially since they’re on the inside but here’s a shot of my seams just for reference or anyone else thinking of welding. More to come later, back to printing!
IMG_9489.jpeg
 
Printing printing so much printing! I’ve probably done about 400 hours in the last four weeks, running this thing nearly non-stop. Progressing slowly through everything but thankfully hitting less sizing snags.

Speaking of sizing, I cut up the torso pieces and printed them at 0.3mm draft settings, 5% infill, and chopped off all the details so I could make a sizing skeleton. It took about 20 hours for the test pieces versus 24+ per piece when I do them in detail. Here is the result!

View attachment 352851

View attachment 352852

Miiiight be a little too big still, but I also think I welded the pieces together wrong which is making a little bit more of a gap than it should be. Putting this over my head was VERY exciting though and it’s great to get a hit of dopamine after the boring progress of printing. Also I imagine this is what the inside of Noble-6’s armor looked like at the end of Reach.

I also tried my hand at welding the PLA with a soldering iron and holy crap was that a roaring success. I was sitting here with glue and clamps and waiting and thought “well this is a draft I should try a new skill.” I’ve never touched a soldering iron in my life (and grabbed the hot part once) but this was SO easy and SO fast! I watched that one guy’s YouTube video and wore a respirator just in case. I didn’t bother making them pretty especially since they’re on the inside but here’s a shot of my seams just for reference or anyone else thinking of welding. More to come later, back to printing!

View attachment 352853
yeah i glued my one part then got the bright idea to solder the seems even with the respirator it was almost gagging an toxic wow never did that again but i think i kill 3 brain cells cause i drool alot now..lol
 
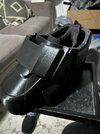
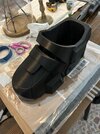
Small update - got my shoes sized and printed one whole boot part. It fit perfectly in the first try which always feels good, but something about seeing it wearable and putting it on and starting to get a feel for the finished look was really exciting. I have a lot of pieces laying around in varying stages of completion as I continue to print my brains out, but seeing this pushed together was really rewarding.

IMG_9947.jpeg IMG_9948.jpeg
 
Took advantage of some Seattle sunshine to get first primer coats down on some finished pieces. Beginning the long step of priming and sanding. The rain is coming so I need to do as much as I can before I’m stuck in the house all winter.

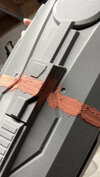
Also took my first ride with bondo spot putty for some seams and realized I need a better applicator than my gloved finger. Squishy skin fits into the seam and just recreates the depression. It might be better once I sand it down so we’ll see!

IMG_9966.jpeg IMG_9986.jpeg
 
Hell yeah man, putting on the helmet the first time is super special. Looking really good so far, keep it up! Also, cutting out the frame for sizing the torso was genius. well done.
 
This looks so cool so far! Alot of suit building is trial and error, with the 3D printed files i had to scale down alot. alot of it is definately trial and error, mostly error XD. the bigger parts of the armour i have build from 10mm foam as it just saved the hassle of printing and was cheaper. another thing with foam is its quieter and doesnt clunk like 3D printed bits do
 
This looks so cool so far! Alot of suit building is trial and error, with the 3D printed files i had to scale down alot. alot of it is definately trial and error, mostly error XD. the bigger parts of the armour i have build from 10mm foam as it just saved the hassle of printing and was cheaper. another thing with foam is its quieter and doesnt clunk like 3D printed bits do
That’s smart to do a combination of the two mediums! My 6mm undersuit foam just came in and I’m surprised by the sturdiness of it! Never worked with the stuff (or 3D printing) before this project.
 
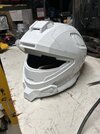
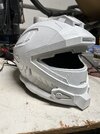
Boy the difference a month makes. Waited for three days for the rain to stop so I could get a coat of paint on my helmet (there are animals and cars in the garage). I’m hoping to give it a trial run at the Geek Craft Holiday Market next week. The spot putty seems to have cracked in some parts of the seams so I’m hoping it’s a surface crack. Will find out when I sand it.

IMG_0550.jpegIMG_0551.jpeg

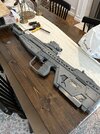
Pretty much every armor piece is printed now. I’m throwing down DMR prints as a reward for progressing on the armor. I got magnets in the two torso pieces so it’s wearable which is really fun. Blue tap is on for future spot putty application.

IMG_0532.jpeg

I want to start working on harnessing, but there are some parts like the waist belt that I will probably attach over undersuit so I need to get an undersuit base layer going so I can create proper strap allowances. I guess I could make it adjustable… just thought of that as I’m typing. But I’m really enjoying everything still and love seeing it all come together!
 
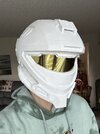
One round of sanding and another coat of primer on the helmet. Coming out really well and need to work on the seams some more. I think I consolidated the putty too much in the seams and need to spread it out a little more for a cleaner transition. But I am wearing it out to Geek Craft Expo tomorrow so I added a layer of gold window tint on the inside. AMAZING result. It’s perfectly mirrored and I have fantastic visibility on the inside. Trying to figure out a way to combine this with the thermoplastic visor once I get that molded.
IMG_0673.jpeg
 

Your message may be considered spam for the following reasons:

If you wish to reply despite these issues, check the box below before replying.
Be aware that malicious compliance may result in more severe penalties.
Back
Top