Great job! Glad I could be there, even if I didn't help too much. Excited to see it at the Gaming Expo!
You are using an out of date browser. It may not display this or other websites correctly.
You should upgrade or use an alternative browser.
You should upgrade or use an alternative browser.
Group Project - Halo 3 Standoff Recreation
- Thread starter PerniciousDuke
- Start date
- Status
- Not open for further replies.
ArcSol
Member
- Member DIN
- S328
It was nice having you! Hope you were able to get enough for your interview. Don't hesitate to reach out to one of us if you need anything!Great job! Glad I could be there, even if I didn't help too much. Excited to see it at the Gaming Expo!
And don't worry about the helping part, we went into it expecting to not finish everything. It's nice we were able to get as much done as we did.
- Member DIN
- S128
UPDATE:
With 4 hours sleep I put in a ten hour work day and I actually got a lot done. Mostly finishing up the stages from what the group worked on yesterday.
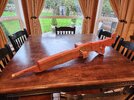
Yesterday Lukavago epoxied the steel bar, pvc pipes and magnets into the MG
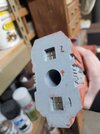
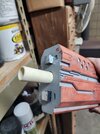
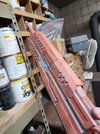
I just had to finish epoxying the magnets for the magazine. Pro tip, put tape between the magnets so both get glued evenly, but don't get glued together.
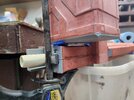
It works, but the seam by the grip is weak and I will have to brainstorm a way to strengthen it non permanently.
I did finish up painting the frames ForwardUntoDusk started on and I did take your advice and used primer filler and sanded down to help reduce the wood grain texture. (pictures on next go around)
SubXzeroXhero and ArcSol applied the graphic to all three screens yesterday and was able to protect one by gluing on front plastic. I was able to finish the front plastic on the other two.
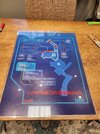
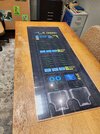
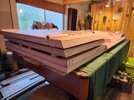
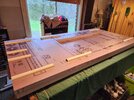
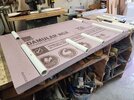
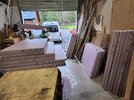
And the real time consuming part... I was able to cut ALL of the insulation board pieces for the wall (minus the hanging details). I made so much pink mist. I also bevel cut where the walls meet. And I glue ALL of the PVC pipes into one side of the foam.
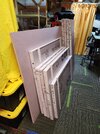
With 4 hours sleep I put in a ten hour work day and I actually got a lot done. Mostly finishing up the stages from what the group worked on yesterday.
Yesterday Lukavago epoxied the steel bar, pvc pipes and magnets into the MG


I just had to finish epoxying the magnets for the magazine. Pro tip, put tape between the magnets so both get glued evenly, but don't get glued together.

It works, but the seam by the grip is weak and I will have to brainstorm a way to strengthen it non permanently.

I did finish up painting the frames ForwardUntoDusk started on and I did take your advice and used primer filler and sanded down to help reduce the wood grain texture. (pictures on next go around)
SubXzeroXhero and ArcSol applied the graphic to all three screens yesterday and was able to protect one by gluing on front plastic. I was able to finish the front plastic on the other two.


And the real time consuming part... I was able to cut ALL of the insulation board pieces for the wall (minus the hanging details). I made so much pink mist. I also bevel cut where the walls meet. And I glue ALL of the PVC pipes into one side of the foam.


- Member DIN
- S128
I've updated the 2nd post with a lot of information. Both consolidating what we've done and cataloging money/time/resources.

 www.405th.com
When I think about this project I question the "group" part of the name because I have spent SO MUCH of my time and money on this thing. But... when I start talking about it with people you can't help but to appreciate how much other members have contributed. We raised a lot of money and I've managed to wrangle all sorts of people to do all sorts of things. This really is going to be a show stopper if I can pull it off in the end. Hats off to everyone that has helped so far.

Group Project - Halo 3 Standoff Recreation
Hello again Pacific peoples! (and other regiments who like cool things) I previously made an interest thread to help generate ideas for what we can do to increase Pacific's footprint at conventions and one idea has really stuck with me. I seriously think I can build it, but I can't do it alone...
When I think about this project I question the "group" part of the name because I have spent SO MUCH of my time and money on this thing. But... when I start talking about it with people you can't help but to appreciate how much other members have contributed. We raised a lot of money and I've managed to wrangle all sorts of people to do all sorts of things. This really is going to be a show stopper if I can pull it off in the end. Hats off to everyone that has helped so far.
- Member DIN
- S128
UPDATE:
After a break last weekend with ECCC I'm totally rested and ready to work (That is a lie. I'm dead inside and everything hurts).
So today I had PapaBear271 over and we worked on the booth! Combined we put in another 12 hours.
Our main focus was gluing the back foam panels onto the front panels that already had the pvc glued in. Everything went very smoothly. We heavily applied the foam glue, pressed the pieces together, used little bamboo skewers to hold them in place and then sat on each piece for a few minutes.
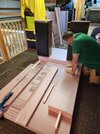
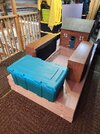
We left all the walls stacked up with some heavy items to keep pressure. I knew there was a reason my mom kept the bear house I made when I was 10!
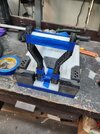
After that I moved on the the switch @nick_yelsa117 modeled for me and MissBoof 3d printed in transparent filament.
I sanded the exposed faces with an orbital sander and cleaned up all the edges. Taped it together to see how the mechanism works and I think it will be great!
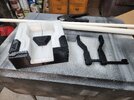
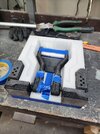
Next up was the MG. The seam next to the handle had too much play so I added a latch that I'm hoping will come across as an ironsight. It worked, but I wanted the epoxy to cure before more photos.
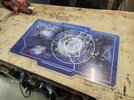
Lastly, I did the final cut on the horizontal screen. Did these very carefully on the table saw. Came out pretty even.
After a break last weekend with ECCC I'm totally rested and ready to work (That is a lie. I'm dead inside and everything hurts).
So today I had PapaBear271 over and we worked on the booth! Combined we put in another 12 hours.
Our main focus was gluing the back foam panels onto the front panels that already had the pvc glued in. Everything went very smoothly. We heavily applied the foam glue, pressed the pieces together, used little bamboo skewers to hold them in place and then sat on each piece for a few minutes.


We left all the walls stacked up with some heavy items to keep pressure. I knew there was a reason my mom kept the bear house I made when I was 10!
After that I moved on the the switch @nick_yelsa117 modeled for me and MissBoof 3d printed in transparent filament.
I sanded the exposed faces with an orbital sander and cleaned up all the edges. Taped it together to see how the mechanism works and I think it will be great!


Next up was the MG. The seam next to the handle had too much play so I added a latch that I'm hoping will come across as an ironsight. It worked, but I wanted the epoxy to cure before more photos.
Lastly, I did the final cut on the horizontal screen. Did these very carefully on the table saw. Came out pretty even.

- Member DIN
- S128
UPDATE:
My back still feels like it is pieces and as of last night I now have a cold and struggle to talk or think clear... Oh you wanted sn update on the booth. My bad.
SubXzeroXhero joined me today and combined we put in 14 work hours. Without sounding dramatic.. I'm not sure how well I'm going to meet this deadline. Every step is taking far longer than I imagined. I'm going to have to pick and choose what gets done for show #1 and what will be upgrades for future shows.
Case and point today's plan was to embed the devil's velcro and magnets in. I guessed one hour. It took 5 hours. I had hoped my edges where each wall meets another wall were close enough, but they were not so we had to figure out a way to cut the 3 segments totaling 8feet and 4" thick at a perfect 30 degree bevel.
The solution: clamp a piece of wood on the top and bottom of the foam and press an 8ft steel bar along it also both top and botton. Then use a coping saw to ride the two metal bars to maintain the angle. It worked! Little rough, but then we sanded it with a wood block to keep the same angle.
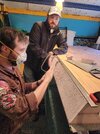
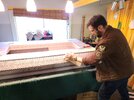
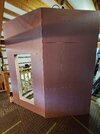
After that we had just enough time to actually embed all the devil's velcro and the magnets into all 12 pieces.
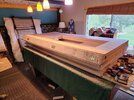
Set up to test with no connection until the magnet glue cured.
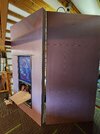
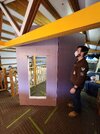
Sub can attest, the size of this thing is impressive. Still not 100% sure we'll be able to pull it off, but I'll keep plugging away at it! Oh and I am happy the embedded PVC works exactly as planned, we assembled each wall several times and tipping was the only issue. The joints were great.
Sub and I both took some parts home to work during the week. He's going to paint the MG and I'm going to work on the switch.
My back still feels like it is pieces and as of last night I now have a cold and struggle to talk or think clear... Oh you wanted sn update on the booth. My bad.
SubXzeroXhero joined me today and combined we put in 14 work hours. Without sounding dramatic.. I'm not sure how well I'm going to meet this deadline. Every step is taking far longer than I imagined. I'm going to have to pick and choose what gets done for show #1 and what will be upgrades for future shows.
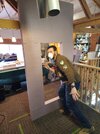
Case and point today's plan was to embed the devil's velcro and magnets in. I guessed one hour. It took 5 hours. I had hoped my edges where each wall meets another wall were close enough, but they were not so we had to figure out a way to cut the 3 segments totaling 8feet and 4" thick at a perfect 30 degree bevel.


The solution: clamp a piece of wood on the top and bottom of the foam and press an 8ft steel bar along it also both top and botton. Then use a coping saw to ride the two metal bars to maintain the angle. It worked! Little rough, but then we sanded it with a wood block to keep the same angle.


After that we had just enough time to actually embed all the devil's velcro and the magnets into all 12 pieces.

Set up to test with no connection until the magnet glue cured.

Sub can attest, the size of this thing is impressive. Still not 100% sure we'll be able to pull it off, but I'll keep plugging away at it! Oh and I am happy the embedded PVC works exactly as planned, we assembled each wall several times and tipping was the only issue. The joints were great.
Sub and I both took some parts home to work during the week. He's going to paint the MG and I'm going to work on the switch.
Last edited:
- Member DIN
- S128
UPDATE:
The weekend is upon me again. This time I'm opting to stay over at my parents in order to work longer. Put in 11 hours today.
Nothing very exciting to show off today. A lot of things just moving along. Hopefully something good tomorrow.
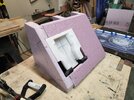
Let's see. I started by making the foam casing around the switch. It was a decent amount of trial and error, but I'm happy with the result. Not finished yet.
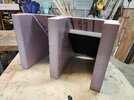
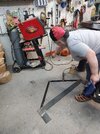
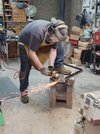
The main task today was creating a base for the middle wall. It will help sturdy things, especially while assembling the wall. Took awhile to get the angles right. Then I had my mom help weld it for me. And I got to do the clean up with the grinder.
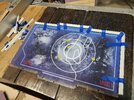
In the in-between times I finished all the pieces for the pvc frame around this screen. Tomorrow I will glue it.
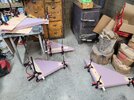
My goal is to paint next weekend so I have to finish all the foam work. I managed to construct the sides of the hanging pieces and embedded them with PVC.
The weekend is upon me again. This time I'm opting to stay over at my parents in order to work longer. Put in 11 hours today.
Nothing very exciting to show off today. A lot of things just moving along. Hopefully something good tomorrow.
Let's see. I started by making the foam casing around the switch. It was a decent amount of trial and error, but I'm happy with the result. Not finished yet.


The main task today was creating a base for the middle wall. It will help sturdy things, especially while assembling the wall. Took awhile to get the angles right. Then I had my mom help weld it for me. And I got to do the clean up with the grinder.


In the in-between times I finished all the pieces for the pvc frame around this screen. Tomorrow I will glue it.

My goal is to paint next weekend so I have to finish all the foam work. I managed to construct the sides of the hanging pieces and embedded them with PVC.

- Member DIN
- S128
UPDATE:
10 hours today and no I'm not just bragging. It's how I've been keeping tally on the work hours for this thing. Still sick mind you.
I started off today constructing the two hanging elements. They went well, but the glue takes 24+ hours to dry and was a pain to deal with. Also finished the switch shroud.
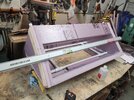
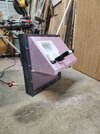
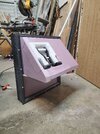
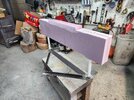
We finished welding the foot brace and it really does the trick.
Took a look at the weather report for next weekend and it wasn't looking good, so after lunch I switched gears and scrambled to assemble the wall outside. It was such a nice day today.
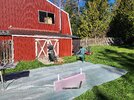
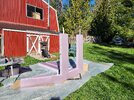
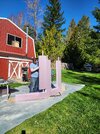
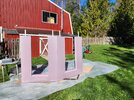
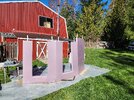
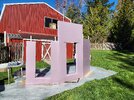
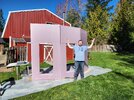
With the help of a spray gun I gave both sides two coats of primer. I told you I'd have something to show. Look, a wall!
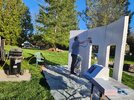
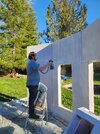
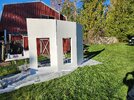
Overall I am really happy with how it is coming out. It was very easy for me to assemble by myself. It set up on the slanted grass and stayed up for a couple hours even with some decent wind. And it didn't even have my pvc braces on the top.
10 hours today and no I'm not just bragging. It's how I've been keeping tally on the work hours for this thing. Still sick mind you.
I started off today constructing the two hanging elements. They went well, but the glue takes 24+ hours to dry and was a pain to deal with. Also finished the switch shroud.


We finished welding the foot brace and it really does the trick.

Took a look at the weather report for next weekend and it wasn't looking good, so after lunch I switched gears and scrambled to assemble the wall outside. It was such a nice day today.


With the help of a spray gun I gave both sides two coats of primer. I told you I'd have something to show. Look, a wall!


Overall I am really happy with how it is coming out. It was very easy for me to assemble by myself. It set up on the slanted grass and stayed up for a couple hours even with some decent wind. And it didn't even have my pvc braces on the top.
Last edited:
- Member DIN
- S024
To add to the excitement, I took home some "homework" from the other weekend and have been working on it in the shop.
The MG:
After whipping up some bondo to fill in a few of the larger gaps, I took my mouse sander to the entire prop and had to do a bunch of hand sanding to smooth out the surface as much as possible. Followed the sanding portion with tried and true filler primer.
Continue the routine of sand and filler prime a few times (about 3 times) and the gun was looking pretty smooth.
Add another two coats of Behr Matte Black and it starts to take shape.


Banana for scale.
Next was the issue of mounting the gun to the stand. Took some PVC piping and sanded it down to size. For ease of access I decided that I was going to make the PVC look like a bolt for the mount and then add a cotter pin to the back side of it so that it will be secure in the bracket. Made the head of the bolt by heating up some worbla and shaping it. Once cooled I sanded it down and added some filler primer for a finished look. Will be finishing up this part of the project this week.


The MG:
After whipping up some bondo to fill in a few of the larger gaps, I took my mouse sander to the entire prop and had to do a bunch of hand sanding to smooth out the surface as much as possible. Followed the sanding portion with tried and true filler primer.
Continue the routine of sand and filler prime a few times (about 3 times) and the gun was looking pretty smooth.
Add another two coats of Behr Matte Black and it starts to take shape.
Banana for scale.
Next was the issue of mounting the gun to the stand. Took some PVC piping and sanded it down to size. For ease of access I decided that I was going to make the PVC look like a bolt for the mount and then add a cotter pin to the back side of it so that it will be secure in the bracket. Made the head of the bolt by heating up some worbla and shaping it. Once cooled I sanded it down and added some filler primer for a finished look. Will be finishing up this part of the project this week.
- Member DIN
- S128
UPDATE:
11 more hours done today, ladies and gentleman. Plus 2 yesterday. Not a ton of photos to show for it, but things are happening. Tomorrow a few of you are coming over and everything should get paint!
Yesterday I mostly just prepped. Cut the pegs for the big yellow bars. Glued some pieces for the switch. And painted the caution stuff yellow.
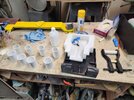
Today I had 8 things on my checklist and I did them all!
Started by getting primer on the hanging baskets. It was too cold to dry, so that was a struggle. Luckily they dried by night and I was able to get the PVC to hang them situated.
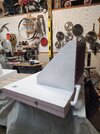
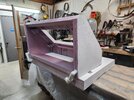
There are two yellow bars that go up the middle wall. I managed to embed PVC in the wall and fits my bars perfectly. Bar photos tomorrow.
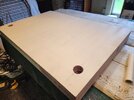
Another not pictured is the yellow caution braces across the front. I glued in magnets and embedded metal plates to the wall. They work!
Similarly, I glued in magnets to these wood strips and embedded corresponding metal plates. This will run the height of the left and right wall. There is a silver and yellow accent in the game and instead of just painting the wall I think this will help frame the whole piece with a nice clean edge.
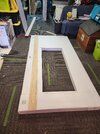
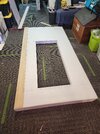
A few more odds and ends worked on today, but I'm too tired to keep typing. So much to do tomorrow!
11 more hours done today, ladies and gentleman. Plus 2 yesterday. Not a ton of photos to show for it, but things are happening. Tomorrow a few of you are coming over and everything should get paint!
Yesterday I mostly just prepped. Cut the pegs for the big yellow bars. Glued some pieces for the switch. And painted the caution stuff yellow.

Today I had 8 things on my checklist and I did them all!
Started by getting primer on the hanging baskets. It was too cold to dry, so that was a struggle. Luckily they dried by night and I was able to get the PVC to hang them situated.


There are two yellow bars that go up the middle wall. I managed to embed PVC in the wall and fits my bars perfectly. Bar photos tomorrow.

Another not pictured is the yellow caution braces across the front. I glued in magnets and embedded metal plates to the wall. They work!
Similarly, I glued in magnets to these wood strips and embedded corresponding metal plates. This will run the height of the left and right wall. There is a silver and yellow accent in the game and instead of just painting the wall I think this will help frame the whole piece with a nice clean edge.


A few more odds and ends worked on today, but I'm too tired to keep typing. So much to do tomorrow!
- Member DIN
- S128
Just gonna drop this here. I'll post more info once my stamina has recharged
That looks so awesome!Just gonna drop this here. I'll post more info once my stamina has recharged
Incredible work! Can't wait to see it in person at the Gaming Expo!
- Member DIN
- S128
Yesterday was a good day in a long line of good days building this wall. I noticed around halfway through the entire projects I hadn't made any costly mistakes and that has held true all the way till now. No misscuts to ruin big pieces of material, no accidents with damage, no paint mix ups. Honestly this project could not have gone better.
UPDATE :
I had pipninja ,SubXzeroXhero, and kilcin, over for the paint day! We all worked 9-5
Pip mostly worked on the lights and electronics. Unfortunately the magnetic switch we designed did not deactivate until it was over 6" away from the reciever which was obviously not viable for a small lever. Pip offered to take it home and use different products. He also secured the lights to frames and did some stencil work on the green box.
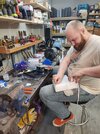
Sub did an outstanding job adding a bevel cut to all the wall foam where the color changes are. I bought the bevall tool to do this, but it did not work well in this type of foam so he free handed every cut with just a razor blade!
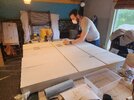
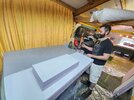
Sub and kilcin both also did the majority of the light and dark gray paint. While I ran around and just tried to keep everyone happy, hydrated and dancing. I did also paint a lot of the odds and ends. All the yellows and silvers. And maintained the order of things happening for best use of time / drying.

We were done an hour before planned and after some debate we decided it was worth it to set up all the components of the wall to check for any needed repairs or additions.
It was tricky, but in the end (even on uneven surfaces) we managed to get it up and stay by itself. It could have lasted the weekend at a con, but there was a small list of things to fix/add. We disassembled and I hung out another 3 hours to finish that list.
There are still details I want to add for the next showing, but for know this thing is ready for the first show!
UPDATE :
I had pipninja ,SubXzeroXhero, and kilcin, over for the paint day! We all worked 9-5
Pip mostly worked on the lights and electronics. Unfortunately the magnetic switch we designed did not deactivate until it was over 6" away from the reciever which was obviously not viable for a small lever. Pip offered to take it home and use different products. He also secured the lights to frames and did some stencil work on the green box.

Sub did an outstanding job adding a bevel cut to all the wall foam where the color changes are. I bought the bevall tool to do this, but it did not work well in this type of foam so he free handed every cut with just a razor blade!


Sub and kilcin both also did the majority of the light and dark gray paint. While I ran around and just tried to keep everyone happy, hydrated and dancing. I did also paint a lot of the odds and ends. All the yellows and silvers. And maintained the order of things happening for best use of time / drying.
We were done an hour before planned and after some debate we decided it was worth it to set up all the components of the wall to check for any needed repairs or additions.
It was tricky, but in the end (even on uneven surfaces) we managed to get it up and stay by itself. It could have lasted the weekend at a con, but there was a small list of things to fix/add. We disassembled and I hung out another 3 hours to finish that list.
There are still details I want to add for the next showing, but for know this thing is ready for the first show!
Last edited:
- Member DIN
- S128
Friend reporting in; had a blast coming out and working on the project. Music was good, food was delicious and felt good having everything come together. Trying to convince the wife to come with me to the con to see how it looks after the small fixes and on flat ground.
You made an account! That's awesome. Glad to hear you enjoyed helping us out. Will be great to see you at the show.
- Member DIN
- S770
Today I got our switch electrical done! PerniciousDuke this one runs off 12V, I have the 12V plug included. Make sure this only gets the 12 v plug, and not the 24 v of the other led strips


- Member DIN
- S128
UPDATE:
The very last piece! You may notice was missing from the set up photo.. Our tall graphic in the left frame.
ArcSol did a fantastic job of masking off the parts of the graphic that are "lights".
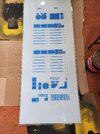
Then we spray painted the back matte black and removed the masks.
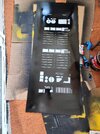
So now, when light passes through it looks super cool!
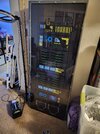
First image, no lights.
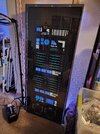
Second image, with the mounted leds
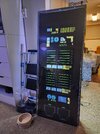
Third image with my ring light behind it!
We were not able to get it in the frame unfortunately. I think when gluing the two sheets of 1/8" acrylic together I got them a little crooked. Just needs a trip back to the shop to get trimmed.
The very last piece! You may notice was missing from the set up photo.. Our tall graphic in the left frame.
ArcSol did a fantastic job of masking off the parts of the graphic that are "lights".

Then we spray painted the back matte black and removed the masks.

So now, when light passes through it looks super cool!
First image, no lights.

Second image, with the mounted leds

Third image with my ring light behind it!

We were not able to get it in the frame unfortunately. I think when gluing the two sheets of 1/8" acrylic together I got them a little crooked. Just needs a trip back to the shop to get trimmed.
- Status
- Not open for further replies.
Similar threads
- Replies
- 14
- Views
- 2,290
- Replies
- 14
- Views
- 3,678
- Replies
- 0
- Views
- 899
