- Hall of Honor - Post Pics of your finished armor/weapons

This is the second suit I ever built. It got named "Magma Chief" by the people at TwitchCon.
Technique is improving a little. And thanks to SgtSkittle117 for the flamethrower pics! Sadly, my fuel tank broke when we first arrived, but no one seemed to care.
 

Attachments

  • 20190929_140107.jpg
    20190929_140107.jpg
    1.6 MB · Views: 531
  • 20190929_140053.jpg
    20190929_140053.jpg
    1.6 MB · Views: 496
  • 20190929_152406.jpg
    20190929_152406.jpg
    1.5 MB · Views: 491
This is the second suit I ever built. It got named "Magma Chief" by the people at TwitchCon.
Technique is improving a little. And thanks to SgtSkittle117 for the flamethrower pics! Sadly, my fuel tank broke when we first arrived, but no one seemed to care.
Dude, that is hot! The flamethrower is beutiful, AND you have EL wire lighting!?!?! You nailed the paint job!
 
My Arbiter helmet!
Took a long time and not perfect for sure, but my first time doing something solo since uni. Made a mould of it to reproduce and hopefully sell ^^
Gonna make a new post/thread for the whole build process.


*Edit* log is now up, over at:
 

Attachments

  • 20190928_102356.jpg
    20190928_102356.jpg
    1.2 MB · Views: 410
  • 20190928_120932.jpg
    20190928_120932.jpg
    622.9 KB · Views: 443
Last edited:
Dude, that is hot! The flamethrower is beutiful, AND you have EL wire lighting!?!?! You nailed the paint job!
Thanks! I actually used side glow fiber and LEDs from a car kit. The EL wire needed too much power so I couldn't get it working. Sadly, the side glow isn't very bright after about 6-8 inches, but it worked okay! :D
 
Last edited:
DUDE, That is Amazing! Glad My Pictures helped you out!
Thank you! :D I'm so glad I found that post you did! Having the flamethrower really made the whole thing come together.

I did make a couple modifications so I could fit the whole thing in my car. I used some magnets and copper tape soldered to the wires to make connectors for the back handle coin switch and the front barrel with the LEDs. And the front grip isn't glued, so I can fold it down and fit it in the back of the car.
 

Attachments

  • Flamethrower5.jpg
    Flamethrower5.jpg
    1 MB · Views: 348
  • Flamethrower1.jpg
    Flamethrower1.jpg
    1.2 MB · Views: 337
  • Flamethrower3.jpg
    Flamethrower3.jpg
    445.9 KB · Views: 340
  • Flamethrower6.jpg
    Flamethrower6.jpg
    518 KB · Views: 327
Thank you! :D I'm so glad I found that post you did! Having the flamethrower really made the whole thing come together.

I did make a couple modifications so I could fit the whole thing in my car. I used some magnets and copper tape soldered to the wires to make connectors for the back handle coin switch and the front barrel with the LEDs. And the front grip isn't glued, so I can fold it down and fit it in the back of the car.
No problem! I Love the modifications you did! You took my work and improved it!
 
Hi all, I'm new here. I saw this forum back in January and decided to try and make a master chief suit. This is the first suit I ever made and it was quite a bit of work. It's not perfect and not 100% accurate but almost the whole thing was cut by hand, half of it using templates, and half of it only looking at reference images. I used it at an event today and people loved it. Thought id share and encourage anyone who is wanting to build a suit for themselves. Also, what are you guys doing for undersuits?
unnamed.jpg
 
Hi all, I'm new here. I saw this forum back in January and decided to try and make a master chief suit. This is the first suit I ever made and it was quite a bit of work. It's not perfect and not 100% accurate but almost the whole thing was cut by hand, half of it using templates, and half of it only looking at reference images. I used it at an event today and people loved it. Thought id share and encourage anyone who is wanting to build a suit for themselves. Also, what are you guys doing for undersuits? View attachment 280009
That looks sooo good for a first build! You nailed it(and you look like a life sized cheif in this photo, lol)! I ductaped my body and hand drew every detail of the undersuit onto the tape, cut it out into templates, then transferred that onto different types of fabrics that were then sewed together. It took about 180 hours to do in total. It is very detailed but hot. Check out spidermonkeys build thread. He used foam and glued it to a morph suit, and a simple way using foam and a net fabric was done by impact props for their master cheif. Definatly check that one out. Simple and effective
 
Hi all, I'm new here. I saw this forum back in January and decided to try and make a master chief suit. This is the first suit I ever made and it was quite a bit of work. It's not perfect and not 100% accurate but almost the whole thing was cut by hand, half of it using templates, and half of it only looking at reference images. I used it at an event today and people loved it. Thought id share and encourage anyone who is wanting to build a suit for themselves. Also, what are you guys doing for undersuits? View attachment 280009
That is spectacular!
 
Thanks guys! I am planning on making a second suit soon. Probably over winter break, this time I’m going to attempt to use a laser cutter on Eva instead of cutting by hand. It should be much faster and more accurate to the in game version. I was looking at motorcycle armor suits today , has anyone had success using those as a cheap undersuit? Also here are some more pics of the event. Those last ones are on a mannequin. Let me know what you guys think and what I could improve on for the next go around.
 

Attachments

  • A1EF0475-6DBA-448F-91E1-21BACC3DF02D.jpeg
    A1EF0475-6DBA-448F-91E1-21BACC3DF02D.jpeg
    1.9 MB · Views: 383
  • 5E76CD3B-DEB5-45AC-BD39-013EA791F172.jpeg
    5E76CD3B-DEB5-45AC-BD39-013EA791F172.jpeg
    1.7 MB · Views: 396
  • C83C46DE-A80F-4803-A6F8-2FB825951143.jpeg
    C83C46DE-A80F-4803-A6F8-2FB825951143.jpeg
    1.3 MB · Views: 358
  • 57F26C20-D6FF-444A-ADB5-D18A4014DF12.jpeg
    57F26C20-D6FF-444A-ADB5-D18A4014DF12.jpeg
    1.9 MB · Views: 294
  • E9F3C2C9-F73B-4A85-80B7-7F1E816FCB36.jpeg
    E9F3C2C9-F73B-4A85-80B7-7F1E816FCB36.jpeg
    1.6 MB · Views: 354
I joined earlier this year with the intention of building a full suit of Halo armour. I had a few false starts. I started with Pepakura and found that wasn't the best way for myself and went with Evakura. I've learnt some awesome techniques and finally finished my suit ready for MCM Comic Con Birmingham on Sunday. I do have all my progress on my own thread but I shall post the finished suit here as well.
 

Attachments

  • IMG-20191105-WA0008.jpg
    IMG-20191105-WA0008.jpg
    163.1 KB · Views: 384
  • IMG-20191105-WA0010.jpg
    IMG-20191105-WA0010.jpg
    171.6 KB · Views: 393
  • IMG-20191105-WA0009.jpg
    IMG-20191105-WA0009.jpg
    173.7 KB · Views: 393
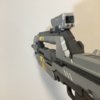
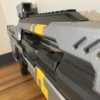
Here's some photos of a BR85 I've been working on over the past six months. It's 3D-printed in PLA, with a wooden dowel reinforcing the center and coated in XTC3D before painting.
 

Attachments

  • IMG_2037.JPG
    IMG_2037.JPG
    1.1 MB · Views: 333
  • IMG_2042.JPG
    IMG_2042.JPG
    1.1 MB · Views: 279
  • IMG_2053.JPG
    IMG_2053.JPG
    1.5 MB · Views: 327
  • IMG_2057.JPG
    IMG_2057.JPG
    1.2 MB · Views: 289
  • IMG_2061.JPG
    IMG_2061.JPG
    860.7 KB · Views: 256
  • IMG_2068.JPG
    IMG_2068.JPG
    993.1 KB · Views: 313
  • IMG_2076.JPG
    IMG_2076.JPG
    1.1 MB · Views: 306
My Arbiter helmet!
Took a long time and not perfect for sure, but my first time doing something solo since uni. Made a mould of it to reproduce and hopefully sell ^^
Gonna make a new post/thread for the whole build process.


*Edit* log is now up, over at:

Yoooo that is sick!
 
Well I can finally post my ODST here, thank you to everyone who helped me along the way, and the resources and tutorials on here could turn a non crafty person like me, into a walking tank. I'll deploy as soon as I get the pics from the wife's camera.

IMG_20191123_161906.jpg
IMG_20191123_161838_1.jpg
IMG_20191123_203946.jpg

IMG_20191017_211452.jpg
 
Last edited:

Your message may be considered spam for the following reasons:

If you wish to reply despite these issues, check the box below before replying.
Be aware that malicious compliance may result in more severe penalties.
Back
Top