- Member DIN
- S068
I've come to that point in time where my original ODST costume from... four years ago has sat unused and collecting dust for more than 8 months and is in dire need of an upgrade to show my improved skills as an armourer and a maker. The theme of this build will be to challenge myself with techniques that I've attempted previously and expand on them to carry them out more elegantly. Welcome to Project: Sparks.

The immediately obvious as thing that would make Lance Corporal Sparks stick out from a crowd of ODSTs is that he has two rather unique pieces of equipment with him. The first being the M99 Stanchion Gauss Rifle and the second being the LCX-20V1 SinoViet Sight Augmentation Module. Both of these pieces of kit have some pretty cool optical challenges to them.
The Stanchion has a big scope on it and when a prop like this is a centerpiece of a costume you want everything to feel real world. Based on my previous experience adding NATO standard rails to props I intend to make this a "functioning" night vision scope using the powers of Rasberry Pi, some tricks with video processing and a heavy dose of cheesing the IR spectrum. Due to the size of the overall rifle there's plenty of room to hide a camera, controller and sizeable rechargeable battery all in one removable optics kit.
The SinoViet kit is a bit more daunting due to the visor profile of an ODST helmet matching almost perfectly with the augmentation module rendering effective actual vision to near zero. The helmet is going to need standard cooling fans, a series of cameras and screens and a whole lot of good stuff contained inside to keep me from cooking my brain and steamrolling folks in the outside world.
The concept art for Sunray 1-1 uses a Halo 3 style of ODST BDU with slight modifications in several areas such as unique shoulders, extra pouches and different rucksacks. The in cinematic models of Halo Wars 2 ODSTs look closer to Halo 2 style with a more angular helmet and less hard plating (also H2A SOEIV). The promotional art has a closer to Halo 3 depiction of ODSTs including the iconic shins and knees and more rounded helmet as well as the M7S. Then there's the game models that are an interesting combination of things.


Between the several art styles that exist I'll be leaning more toward the style of the first image of this thread since it's closer to my aesthetic preferences and working to make this as faithful a build to that artwork as possible while still making it comfortable and easy to get into and out of. There's no hard deadline for this build but if I can have it done for the end of May and the next round of big cons I'd be extremely happy.
As usual I will use the original post as an index to link to other posts of note as well as a tracking sheet for progress and material consumption.
Wish me luck folks.
Thread Index
Helmet - Halo 3 ODST [Designing]
Modelling - 14 hours
Print Time - 50 hours
Sanding/Cleanup - 8 hours
Helmet - Halo 2 ODST [Designing]
LCX-20V1 SinoViet Sight Augmentation Module - [Designing]
Torso - ODST + Camouflage Netting [Scaling]
Shoulders/Biceps - Romeo Sharpshooter(L) None(R) [Awaiting Progress]
Gauntlets - ODST[Modelled/Tested]
Modelling - 8 hours
Print Time - 22 hours
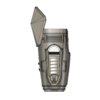
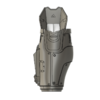
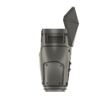
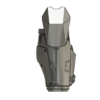
Thighs- ODST with Tactical/Soft Case [Scaling]
Shins/Boots- ODST[Scaling]
Under Suit - [Awaiting Progress]
M99 Stanchion Gauss Rifle [Designing]
Modelling - 12 hours
M6C/SOCOM [Sanding/Cleanup]
Modelling - 6 hours
Print Time - 32 hours
Sanding/Cleanup - 3 hours
Combat Knife [Awaiting Progress]
Build Cost Tracking
Materials Consumed
eSun PLA+ Gray - 2kg
Expendable Materials Consumed
Tools Purchased for Build
Printer Replacement Parts
0.4mm Brass Nozzle - 2
Capricorn Tubing - 0.5m
Consumables Consumed
Tim Horton's Dark Roast Double Double - 5
The immediately obvious as thing that would make Lance Corporal Sparks stick out from a crowd of ODSTs is that he has two rather unique pieces of equipment with him. The first being the M99 Stanchion Gauss Rifle and the second being the LCX-20V1 SinoViet Sight Augmentation Module. Both of these pieces of kit have some pretty cool optical challenges to them.
The Stanchion has a big scope on it and when a prop like this is a centerpiece of a costume you want everything to feel real world. Based on my previous experience adding NATO standard rails to props I intend to make this a "functioning" night vision scope using the powers of Rasberry Pi, some tricks with video processing and a heavy dose of cheesing the IR spectrum. Due to the size of the overall rifle there's plenty of room to hide a camera, controller and sizeable rechargeable battery all in one removable optics kit.
The SinoViet kit is a bit more daunting due to the visor profile of an ODST helmet matching almost perfectly with the augmentation module rendering effective actual vision to near zero. The helmet is going to need standard cooling fans, a series of cameras and screens and a whole lot of good stuff contained inside to keep me from cooking my brain and steamrolling folks in the outside world.
The concept art for Sunray 1-1 uses a Halo 3 style of ODST BDU with slight modifications in several areas such as unique shoulders, extra pouches and different rucksacks. The in cinematic models of Halo Wars 2 ODSTs look closer to Halo 2 style with a more angular helmet and less hard plating (also H2A SOEIV). The promotional art has a closer to Halo 3 depiction of ODSTs including the iconic shins and knees and more rounded helmet as well as the M7S. Then there's the game models that are an interesting combination of things.
Between the several art styles that exist I'll be leaning more toward the style of the first image of this thread since it's closer to my aesthetic preferences and working to make this as faithful a build to that artwork as possible while still making it comfortable and easy to get into and out of. There's no hard deadline for this build but if I can have it done for the end of May and the next round of big cons I'd be extremely happy.
As usual I will use the original post as an index to link to other posts of note as well as a tracking sheet for progress and material consumption.
Wish me luck folks.
Thread Index
Helmet - Halo 3 ODST [Designing]
Modelling - 14 hours
Print Time - 50 hours
Sanding/Cleanup - 8 hours
Helmet - Halo 2 ODST [Designing]
LCX-20V1 SinoViet Sight Augmentation Module - [Designing]
Torso - ODST + Camouflage Netting [Scaling]
Shoulders/Biceps - Romeo Sharpshooter(L) None(R) [Awaiting Progress]
Gauntlets - ODST[Modelled/Tested]
Modelling - 8 hours
Print Time - 22 hours
Thighs- ODST with Tactical/Soft Case [Scaling]
Shins/Boots- ODST[Scaling]
Under Suit - [Awaiting Progress]
M99 Stanchion Gauss Rifle [Designing]
Modelling - 12 hours
M6C/SOCOM [Sanding/Cleanup]
Modelling - 6 hours
Print Time - 32 hours
Sanding/Cleanup - 3 hours
Combat Knife [Awaiting Progress]
Build Cost Tracking
Materials Consumed
eSun PLA+ Gray - 2kg
Expendable Materials Consumed
Tools Purchased for Build
Printer Replacement Parts
0.4mm Brass Nozzle - 2
Capricorn Tubing - 0.5m
Consumables Consumed
Tim Horton's Dark Roast Double Double - 5
Last edited:


