Foam KaeSpoon's Halo Reach Marine Foam Build

KaeSpoon

Member
Member DIN
S226
TABLE OF CONTENTS:
Post 1: Foamsmithing
Post 2: Sealing
Post 3: BDU and other bits
Post 4: Hemming BDU and finishing foamwork
Post 5: Fixing textured Leakseal with acrylic
Post 6: Painting part 1
Post 7: Painting part 2 and final details
Post 8: Final build photos
Post 9: Shins part 1

Hello, been awhile friends! Welcome to KaeSpoon’s Marine build thread!
This has been a build in progress since January that I never got around to making a thread for. It was originally planned to be due by HCS Charlotte, but I ran out of time and took a break.

Why the marine? Wasn’t I already building a Spartan?
Some health issues have resulted in a long pause on the Spartan build, so I picked a marine because I thought it would be “easier” to make and fit. It was also a build that would allow me to participate in 405th events while my Spartan is still a work in progress/on hold.

9efb13988630f315fc1c44edd551dc3a.png
Mockup and fitting

Shoulder
20230111_215931.jpg
20230113_014153.jpg
20230113_014416.jpg
20230408_205313.jpg

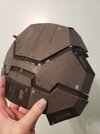
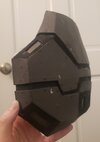
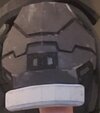
Wish I had more photos of the build progress, this shoulder was a tough and tedious one! You can tell I went a little nuts on the foam clay afterwards, something I'm working on NOT doing. The bolts of the shoulder will be 3d printed.

Chest
20230120_155018.jpg
20230120_184415.jpg
20230121_151901.jpg
20230123_151356.jpg

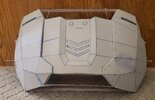
Paper and cardboard holders to keep the foam in the correct shape (using measurements) while I hot glue and shoegoo.
I ended up restarting the chest after this progress due to being unhappy with it and thinking it might be too small.

20230126_000444.jpg
20230126_000356.jpg
20230125_224005.jpg

Doing the same thing with the paper and cardboard as above!

20230127_213716.jpg
20230127_231701.jpg

20230129_135416.jpg
20230130_190126.jpg

Test gasket with sample upper and lower strapping. I went into Blender and modeled my own gasket and then transferred it into a pattern. Lower strapping and details for that done and then the permanent gasket was installed! All that planning sometimes leads to battle scars... :)

20230131_115319.jpg
20230203_143101.jpg

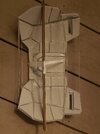
Scarring the backplate picked up thanks to the hot glue I used to hold the temporary straps, thankfully foam clay exists and the damaged areas will get covered up anyway! Don't be afraid to use foam clay to save your sanity. I did the backplate details by freehanding a pattern on tape and then using 2mm foam in layers.

20230131_181258.jpg


20230131_191112.jpg
20230211_135845.jpg

An example of how I freehanded some details using painter's tape, tedious and took a few tries but it was worth it!

20230201_183526.jpg
20230210_160352.jpg

20230202_192439.jpg
20230202_194252.jpg
20230211_135808.jpg

More details...

20230209_021214.jpg
20230209_122004.jpg

STOP. COLLAR TIME. I made it in two parts so it could be magnetic!

20230205_173744.jpg

Size comparison between my first Marine's (LA) Lower belt and my newer one.

20230628_173931.jpg

Quick builds of the thigh UA's for the marine, these patterns were made by me. I am not very pleased with how they turned out, but they are good enough for now and I will remake them from the armory files at some point.

20230212_220043.jpg

Test fit and finishing touches with foam clay, fixing a few seams and imperfections. I was pretty nervous at this stage, things were looking messy and not as clean as I'd hope; but sometimes things can look grim but end up turning out okay at the end.

I made the chest in a span of 5 weeks, but at the cost of extreme burnout and months without touching foam afterwards. Pace yourself friends!

Continuation below....
 

Attachments

  • 20230111_215931.jpg
    20230111_215931.jpg
    1.1 MB · Views: 139
  • 20230121_125554.jpg
    20230121_125554.jpg
    1.8 MB · Views: 143
  • 20230125_224005.jpg
    20230125_224005.jpg
    3.4 MB · Views: 119
  • 20230127_213716.jpg
    20230127_213716.jpg
    992.5 KB · Views: 131
  • 20230130_190126.jpg
    20230130_190126.jpg
    1.3 MB · Views: 118
  • 20230131_152557.jpg
    20230131_152557.jpg
    1.3 MB · Views: 140
  • 20230113_014153.jpg
    20230113_014153.jpg
    2.4 MB · Views: 136
  • 20230113_014416.jpg
    20230113_014416.jpg
    1.3 MB · Views: 142
  • 20230113_014402.jpg
    20230113_014402.jpg
    1.1 MB · Views: 116
  • 20230628_162816.jpg
    20230628_162816.jpg
    26.9 KB · Views: 128
  • 20230120_155018.jpg
    20230120_155018.jpg
    1.6 MB · Views: 133
  • 20230120_184415.jpg
    20230120_184415.jpg
    1.2 MB · Views: 132
  • 20230121_151901.jpg
    20230121_151901.jpg
    2.7 MB · Views: 128
  • 20230123_151356.jpg
    20230123_151356.jpg
    2.8 MB · Views: 118
  • 20230121_151901.jpg
    20230121_151901.jpg
    2.7 MB · Views: 118
  • 20230628_162816.jpg
    20230628_162816.jpg
    26.9 KB · Views: 124
  • 20230113_014402.jpg
    20230113_014402.jpg
    1.1 MB · Views: 135
  • 20230201_183526.jpg
    20230201_183526.jpg
    1.1 MB · Views: 131
  • 20230131_152557.jpg
    20230131_152557.jpg
    1.3 MB · Views: 136
Last edited:
Leak seal time! unfortunately I had a hard time when applying leakseal to the chest, there was a lot of details and layers that made application difficult. It also left a textured look to my armor that required a lot of sanding. Though its still not perfect and I wish the application was better, its good enough.
20230220_133633.jpg
20230220_133652.jpg
20230221_134902.jpg

Sometimes you have to take a leap of faith and keep going.

20230223_171516.jpg
20230222_173559.jpg

Lots and lots of sanding...

I ended up using Plastidip on the midsection of the chest, but wasn't happy with the results either, it pulled seams apart but overall had a cleaner application.


Semi-Finished chest: (Still needs more sanding, coat of paint, etc)
20230305_210150.jpg
20230224_225858.jpg

20230427_164740.jpg
20230323_182403.jpg
20230402_185942.jpg
20230628_174750.jpg

9666f5fa-bbfd-48bd-9ed4-7489926231c0.png
20230226_125948.jpg


I do plan on making this a hybrid build and finally put that MK V(B) that was too small for my spartan to some good use! I was worried the chest ended up too big, but with a BDU it SHOULD be okay. If not, I'll just be extra tanky. :)

So far, this build has been a TON of work, I was very ambitious and went overboard on details. I've learned a lot and can't wait to put what I've learned to good use with my Spartan build!
 
Last edited:
Thats it for now folks! More coming very soon, I hope to have this done by Dragoncon2023!

I do have a question for you folks about what color to paint the armor.
I am really digging the black look for the chest and was planning on getting a black BDU. Considering the MKV(B) would make the armor "non cannon" I was thinking about making a black "Spec ops" Space marine. However, doing this would knock me from able to obtain teir 3 and partake in a few 405th events, so I'm torn on what to do!

Pictures with the BDU coming soon!
 
Last edited:
However, doing this would knock me from able to obtain teir 3 and partake in a few 405th events, so I'm torn on what to do!

Just to clarify, we have never yet had an event that was "locked" to any specific Tier level of Deployment, so please don't let a fear that a certain Deployment Tier would prevent you from attending an event stop you pursuing a custom Stealth/Spec Ops color scheme.
 
Kae, this build is turning out amazing! Don't let some tier level prevent you from making the build you want. Remember it's YOUR character. If when you're done with your preferred build/paint scheme you still want a T3 of the same suit no one's going to stop you from making a second one. Heck we'll be following along cheering you on the whole way. Ultimately it's up to you, but no matter what it's gonna look awesome!
 
Apologies, I didn't see the question on my first read. Like Cadet and Fallen said: build your character first. There's never been a tier locked event and there may never be. I'd hate to see you make a costume you're less happy with simply to hit an artificial goal post.
 
Considering the MKV(B) would make the armor "non cannon" I was thinking about making a black "Spec ops" Space marine. However, doing this would knock me from able to obtain teir 3 and partake in a few 405th events, so I'm torn on what to do!
canon smanon just make it look as sick as possible! Looks GREAT so far!
 
KaeSpoon - your work on the foam is meticulous and it looks amazing!

As a big fan of fun colors - I think you should do whatever speaks to you for paint color. You've spent all this time making it - do something cool!
 
The foam work looks so good!!! For the colors you could do some splashes of red with black. (Go red team!)
 
Happy weekend everyone!

Here’s the camo/BDU with the chest.
20230702_140640.jpg
20230702_140809.jpg
20230702_140601.jpg

___ BDU___________________________________________Tucked in____________________________________________Regular clothing
I’m not sure if I will use theBDU, It's oversized and needs to be hemmed. I might end up using a black, collared long-sleeved shirt and jeans(not pictured above) that fit better and therefore look more put-together? At some point I want to sew my own BDU, but I won't have time to do that before the con. As of now I am still undecided on what color to paint the armor and if I will replace the silver nylon with black.

Now, onto other matters.
I was taking a second pass on sanding and noticed a lot of problematic areas that the Leak Seal did not properly set/too thin on the chest and especially collar. I am debating on what to do because it gives off a pinpoint, bubbly, flakey, strange texture that becomes worse when painted with a satin finish.
810ff67f12e0da43149e4421f9e787ef.gif
20230629_145751.jpg
20230629_145729.jpg

From 5 feet away it does not look so bad. I am currently looking into a way to fill in the indents without having to reapply and risk things becoming worse, I will be testing out caulk and maybe some filler primer. I am currently stalled on sealing anything else until I get this figured out. If anyone has any ideas or tips about leak seal, please let me know!

EDIT: Solved the bubble problem, look HERE
Leak Seal:
Pros: Sandable, easily hides seams and crimes
Cons: Easy to mess up, gloppy, thick consistency that can cover details, expensive

Plastidip:
Pros: Can be applied in multiple thin layers, easy smooth finish, cheaper
Cons: Cannot be sanded well, prone to peeling and wrinkling, can pop seams and make them worse (from my experience)
20230702_144338.jpg
<Plastidip

Shoulder mount
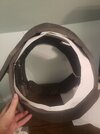
I wish clipping was a thing in real life because the mount and chest bump into each other, so I cut out an area to see if mobility is any better. I plan on tweaking the pattern or converting it to 6mm foam or fabric, I’m not certain on what to do as of now.
20230701_153526.jpg
20230702_133244.jpg


Thats all for now, thanks for reading! :)
 
Last edited:
Small update.

After some work and assistance from my grandmother who is a seamstress, the BDU has been hemmed and fits a lot better!
20230702_140640.jpg
20230706_154711.jpg


I got one of the shoulders mounted thanks to a built-in area on the BDU. The shoulder mount looks to be too far from my chest and gives off a broad-shouldered look, so I might make the arm gaskets with 6mm foam instead of 10mm to close the gap. Chest has been separated so it can get another pass with sanding.
20230712_175439.jpg
20230712_175634.jpg
20230712_175655.jpg

20230712_180019.jpg
Super cool shoulder thing that saves me the time of not making custom strapping.

20230712_180511.jpg

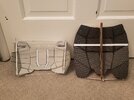
Thighplates and shoulder gaskets. One of the thighplates has been covered with leak seal, I originally thought I ruined it so I made another as a backup (on the left) but I might not need it. To be honest, I'm not very happy with the thighplates. They don't look like they match with the rest of the armor, but my legs will be bare and look off without them. A friend of mine is coming over tomorrow to help me seal the rest of my armor.

A color idea I'm thinking of is Noble Six steel gray (#646464) with black accents.


Thats all for now, thanks for reading!
 
Last edited:
Small update.

After some work and assistance from my grandmother who is a seamstress, the BDU has been hemmed and fits a lot better!
View attachment 333502View attachment 333503

I got one of the shoulders mounted thanks to a built-in area on the BDU. The shoulder mount looks to be too far from my chest and gives off a broad-shouldered look, so I might make the arm gaskets with 6mm foam instead of 10mm to close the gap. Chest has been separated so it can get another pass with sanding.
View attachment 333504View attachment 333505View attachment 333506
View attachment 333507 Super cool shoulder thing that saves me the time of not making custom strapping.

View attachment 333508
Thighplates and shoulder gaskets. One of the thighplates has been covered with leak seal, I originally thought I ruined it so I made another as a backup (on the left) but I might not need it. To be honest, I'm not very happy with the thighplates. They don't look like they match with the rest of the armor, but my legs will be bare and look off without them. A friend of mine is coming over tomorrow to help me seal the rest of my armor.

A color idea I'm thinking of is Noble Six steel gray (#646464) with black accents.


Thats all for now, thanks for reading!
Outstanding work! Your suit looks amazing so far, I can't wait to see it finished!
 
Small update.

After some work and assistance from my grandmother who is a seamstress, the BDU has been hemmed and fits a lot better!
View attachment 333502View attachment 333503

I got one of the shoulders mounted thanks to a built-in area on the BDU. The shoulder mount looks to be too far from my chest and gives off a broad-shouldered look, so I might make the arm gaskets with 6mm foam instead of 10mm to close the gap. Chest has been separated so it can get another pass with sanding.
View attachment 333504View attachment 333505View attachment 333506
View attachment 333507 Super cool shoulder thing that saves me the time of not making custom strapping.

View attachment 333508
Thighplates and shoulder gaskets. One of the thighplates has been covered with leak seal, I originally thought I ruined it so I made another as a backup (on the left) but I might not need it. To be honest, I'm not very happy with the thighplates. They don't look like they match with the rest of the armor, but my legs will be bare and look off without them. A friend of mine is coming over tomorrow to help me seal the rest of my armor.

A color idea I'm thinking of is Noble Six steel gray (#646464) with black accents.


Thats all for now, thanks for reading!

This looks so freaking good! The thighplate with leakseal looks really good as well!
 
This is coming out SOOOOOOO well done.the proportions and everything are pretty spot on. Please feed us more and keep up the good work, you got this! And I will be following your progress. I am dumbfounded by your ability, it looks so good!
 
Been a bit quiet, the past two weeks I have been going back and forth on the same three paint colors, but I can (thankfully) say that almost everything has the base color on. I need to re-leakseal the collar and prime the helmet for painting which will be done tomorrow. I did notice I forgot a detail on the chest, but it will be covered by the collar and would be more of a risk/hassle to add this late in the process. I'm not sure how happy I am with the dark gray color, but too late!

20230813_195857.jpg

Excuse the mess, first time using an airbrush.

I'm close, but still in a bit of a panic to get this done on time... WOOH!
 

Your message may be considered spam for the following reasons:

If you wish to reply despite these issues, check the box below before replying.
Be aware that malicious compliance may result in more severe penalties.
Back
Top