- Member DIN
- S426
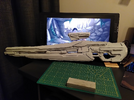
A few months ago I had a photoshoot where multiple photagraphers mentioned my needler doesn't match the colours of my armor so well. So I decided to make a new prop to go with my armor that matches it a lot better: a lightrifle! Here's how I went about it, might be helpful to others (and to me if you guys have feedback for me)
Pattern
I used the patterns by Zoogami Snowfox as a base but since I do not have a colour printer and printing solid blocks of grey costs a lot of ink I adapted their patterns into lineart with numbers and letters to mark the layers and parts. Here's what I made if you're interested:

Piece Z is done with 10 mm foam, as well as every piece that needed to be done double to account for the 5 mm foam thickness. You could make the whole thing with 5 mm foam, but it saves some effort to make those pieces with thicker foam instead.
All of these have to be mirrored for the other side as well.
Materials
- 5 mm high density foam
- 10 mm hd foam
- 1 mm hd foam
- fibreglass rod
- LED wire (not EL wire)
- electricity wire
- 2 AA battery holder
- on/off button switch
- plastidip
- Clear acrylic/plastic for the floating effect of the visor
Progress pictures

You can see the fibreglass rod here that I used for stability, keeps the prop from being floppy.
Light test with the button and the LED wire.

After assembling all the layers the gun ends up quite square so I cut off sections of the sides at the top and bottom of the barrel, even after sanding I didn't like how rough this looked so this is where the 1mm foam comes in: I used it to smooth out the sanded parts.


The paintjob isn't entirely finished and I am open to feedback! I feel like it is a bit bland atm.


Pattern
I used the patterns by Zoogami Snowfox as a base but since I do not have a colour printer and printing solid blocks of grey costs a lot of ink I adapted their patterns into lineart with numbers and letters to mark the layers and parts. Here's what I made if you're interested:
Piece Z is done with 10 mm foam, as well as every piece that needed to be done double to account for the 5 mm foam thickness. You could make the whole thing with 5 mm foam, but it saves some effort to make those pieces with thicker foam instead.
All of these have to be mirrored for the other side as well.
Materials
- 5 mm high density foam
- 10 mm hd foam
- 1 mm hd foam
- fibreglass rod
- LED wire (not EL wire)
- electricity wire
- 2 AA battery holder
- on/off button switch
- plastidip
- Clear acrylic/plastic for the floating effect of the visor
Progress pictures
You can see the fibreglass rod here that I used for stability, keeps the prop from being floppy.
Light test with the button and the LED wire.
After assembling all the layers the gun ends up quite square so I cut off sections of the sides at the top and bottom of the barrel, even after sanding I didn't like how rough this looked so this is where the 1mm foam comes in: I used it to smooth out the sanded parts.
The paintjob isn't entirely finished and I am open to feedback! I feel like it is a bit bland atm.

