- Member DIN
- S170
Hey all! It’s me again after a long hiatus!
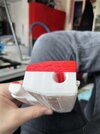
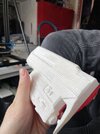
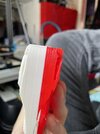
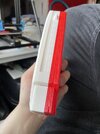
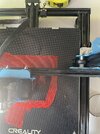
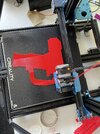
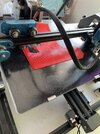
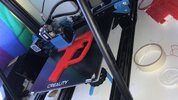
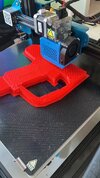
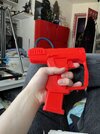
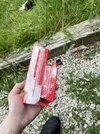
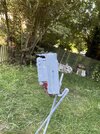
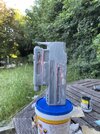
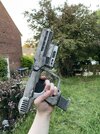
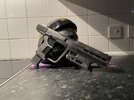
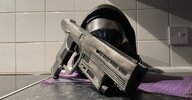
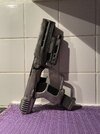
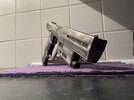
I managed to get my hands on a Creality CR10 in January, and have been learning the system ever since. Last week I started an ODST Silenced Pistol build, using the printer.
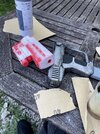
Initially, I didn’t level the bed correctly, and the first print wasn’t fantastic. But this is how we learn. I went back, levelled the bed, and tried again. This time we got both a handle and a barrel printed!
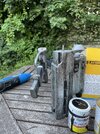
But I want to note, this wasn’t at all perfect. Hindsight taught me that I should have printed vertically, with Two Penny and Zak Moussa sending me a few videos showing me a few different tips and tricks on printing.
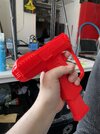
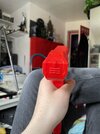
It resulted in a print that did need a large amount of sanding, filling, priming and repeating to insanity. And overall it wasn’t perfect. Due to the print being on it‘s side, I lost a lot of details like the vents on the left side.
This pistol’s been a fantastic learning curve for me, as a guide for what not to do the first time round and a lesson in hubris.
But this isn’t my last print, as I learn with each print, my process and practice will become better, because practice makes perfect!

I managed to get my hands on a Creality CR10 in January, and have been learning the system ever since. Last week I started an ODST Silenced Pistol build, using the printer.
Initially, I didn’t level the bed correctly, and the first print wasn’t fantastic. But this is how we learn. I went back, levelled the bed, and tried again. This time we got both a handle and a barrel printed!
But I want to note, this wasn’t at all perfect. Hindsight taught me that I should have printed vertically, with Two Penny and Zak Moussa sending me a few videos showing me a few different tips and tricks on printing.
It resulted in a print that did need a large amount of sanding, filling, priming and repeating to insanity. And overall it wasn’t perfect. Due to the print being on it‘s side, I lost a lot of details like the vents on the left side.
This pistol’s been a fantastic learning curve for me, as a guide for what not to do the first time round and a lesson in hubris.
But this isn’t my last print, as I learn with each print, my process and practice will become better, because practice makes perfect!
Attachments
-
 IMG_5723.jpeg1.4 MB · Views: 162
 -
 IMG_5724.jpeg1.3 MB · Views: 144
 -
 IMG_5725.jpeg1.5 MB · Views: 149
 -
 IMG_5726.jpeg1.5 MB · Views: 155
 -
 IMG_5704.jpeg2.4 MB · Views: 157
 -
 IMG_5707.jpeg2.3 MB · Views: 151
 -
 IMG_5708.jpeg2.1 MB · Views: 149
 -
 65395154-410c-4e44-8842-a60b5a2cc885.jpeg242.8 KB · Views: 131
 -
 0808ae54-5edd-41d0-b0cd-4351e1ddcce0.jpeg209.4 KB · Views: 133
 -
 IMG_5727.jpeg1.4 MB · Views: 148
 -
 IMG_5728.jpeg1.3 MB · Views: 157
 -
 IMG_5729.jpeg1.6 MB · Views: 152
 -
 IMG_5730.jpeg1.9 MB · Views: 154
 -
 IMG_5770.jpeg2.1 MB · Views: 152
 -
 IMG_5775.jpeg971.5 KB · Views: 155
 -
 IMG_5786.jpeg2.7 MB · Views: 165
 -
 IMG_5787.jpeg2.2 MB · Views: 151
 -
 IMG_5789.jpeg2.1 MB · Views: 148
 -
 IMG_5790.jpeg2.3 MB · Views: 155
 -
 IMG_5792.jpeg2.7 MB · Views: 147
 -
 IMG_5793.jpeg1.9 MB · Views: 149
 -
 IMG_5794.jpeg2.2 MB · Views: 151
 -
 IMG_5795.jpeg1.6 MB · Views: 139
 -
 IMG_5798.jpeg2.4 MB · Views: 151
 -
 IMG_5802.jpeg2.2 MB · Views: 146
 -
 IMG_5806.jpeg2.9 MB · Views: 169
 -
 IMG_5807.jpeg1.9 MB · Views: 158
 -
 IMG_5808.jpeg2.1 MB · Views: 168
 -
 IMG_5809.jpeg1.7 MB · Views: 164
 -
 IMG_5812.jpeg2.5 MB · Views: 157