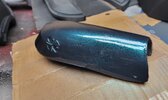
Mark IV - First (Halo) Build

Well, time to resurrect this thread. A friend had space available in his room block, so it looks like I'm going to be attending my first DragonCon at the end of August.

I'd like to walk in the parade, which the informational post elsewhere in these forums indicates is roughly a mile long. The shuffle around C2E2 was manageable, but not terribly comfortable due to the way my calf armor (poorly) articulated at the ankles, as well as one of my boots literally falling apart as I walked. Also the strapping issue I talked about would almost certainly turn me into a heat casualty if I walked a mile in an Atlanta summer.

My goals to prepare for DragonCon:
  • Rebuild my boots.
  • Cut the back/inside of my calf and thigh armor to allow for expansion. If this doesn't work the way I hope, I'll just reprint them larger.
  • Finally add fans to the helmet, as well as mic/speaker. I bought the headphones that are recommended on these forums, but they've just been sitting on my kitchen table for a couple of months.
  • I'm considering rebuilding my back armor to integrate fans and an open back. Right now I have it filled with expanded foam to give it more rigidity, but I think putting some vents and fans at the shoulders and running air over my back would go a long way in keeping me cool/comfortable. I'll opt for more printed walls and probably a full fiberglass layer on the inside to give it enough strength.
  • I've got more experience with buckles and snaps now, so I'll optimize the ways some of my armor connects to make it easier to wear.
  • I am going to finish the pistols and dual wield those. I'm not particularly optimistic about being able to build the Hunter shield in time.
  • I'm going to move away from the silver undersuit and go with a more traditional black. I ordered a padded shirt to use as a stand-in. If I have time I'll add some EVA foam to give it more bulk/structure.
I'd also like to bring a new Cosplay to DragonCon. I bought the files for a Judgement Paladin armor from World of Warcraft, so I'm going to start printing those. I'll start a build thread in the non-Halo costuming section for that once it's underway.
I feel your pain brother man if the boots hurt then walking is not good. i have my suit redone to help me walk more. but this is a great job on the armor i dig the colors look forward to seeing photos from dragon Con
 
Update Aug-5th:

I've made the decision to attend Anime414 in Milwaukee this weekend so I can see Steve. There is a Halo panel being led by him that I want to attend in my armor, and then (or beforehand) I'd like to have him sign a pistol (probably with "I need a weapon.")

This means that some of my plans need to be accelerated, as I basically only have until Thursday night. I'm not as worried about some of the things like fans or the mic/speaker in the helmet, and there won't be nearly as much walking as DragonCon will have.

A couple of things I accomplished recently/tonight:
  • Got the padded shirt delivered. I like that some of the pads are around the abdomen right below the chest armor, so this adds the "bulk" I'm wanting. Ironically the added pads on the forearms actually make the bracers fit much better as well. I need to figure out which pants I want to pair with the top still.
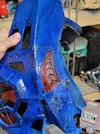
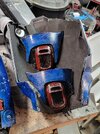
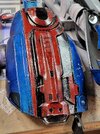
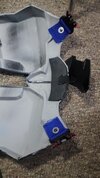
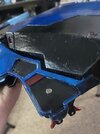
  • I've decided that the bottom "straps" of the chest armor really just get in the way as they currently are. They're rigid (3D printed) and are really difficult to buckle. They also make the chest armor really loose when being worn, but also annoying to put on. To solve this, I cut the pieces off, and I'm going to replace them with blue leather straps that can be tightened. This should help with some of the clanking around, as well as make it easier to put on/take off.
  • I have also cut off the inner thigh piece of the thigh armor. This should allow it to flex (they were a bit too tight), as well as eliminate some of the plastic-on-plastic rubbing noises. I'm probably going to put some EVA foam over the gaps.
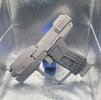
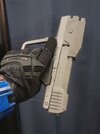
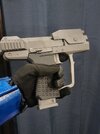
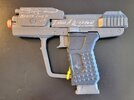
  • Finally put more work into the first pistol which will be the one I get signed. I'm trying out Flex Seal for the hand grip and gunmetal gray for the rest of the body.
Work that I want to get done by Thursday night:
  • Finish the items mentioned above.
  • Eliminate the side buckles currently being used on the belt. They add just a hair too much circumference, so I'm going to cut the buckles, make one end a basic nylon strap connection, and try to get the other side to have the buckle either inside or outside of the actual belt piece. Ideally do it in some way that I can tighten the belt.
  • Need to slap together something for boots.
  • Still not entirely sure how I want to approach the calf armor. I might just cut some of the bottom away.
  • Bicep armor probably needs to be put on EVA foam sleeves. Not super worried about this, but it was one of the major pinch points at C2E2.
  • Need to fix the buckle connections for both shoulders.
 

Attachments

  • 20240805_220743.jpg
    20240805_220743.jpg
    1.2 MB · Views: 39
  • 20240805_220731.jpg
    20240805_220731.jpg
    1.5 MB · Views: 39
  • 20240805_220729.jpg
    20240805_220729.jpg
    1.5 MB · Views: 40
  • 20240805_220622.jpg
    20240805_220622.jpg
    1.3 MB · Views: 39
  • 20240805_220615.jpg
    20240805_220615.jpg
    1.2 MB · Views: 40
Update Aug-8th:

I finally finished the pistol, or at least as good as I need it to be for Steve Downes to sign it. His Halo panel has dropped off the Anime414 schedule, so I hope that's not a bad sign. I guess that means I'll have more time to roam the vendor hall and also have ample time to get out of the armor before the cosplay contest, since I plan on taking photos of everyone that competes.
I am currently printing a plug for the pistol so that I can paint it orange so that the Con can't complain. I also need to print another safety lever at some point, but that'll be a resin print and I'm very lazy about those recently.

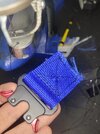
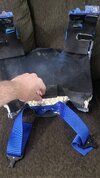
The morning after I posted my last update, I realized that using blue leather for the side straps on the torso was a dumb idea, because colored nylon exists and is way easier to work with. So I ordered some 2" wide blue nylon and some of those fancy tactical belt clips.

One of the things I really want to move away from in my builds is relying on glue for structural purposes (especially hot glue) and lean more towards mechanical connections (bolts, sewing, rivets, etc). All the previous nylon straps were either hot glued together or some used rivets, but I recently got my leather shoe patcher (basically a handcrank leather sewing machine) set-up with some pretty sturdy thread and needle, and I can finally sew my nylon straps together. My lines are atrocious (I need to print an edge guide), but I'm still happy with the results. Should be much stronger than the hot glue messes of the past.

For attaching the straps to the armor, I ordered some Chicago screws of various heights, so I can drill holes in the armor and straps, and then physically bolt the two together, adding a washer to the strap side to increase the surface area of the grip. I like that this is far less likely to separate from the armor if I'm moving around, and it also allows for more freedom of movement if I want, since using a single screw will allow the piece to pivot if needed. A quick dab with a paint pen helps them blend into the armor pretty easily.

As seen in the photos, the nylon straps stand out a bit, but I actually think that they work better than expected. I especially like that I can easily tighten them, and it will now hold the entire torso armor nice and snug to my body, where it used to just flop and clank around. Between this and the thigh armor cuts, I'm really hoping to minimize the amount of noise I make while moving around.
At some point I'll need to swap the shoulder clips to have a better connection (they're still hot glued nylon), but that can be after Anime414.

Tomorrow I need to get the belt figured out, and then decide if I want to change any of the attachment methods for the shoulders/arms. Then a full test fit up and cobble together a boot solution.
 

Attachments

  • 20240807_213538.jpg
    20240807_213538.jpg
    1.4 MB · Views: 38
  • 20240808_000206.jpg
    20240808_000206.jpg
    1.1 MB · Views: 40
  • 20240808_000325.jpg
    20240808_000325.jpg
    1.3 MB · Views: 37
  • 20240808_000335.jpg
    20240808_000335.jpg
    949.9 KB · Views: 35
  • 20240808_002050.jpg
    20240808_002050.jpg
    1.5 MB · Views: 38
  • 20240808_003600.jpg
    20240808_003600.jpg
    716.4 KB · Views: 32
  • 20240808_003609.jpg
    20240808_003609.jpg
    255.4 KB · Views: 40
  • 20240808_003633.jpg
    20240808_003633.jpg
    788.5 KB · Views: 36
  • 20240808_003637.jpg
    20240808_003637.jpg
    601.7 KB · Views: 36
Update Aug-9th:

As is tradition with the final crafting night before a Con, I made a ton of progress last night. No pictures today (sorry to those who don't like to read), but they took down Steve's Halo panel from the Anime414 schedule so it looks like I'll have a bunch of time at the Con to take photos (gonna bring my camera and a tripod and have at it).

Probably the most significant update I made to the armor last night was to update the belt/cod piece. When printed, the fit was pretty much spot on, but when I added the 2" buckles on each side, the belt gained so much circumference that I had to loop it into the H-harness to keep it held up. This made for a very loose fit and added to the clanking I've complained about so much.
My solution was to remove the plastic buckles and swap them with the same "tactical belt clips" that I used on the torso armor. I also cut about 4.5" from each side of the front belt/cod piece. This allowed me to install the clips in-line with the belt. Using the 2" blue nylon and Chicago screws, I now have a secure enough connection that I can actually tighten it and make it fairly snug, so now it will hold itself up on my hips. Since I set the Chicago screws for the back piece back from the edge a couple of inches, I can tuck the excess nylon behind the back piece.

Outside of that, I swapped out a bunch more hot glue connections for Chicago screws and rivets.

For the arms, I decided to toss out the weird middle bicep plate and only bother with the main bicep and triceps plate. I swapped hot glue for rivets, and now that I have a few inches of space between the two pieces, one of the most annoying pinch points from C2E2 has been eliminated.

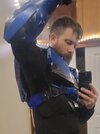
At C2E2, both shoulder pieces were basically just clipped into one swivel attachment on the shoulder straps of the torso armor. This meant that they kept flopping back or sitting awkwardly. To fix this, I added sturdier arm loops under each shoulder piece and put an actual buckle on the large shoulder (I'm tempted to double up on the big shoulders like OhFiveTwo does) and used 1/4-20 bolts and eyelets in the nylon to make pretty much as strong of a connection as I can realistically make. I even accidentally added the female buckle to the left side of the torso the first time around instead of the right, so it will be super easy to add a second large shoulder if I want. :lol:

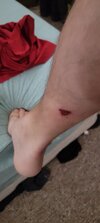
Due to a fight I got into with an underwater rock while on a float trip a couple of weeks ago, I recently had 7 stitches removed from my shin, and in the interest of not rubbing that still-tender skin, I have made the decision not to wear the calf armor, and I'm also going to just go with regular boots instead of trying to do MJOLNIR boots. I made to efforts to fix the boots last night, though I'll probably bring the pieces along with me to the hotel since it looks like I'll have plenty of free time. I might toss on the calf armor and boots just for some photo opportunities at the hotel, but for walking around/meeting Steve, I'm not going to wear them.
Without the calf armor needing to be aggressively held up, the opened up thigh armor (since it can now expand thanks to the cuts I did a while back) can be held up in place with a simple strap to the belt, which means I also don't need to wear the h-harness. This will keep some weight off of my shoulders, which was a major issue at C2E2 (one of the guys literally said, "you look like you're having a rough time" because every time we would stop walking and weren't having photos taken, I would slouch over to relieve the pressure on my shoulders).

Probably the only piece I haven't touched in this armor refresh is the helmet. I am going to simply deal with the lack of fans and mic/speaker for now, and that will be one of the top priorities before DragonCon. I also still need to add the lights to the "ears", since right now those are just empty holes...

Regardless, I'll update tomorrow after I (hopefully) get to meet Steve and get him to sign the pistol. I'm hoping there's space for him to write "I need a weapon", but I suspect that the slide doesn't have the real estate necessary, so I'll probably have to settle for just a signature.
 
Anime414 After Action:

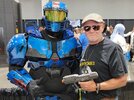
I got to meet Steve and he signed the pistol. He even insisted on holding it for the photo, which I certainly wasn't going to complain about. Now I need to make a wall mount for it so I can display it, and then finish up a new one to carry around at Cons.

If anyone is curious about 414, I'd say that it's worth it if there is a VA there that you really want to meet and get a signature and/or photo, though I wouldn't travel very far for it, and there's definitely not enough to do to justify a weekend pass. The Cosplay Contest on Saturday was run surprisingly well, and they gave out cash prizes.

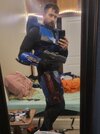
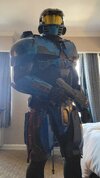
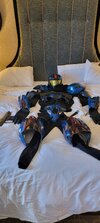
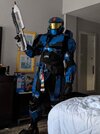
Anyway, back to the armor. As you can kind of see in the hotel room photo, I opted to not wear the calf armor or shoes, and just went with some generic black boots. This worked well for comfort, though has a bit of a goofy look for full body photos. But nobody I met even mentioned it, and a bunch of people still took photos with me.

The torso and belt clip improvements were very nice to have, the clanking was drastically reduced. The extra elastic I used for the smaller shoulder ended up being a bit too much and caused it to push my bicep/triceps plates down my arm, so I will need to revisit that attachment point. I have also been considering going to a double large shoulder, similar to the Halo Infinite style. One of the reasons I like the Mark IV is the "tankiness", and having both shoulders be the larger bells would certainly add to that.

Removing the extra arm plate definitely helped with pinching.

The thigh armor worked fine being held up by the belt, but there was a delicate balancing act of having it hang low enough to not rub against the cod plate. It ended up catching at the very corners, so I could still be heard walking, but I think the final form of this armor will still involve running the straps up to my shoulders. I think I'm going to remake the calf armor to be foam, instead of trying to cut up the PLA set.

I have decided that I prefer the black undersuit, though I want to get something to fill the stomach space. I'll probably make a few panels out of EVA foam.

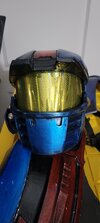
For DragonCon prep, the focus will be getting another pistol finished (with magnets to attach it to the leg armor), making foam calf armor, making boots that work with the calf armor, and finally getting around to adding lights, fans, and speaker/mic to the helmet. I should probably also try to make the visor fit better. Right now it's just awkwardly pressed into the space. Looks fine from a distance, but weird when you're holding it.
 

Attachments

  • 20240810_110332.jpg
    20240810_110332.jpg
    1.1 MB · Views: 45
  • 20240810_131903.jpg
    20240810_131903.jpg
    1 MB · Views: 46
  • 20240810_121732.jpg
    20240810_121732.jpg
    1.2 MB · Views: 48
  • 20240810_113004.jpg
    20240810_113004.jpg
    1.3 MB · Views: 46
Aug-21 Update:

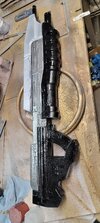
Most of my time has been spent working on my Judgement Paladin build, but I am hoping to have the MA5C Assault Rifle done in time for DragonCon. The original intent was to finish another pistol but some of the parts were brittle and broke, so I'm falling back on the Assault Rifle that was already about halfway done.

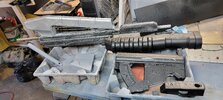
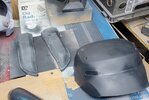
I decided that I like the Plasti-dip texture, so I'm using it on the hand guards and the grip. Apparently the "dark metal gray" rattlecan that I have has gone bad, so it turned out really weird. I'll have to pick up a new can today. The barrel guard (top piece) is a lighter gray, and I'm satisfied with that.

To do:
  • Respray the middle piece.
  • Paint the magazine and barrel.
  • Glue everything together.
I'm not sure how I want to attach/carry it yet. I am letting some of the aluminum tube to extend out the buttstock so that I can attach a d-ring for a sling or something similar.

Armor still needs to be adjusted for the parade, but I'm still undecided about the calves/boots. One of these nights I need to add fans into the helmet as well.
 

Attachments

  • 20240821_080524.jpg
    20240821_080524.jpg
    2.7 MB · Views: 28
MA5C is sufficiently completed. The glue up required some strategic clamping. Looks like the plasti-dip doesn't really like the clear coat I applied. I still need to flip it and clear coat the other side, and then drill a hole for a d-clip.

I'm not thrilled with the result, but it's acceptable.
 

Attachments

  • 20240822_015645.jpg
    20240822_015645.jpg
    1.5 MB · Views: 33
Aug-27 Update:

After I finished up the Judgement armor last night, I turned to the Mark IV. Made a few hasty repairs to some broken/loose elastic straps on the wrist armor, and then finally had to decide on what I want to do about the leg armor pieces.
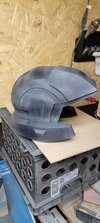
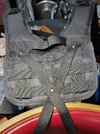
For the thigh armor, I'm going to move the weight back to my shoulders via the H-harness. During a previous fitup I snapped one of the clips used to attach a strap to the back of the harness, so I busted out the leather shoe patcher and riveted and sewed the back straps directly to the harness.

For the calf armor I made the decision to cut away the lower back calf section. My calf muscles are almost comically large, so scaling calf armor will always be awkward. Eventually I'll just make it out of foam but for now I'm going to rely on the black undersuit looking sufficiently close enough to the black plastic that used to be there.

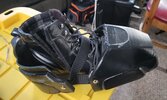
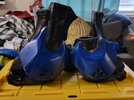
For the boots/shoes, I've currently given up on the top strap, and moved from a set of crocs as the base to a set of actual boots. Instead of using crazy amounts of hot glue to hold the armor on, I used Chicago screws to rivet some elastic straps to hold it on/against the boot.

At this point, the only thing left to do before DragonCon in regards to the Mark IV is to slap some fans in the helmet.

Then it's just a matter of hydrating like a mad lad to hopefully not die in the parade.
 

Attachments

  • 20240827_105125.jpg
    20240827_105125.jpg
    840.7 KB · Views: 27
  • 20240827_121058.jpg
    20240827_121058.jpg
    1.8 MB · Views: 26
  • 20240827_114938.jpg
    20240827_114938.jpg
    1.2 MB · Views: 27
DragonCon After Action Report:

I managed to slap together a single fan for the inside of the helmet which 1000% is the only reason I was able to walk the entire parade with the helmet on. The batteries and wiring held up just long enough for the parade and the walk back to my hotel room, but something broke/died when I tried to turn them back on for the photoshoot. Not a big deal though, I only considered them to be temporary.

The Atlanta heat was absolutely crazy for this Con and the Cosplays I choose, paired with the amount of alcohol I consumed. I basically spent every Con moment being drenched in sweat.

The gear mostly worked well. I'm pretty satisfied with how the chest and back armor have held up, as well as the improvements I made to the belt/cod piece.
The shoe coverings actually held up decently, though the gap I placed under them in an attempt to reduce sounding like a Clydesdale horse was apparently completely futile. I saw that several other members put an full length layer of EVA foam under the boots, and I think I might do something similar. They didn't fall apart though, so I'm happy with that.

The bicep/triceps armor continues to be annoying and a hindrance to both flexibility and general comfort. Since I was constantly either wiping sweat off of my face or holding a water bottle up to drink, the left arm bicep/triceps plates were constantly pinching against my forearm. This wasn't as big of an issue for the right arm due to the strap of the larger pauldron sitting below the bicep/triceps plates, but on the left arm, the strap sits above them, and the smaller pauldron tends to push them down my arm and towards my forearm.

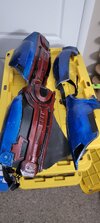
The thigh armor suffered an almost full failure, unfortunately. My left thigh armor broke apart at a weld seam while waiting in line to load the parade shuttle bus, while the other side popped a different weld seam but was hanging on just because of the paint layers, so I pulled it off before we stepped off just to avoid having to deal with it. For both sides though, the very front of the thigh armor is where my buckles attach to, so that piece still hung against my body and gave a decent illusion of having enough thigh armor. There was also a pretty aggressive rub point on my hip due to the bolt I use to attach all of the nylon straps. That bolt dug into my hip for most of the day.

The calf armor continues to be annoying, but technically held up. The lighter weight and wider fit provided by cutting out the back meant that I didn't have to tighten the straps holding them up nearly as much. However, it did mean that I had some pretty aggressive rubbing against the back of my calves, and if the piece was allowed to dangle too loosely, it had a strong tendency to want to rotate on my leg to point outwards instead of forward.

The H-harness was a much more comfortable fit now that the leg armor isn't putting so much force on pulling it down against my neck. I did still build up some rubbing sores on the back of my neck from wearing it for so long though.

The final equipment issue was that one of the ears fell off of the helmet as I was taking it all off after the photoshoot. Not a big deal though, as they were both just attached with hot glue in anticipation of removing them to run wires in the future.

Fixing the issues:
  • Calf armor: I am once again pledging to replace the calf armor with either foam or cast rubber. I think I need the ability to tighten it while having some flexibility.
  • Thigh armor: I will likely reweld these for the moment. The welds broke because I am asking the PLA to flex ever so slightly, which obviously it doesn't want to do. I am tempted to either line the inside with fiberglass or just make a mold and then make the actual thigh armor out of fiberglass. I would have lighter armor, plus the walls would be thinner (giving me slightly more room without reprinting them a third time). It would also still be strong enough to bolt mounts to for either my camera (still an eventual goal) or any hip-mounted weapons.
  • Biceps/triceps: I've basically defaulted to removing these any time I'm not doing a photoshoot. I think I will explore the idea of printing them slightly smaller, as well as finding a way to attach them to either the pauldrons or the back armor to hold them up high on my arms, instead of relying on elastic straps. They would also be good candidates for moderately easy foam work that wouldn't have to be perfect.
  • Helmet fan: I need to completely pull out the fan/wiring and do it properly. I used some very questionable means to attach the wires which aren't efficient or reliable. I'd also like to play with adjusting the direction of the airflow.
  • Rubbing points: thigh armor bolt point will be re-evaluated for hardware size. I might either cap/cover the entire bolt or move to multiple bolts so that they have fewer pieces of nylon to hold (and can therefor be shorter). Right now the calf armor strap runs all the way up to the top of the thigh, I might move that connection to the bottom, unless switch to foam allows me to skip the strapping entirely. For the H-harness rubbing along the back of the neck, I am going to sew a strip of EVA foam to the part the rubs against my neck. This isn't a perfect solution, but should help for the long wears.
  • Shoe clomping: for now, I'll just add a full-sized strip of EVA foam as a sole. Though honestly I also think I need to play with the scale a bit, so a full reprint might be in order. I kind of want to do at least the heel and top strap out of foam. At that point though, I might as well make the entire thing out of foam, and just build a full set of boots (maybe attached to the calves?)
The next Con I intend to wear the Mark IV is Colossalcon North, in approx 80 days. I'd like to have the helmet fan and thigh armor fixed at the minimum before then.

Overall I had an amazing time at DragonCon, and will absolutely be back next year (I'm probably going to buy my ticket this week for DragonCon 2025). However, I definitely need to make some specific cooling improvements before that one.

The first goal is better helmet cooling. I definitely need to make at least the current fan rock solid, but I'd also like to add a second fan. Something one of the other members showed me was that he had a larger fan clipped inside of his chest armor that pointed up into the helmet. This gave him a much more powerful fan without needing to fit anything into the helmet. I might pursue a similar idea.

I'd also like to attempt a hot weather specific back-armor. I am thinking about making the back armor out of fiberglass, and then opening up the shoulder vents to install fans with ducting that blows the air over my back (where I sweat so, so much) and out another vent at the back (or maybe at the top, to avoid blowing sweaty air into the person standing immediately behind me). Right now my back armor is filled with expanded foam to give it a better fit and some rigidity, but is a pretty major heat sink/holder.

I would also like to explore blowing some air over my chest, but I think having a non-sweaty back and head will keep me cool enough to not really need to keep adding fans to more places. I think I'll end up using the chest cavity to house any batteries needed. The next major upgrade to the armor will be adding various electronics, for function and fun. I'll be needing a lot of power.
 

Attachments

  • PXL_20240831_120122757.jpg
    PXL_20240831_120122757.jpg
    1.3 MB · Views: 30
  • 20240904_011210.jpg
    20240904_011210.jpg
    832.7 KB · Views: 28
  • 20240904_011132.jpg
    20240904_011132.jpg
    902.5 KB · Views: 22
  • 20240904_010436.jpg
    20240904_010436.jpg
    596 KB · Views: 28
  • PXL_20240831_142047868.mp4
    7.8 MB
Glad you got a fan in the helmet! I can barely handle the heat in cosplay at Canadian cons. I can't imagine how hot it would be in late August in Atlanta, Georgia! Although I don't have a chest fan, it sounds like a good idea. I'm interested to see what you do with that. Glad to hear DragonCon was a blast!
 
DragonCon After Action Report:

I managed to slap together a single fan for the inside of the helmet which 1000% is the only reason I was able to walk the entire parade with the helmet on. The batteries and wiring held up just long enough for the parade and the walk back to my hotel room, but something broke/died when I tried to turn them back on for the photoshoot. Not a big deal though, I only considered them to be temporary.

The Atlanta heat was absolutely crazy for this Con and the Cosplays I choose, paired with the amount of alcohol I consumed. I basically spent every Con moment being drenched in sweat.

The gear mostly worked well. I'm pretty satisfied with how the chest and back armor have held up, as well as the improvements I made to the belt/cod piece.
The shoe coverings actually held up decently, though the gap I placed under them in an attempt to reduce sounding like a Clydesdale horse was apparently completely futile. I saw that several other members put an full length layer of EVA foam under the boots, and I think I might do something similar. They didn't fall apart though, so I'm happy with that.

The bicep/triceps armor continues to be annoying and a hindrance to both flexibility and general comfort. Since I was constantly either wiping sweat off of my face or holding a water bottle up to drink, the left arm bicep/triceps plates were constantly pinching against my forearm. This wasn't as big of an issue for the right arm due to the strap of the larger pauldron sitting below the bicep/triceps plates, but on the left arm, the strap sits above them, and the smaller pauldron tends to push them down my arm and towards my forearm.

The thigh armor suffered an almost full failure, unfortunately. My left thigh armor broke apart at a weld seam while waiting in line to load the parade shuttle bus, while the other side popped a different weld seam but was hanging on just because of the paint layers, so I pulled it off before we stepped off just to avoid having to deal with it. For both sides though, the very front of the thigh armor is where my buckles attach to, so that piece still hung against my body and gave a decent illusion of having enough thigh armor. There was also a pretty aggressive rub point on my hip due to the bolt I use to attach all of the nylon straps. That bolt dug into my hip for most of the day.

The calf armor continues to be annoying, but technically held up. The lighter weight and wider fit provided by cutting out the back meant that I didn't have to tighten the straps holding them up nearly as much. However, it did mean that I had some pretty aggressive rubbing against the back of my calves, and if the piece was allowed to dangle too loosely, it had a strong tendency to want to rotate on my leg to point outwards instead of forward.

The H-harness was a much more comfortable fit now that the leg armor isn't putting so much force on pulling it down against my neck. I did still build up some rubbing sores on the back of my neck from wearing it for so long though.

The final equipment issue was that one of the ears fell off of the helmet as I was taking it all off after the photoshoot. Not a big deal though, as they were both just attached with hot glue in anticipation of removing them to run wires in the future.

Fixing the issues:
  • Calf armor: I am once again pledging to replace the calf armor with either foam or cast rubber. I think I need the ability to tighten it while having some flexibility.
  • Thigh armor: I will likely reweld these for the moment. The welds broke because I am asking the PLA to flex ever so slightly, which obviously it doesn't want to do. I am tempted to either line the inside with fiberglass or just make a mold and then make the actual thigh armor out of fiberglass. I would have lighter armor, plus the walls would be thinner (giving me slightly more room without reprinting them a third time). It would also still be strong enough to bolt mounts to for either my camera (still an eventual goal) or any hip-mounted weapons.
  • Biceps/triceps: I've basically defaulted to removing these any time I'm not doing a photoshoot. I think I will explore the idea of printing them slightly smaller, as well as finding a way to attach them to either the pauldrons or the back armor to hold them up high on my arms, instead of relying on elastic straps. They would also be good candidates for moderately easy foam work that wouldn't have to be perfect.
  • Helmet fan: I need to completely pull out the fan/wiring and do it properly. I used some very questionable means to attach the wires which aren't efficient or reliable. I'd also like to play with adjusting the direction of the airflow.
  • Rubbing points: thigh armor bolt point will be re-evaluated for hardware size. I might either cap/cover the entire bolt or move to multiple bolts so that they have fewer pieces of nylon to hold (and can therefor be shorter). Right now the calf armor strap runs all the way up to the top of the thigh, I might move that connection to the bottom, unless switch to foam allows me to skip the strapping entirely. For the H-harness rubbing along the back of the neck, I am going to sew a strip of EVA foam to the part the rubs against my neck. This isn't a perfect solution, but should help for the long wears.
  • Shoe clomping: for now, I'll just add a full-sized strip of EVA foam as a sole. Though honestly I also think I need to play with the scale a bit, so a full reprint might be in order. I kind of want to do at least the heel and top strap out of foam. At that point though, I might as well make the entire thing out of foam, and just build a full set of boots (maybe attached to the calves?)
The next Con I intend to wear the Mark IV is Colossalcon North, in approx 80 days. I'd like to have the helmet fan and thigh armor fixed at the minimum before then.

Overall I had an amazing time at DragonCon, and will absolutely be back next year (I'm probably going to buy my ticket this week for DragonCon 2025). However, I definitely need to make some specific cooling improvements before that one.

The first goal is better helmet cooling. I definitely need to make at least the current fan rock solid, but I'd also like to add a second fan. Something one of the other members showed me was that he had a larger fan clipped inside of his chest armor that pointed up into the helmet. This gave him a much more powerful fan without needing to fit anything into the helmet. I might pursue a similar idea.

I'd also like to attempt a hot weather specific back-armor. I am thinking about making the back armor out of fiberglass, and then opening up the shoulder vents to install fans with ducting that blows the air over my back (where I sweat so, so much) and out another vent at the back (or maybe at the top, to avoid blowing sweaty air into the person standing immediately behind me). Right now my back armor is filled with expanded foam to give it a better fit and some rigidity, but is a pretty major heat sink/holder.

I would also like to explore blowing some air over my chest, but I think having a non-sweaty back and head will keep me cool enough to not really need to keep adding fans to more places. I think I'll end up using the chest cavity to house any batteries needed. The next major upgrade to the armor will be adding various electronics, for function and fun. I'll be needing a lot of power.
Well now I want to walk in a parade in armor haha new goal unlocked!
 
This thread is more than 3 months old.

Your message may be considered spam for the following reasons:

  1. This thread hasn't been active in some time. A new post in this thread might not contribute constructively to this discussion after so long.
If you wish to reply despite these issues, check the box below before replying.
Be aware that malicious compliance may result in more severe penalties.
Back
Top