1st Build MJOLNIR MK VI Master Chief Armour (Halo 3)

Status
Not open for further replies.

N8TEBB

Sr Member
Member DIN
S410
Well hi there!

Earlier this year I got inspired to create a Master Chief suit. Here's how this idea came about:

STORY TIME! (Long Version)
So the day is December 28th, 2019. I was visiting a relatives house who had just recently purchased a 3D printer. I had no idea that 3D printing was possible until that day, so when I found out how inexpensive these machines were (at least compared to what I was expecting) I knew I had to get one. I played around with my new CR-10 for a while, and eventually decided to print a Master Chief helmet. (I only knew of this helmet through Red Vs Blue, and I really liked the way it looked.) This got me thinking, "I wonder what the actual game is like".

Up to this point the only video game I had ever played was Minecraft java edition. I did not own an Xbox so I ended up playing the halo CE campaign on the old gearbox PC port. This game blew me away. I didn't even care that the graphics were older than me (this was March of 2020 and I was 16 at that time) this game instantly became my favourite. I played halo 2 on PC as well. This was April of 2020, so most of the Master Chief Collection wasn't on PC. I did manage to get the halo 3 campaign running on PC with an emulator, but my potato of a computer could only run it at like 15 fps, so I knew I would have to find an Xbox.

Eventually I played through halo CE, 2, 3, ODST, 4, and reach (in that order) by using a borrowed Xbox, and buying used games off of Kijiji. As this happened I found videos on YouTube by Impact Props and Blake Hull who had made their own Master Chief Suit. These people inspired me and made me see that it was possible to make something as cool as this. Naturally, those videos led me here to the 405th.

STORY TIME! (Short Version)
I had never played halo until march 2020 and now I want to make a Master Chief suit because I saw people on YouTube make it look easy.

Da Build
This isn't my first build thread, but this project was started before the others. I didn't make a thread right away because I was really unsure if I was actually going to be able to finish this project. Currently, the date is December 14th, 2020. As of writing this, the suit has already been completed. I figured it was about time I actually posted something about it.

So I decided to make the suit from halo 3.
Chief Holding.png

I was originally going to do halo 2, but I wasn't sure if I should make the original or the anniversary. I liked the suit from halo 2, but I wasn't sure if I would like the suit from anniversary better, so to avoid that choice I just made the suit from halo 3. I know that doesn't make much sense but I don't care.

I decided to make the suit out of foam, and 3D print the helmet. I have never worked with foam before, so I did a few test pieces before really getting going. I figured I could manage this project, so after a bit of shopping, I officially began this suit on July 2nd, 2020. (3 months after I played CE for the first time.)
G0013422.JPG

As I said before, as of writing this, the suit has already been completed. I'm just going to add to this thread when I have time to write.
 
IMG_0403.JPG

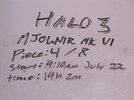
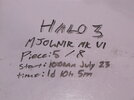
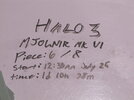
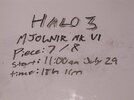
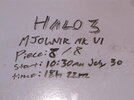
Just wanted to keep track of how much time I this will take!

IMG_0404.JPG

This is my work station. It's just the corner of the basement, but it works! I cut the templates out with a small hobby knife, and I trace it to half inch EVA foam. Then I use a larger box knife to cut out the foam. I originally used only hot glue to stick it all together.

IMG_0406.JPG

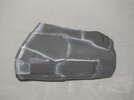
This is my first piece. Yes, I am aware of how janky it looks. I remade this piece later on. Because it was the first piece I made some mistakes that I needed to fix on future pieces. The first thing I changed was I switched from hot glue to contact cement. I find that hot glue took too long to dry and it made really sloppy joints as it would squeeze out. Fast-drying contact cement fixed this issue. I also got a bigger knife and LOTS of replacement blades. The switch from a 18mm to a 25mm and always having sharp blades makes a really big difference.

Also, you can see I tried to use a filler to hide the gaps, but that didn't work at all. This was because I did no research into what I should use, so I just tried to first thing I saw in the garage. The next day, I used Kwik Seal, which worked much better. I also figured out it was a good idea to use a sanding bit on a Dremel tool to smooth out the joints.

I reinforced the pieces with hot glue on the inside only, and eventually I added straps and stuff. This template is made by Art Andrews and I got it here: Halo 3 - MJOLNIR Mark VI - Standard LD
It worked super great for what I was using it for. Don't ask why I chose a low def version, I was super super new to the 405th and just clicked on the first mjolnir mk6 suit I found.

Also because I was super new, I didn't really look around the site for tutorials. Instead, all my knowledge of foam building was off of YouTube. YouTube isn't a bad resource, but I wish I had done a little more browsing of the 405th before I got started.

IMG_0409.JPG

Pieces 2 and 3 look a little better. I still need to sand and fill in the gaps, but They look way nicer that the first piece.

Also, I will add detail to all the pieces with thinner foam eventually.
 
Fast forward to July 22
IMG_0484.JPG

Man, July was such a great month to work on this project. Everyone was in lockdown, which means my only priority for the month was to work on this project. I only took a few break days because I was out of town a few days. As you can see I've mostly completed the foam pieces. I still want to add detail and stuff with thinner foam, but right now, progress is looking good.

IMG_IDK2.PNG


I jus threw all the pieces on the ground to see my progress. I know this picture isn't great, but you get the idea right?
Some of the pieces are too big, or just the wrong size, so I'll have to adjust them. The forearm and shoulder pieces are a bit wide. Also, I still have to make the COD piece. Right now it's just held together by duct tape.
IMG_0471.JPGIMG_0472.JPGIMG_0473.JPGIMG_0474.JPGIMG_0475.JPGIMG_0476.JPGIMG_0477.JPGIMG_0478.JPGIMG_0479.JPGIMG_0480.JPGIMG_0481.JPGIMG_0483.JPG
Prior to this day, I was usually hesitant to tell people about what I was making because I had no idea if I would be able to finish, or if I was skilled enough to make a half decent suit. But once I saw that I had made almost 12 complete pieces, I was so stoked about this project. I was pretty sure now that I was going to finish before school started up in mid September.
 
Time for
-=x=-=x=- -=x=-=x=- T H E H E L M E T -=x=-=x=- -=x=-=x=-

Wow look at me go! Two posts in one day WOO! School is slowing down because Christmas break is coming up so I have more time to put stuff on here! (I'm in gr12 currently.)

You may have noticed I didn't make the helmet out of foam. Well, I figured the first thing most people would look at when they see this suit would be the helmet, so I wanted to make sure it was spot on. I found the model on thingiverse: Halo 3 Mark 6 Helmet by Rainyfire
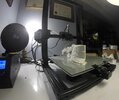
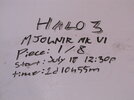
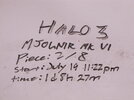
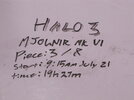
I printed it on my CR-10 in white PLA. Layer height: 0.2mm, speed: 50mm/s. I also use support when necessary and a brim. There are 8 pieces to this helmet.

I had issues printing some pieces, so I had to stop the print and do the remaining portion separately. All that means is I'll have a bit more work to do filling in the gaps later.
Master Chief 4_Moment.jpgMaster Chief 4_Moment1.jpgMaster Chief 4_Moment2.jpgMaster Chief 4_Moment3.jpgMaster Chief 4_Moment5.jpgMaster Chief 4_Moment6.jpgMaster Chief 4_Moment7.jpgMaster Chief 4_Moment8.jpgMaster Chief 4_Moment9.jpgIMG_0437.JPGIMG_0449.JPGIMG_0454.JPGIMG_0466.JPGIMG_0485.JPGIMG_0490.JPGIMG_0492.JPGIMG_0494.JPG
Some of these photos have funny file names because I took them out of a printing time lapse video.

Man, posting all this stuff at once makes me wish I wasn't so scared to post progress photos. I think it would have been cool to upload stuff as I make it. This was like two weeks of printing. It took a little over 1kg of filament. The total print time was around 210 hours of printing. It was printing while I made the foam pieces.

Now that all them pieces are printed, I gotta stick em together. CA glue is my favourite because it sticks things together really fast. Once I glue it together, I reinforce the helmet with epoxy. This just makes those connections s little stronger.
CA glue.PNG
epoxy.PNG

glued.PNG

helmetglued2.PNG


Next I gotta make this helmet smoooth so I can paint it.
 
*sniff* *sniff*
smell that?
Probably not. That's because you wear a respirator when you use bondo.
I smell it. That's because I didn't use a respirator
"Why didn't you use a respirator or a mask when you did bondo?" You ask me, concerned for my lungs
*thinks for a moment*
I forgot?
Then you say "How could you forget? TurboCharizard told you to use a mask!"
does anyone read this.PNG

Well..... I made this helmet before the assault rifle. So this took place before I was politely reminded to be safe.
ANYWAYS
Time to make this helmet smooooth.
3 things I used: Bondo, Sport Putty, Filler Primer
bondo fprimer spot.PNG

First I slapped on that bondo. I find the stuff I have to mix myself is stronger than the spot putty, so I like to use it in those big gaps between the pieces.
bondo.PNG

Then I sanded it. I did a bit with a rotary tool and a bit by hand. I used fairly rough grits right now because this stuff is really solid.
smooth helmet.PNG

Gotta help some of those annoying print lines to go away, so time for spot putty! wee!
sport putty.PNG

Man. That's some good lighting.
Once again, it's time to saaaaaaand. Finer grits now
sanded after spot putty.PNG

How on earth do people 3D print the whole suit? This one helmet takes enough time on its own!
Anyways, lets get rid of them smaller print lines. F I L L E R - P R I M E R - T I M E
filler primer.PNG


WOAH THERE! is the helmet the only 3D printed part of this suit?
I'm glad you asked! Of course not! There are some itty bitty details on the suit that I didn't fell like making out of foam. Really only two peices: The hand plate, and some pieces for the COD piece. Also, I'm going to print a visor mold so I can vacuum form the visor later.

hand plate.PNG
hand plate lol.PNG

pretend there's two hand plates

COd piece detail.PNG
cod piece det.PNG
cod piece det2.PNG

Only needed that little side piece

visor1.PNG

Visor!

I finish these pieces in the same way as the helmet. sport putty, primer, sanding, all that jazz.

And now... back to the helmet!
sand.PNG

helmet sanded.PNG

Hmm... there's still some spots that aren't filled in. Where are they? after some filler primer I'll mark them so I can see 'em better
marked.PNG

Let me just fill those in with spot putty
spot 2.PNG

And of course... where there's spot putty, there's also sanding!
looking snazzy.PNG

Lookin snazzy in that bucket hat and golden shades! Also, it is now day 33, August 8 2020.
smoothh.PNG

Now that's a smooth helmet! Let me just do one more coat of regular primer (not filler primer) to cover up to spot putty.
primer reg.PNG

NICE. Also, here's where I'm at with the other pieces.

visor and handplates.PNG
hhhhnd plates.PNG


The hand plates are the first pieces to have colour! Phew, that was a long post.
But soon I'll add colour to the rets of the suit! Looking forward to posting again!
 
IMG_0558.JPG

BLAM! paint! beauty aint it? The main green colour is botanical green, and there's also some hunter green and black sections. I still have to do the weathering. For the weathering, I'm just going to use black acrylic paint, water it down, and brush it on. Then I use a rag and dab most of it off, only leaving enough to make it look dirty. I'm also going to dry brush on some silver paint on the edges to make the paint look chipped.
 
HEY! I know I'm going a bit out of order, but I made a video for this project!
You can see it's completely done. From this point on in the thread, I want to include stuff I didn't mention in the video. There's actually a lot I still have to get down. Hope you enjoy this vid!
 
DUUUUDE! That's... that's unbelieveable that you made one in that time, and so high quality too! Plus, the video quality was great!
Thanks man! I really like posting on the 405th because you guys are all so nice here.
It was a bit of a grind but it was also 2020 so I didn't have any other plans lol. Really, the video took longer than the project.
I'm super happy with the final suit though.
 
my picture.PNG

Holy Bologna! I posted that one picture at the end of my video on reddit and a whole ton of people upvoted it. I've never had anything I've made be seen by that many people lol. Just wanted to share.

Also, ya boi's moving up in the world! This was message #51!
newbie.PNG
jr.PNG
 
Last edited:
Ok now I'm actually going to get back to the build. Where were we.... oh yes. I had just finished painting the thing. At this time, I began work on the visor. Since I showed how I made the nice visor in my video, I'll just share how not to make one.

Here's a comparison to my first attempt and my second attempt
how to.png

towto.png

dye.png

After that, I just used an airbrush to spray chrome to the inside of the visor. This is what makes it like a one-way mirror.
visorsss.png

Keep in mind these were taken with a phone camera up close. When you look through the first one with your eyes, it is even harder to see through. The picture on the right is pretty accurate.
I also experimented with spraying the inside of the visor with clear spray paint so that the chrome wouldn't rub off. But, for some reason, it just turned the chrome into solid silver paint, and I ruined that visor. you can't see a thing out of that visor now. It's a good thing I made these visors in batches of 4. Had to use one of my spares!

Here's a comparison of the visors in the helmet. The first one was taken on August 28, 2020 with the first visor. There was no foam in the helmet at that time so it was just wobbling around on my head. The one on the right was taken a few days ago. It has the good visor.
visor comparison.png

I know it's not the best angle to be looking at the visor, but you get the idea right? Also, I noticed just now you can actually see my face in the one on the left. The newer one reflects almost everything. Also, you can see I did the weathering on the suit. As I said before, I just used black acrylic paint that I watered down and painted on. Then I used a rag to dab most of it off, only leaving enough to make it look dirty. I also dry-brushed silver paint along all the edges to give the effect of chipped paint.

Pictures made with MS paint and powerpoint lol
 
I want to go back to the paint for a second, because I didn't really pend any time on it. As usual I sprayed the foam with plasti-dip to seal it, but I also sprayed it with primer. I did this because the green paint I wanted to use didn't want to stick to the plasti dip for some reason. Once I added primer, the green paint could stick easily. For some reason, I kept all the cans I went through, so today I got them all out. This is all the spray paint I used to make the whole suit and the assault rifle. Most of the cans are empty, but some of them still have paint in them.
IMG_4223.JPG

You may ask... why gloss?
I answer... because I like shiny things.

Looking at this picture you may think to yourself.... gee that's a lot of dollars. But how many dollars? Well here in Canada, my local home hardware charges $8.99/can and at Lowe's plasti dip is $22.99/can. (I can get plasti dip cheaper at home depot $16.79/can but I didn't know that until after i bought three cans) and filler primer is $12.67. So ill just do some quick calculations...
15 x 8.99 = 134.85
3 x 22.99 = 68.97
1 x 16.79 = 16.79
5 x 12.67 = 63.35
134.85 + 68.79 + 16.79 + 63.35 = 283.96
x 13% tax = $320.87
yikes. that's a lot of dollars to spend on paint. It would have taken me about 24 hours to make that much earning student minimum wage. (currently $13.25). Good thing I worked part time over the summer!
btw 320.87 CAD = 250.11 USD currently
let me know is paint is this much everywhere, or if it's a Canada thing. I think it would be interesting to know.
 
What a wild ride dude! Just went through the whole thread in one go. This looks incredible! The paint is spot on to my eye color wise. +1 for using Rustoleum, I see you too are a man of culture. I have seen so many foam builds at this point and I'm still amazed every time I see a new one especially one with this level of quality and detail! I have nothing constructive to add I just needed to comment lol.
 
What a wild ride dude! Just went through the whole thread in one go. This looks incredible! The paint is spot on to my eye color wise. +1 for using Rustoleum, I see you too are a man of culture. I have seen so many foam builds at this point and I'm still amazed every time I see a new one especially one with this level of quality and detail! I have nothing constructive to add I just needed to comment lol.
Thanks so much for saying so! It's honestly so encouraging to hear feedback on what I've made. Glad you gave my thread the time of day. :)
 
Now, knowing how much making a suit is going to cost before you go and make one is really hard to estimate. After I completed the suit I went back and listed everything I purchased and how much it cost. On this lovely pdf that I made in excel there are two lists.

The first one is called Amount Purchased. This included everything I bought for this project whether I used it or not. Some things I used, but weren't in the final project. An example of this is the foam I used to make incorrectly sized pieces that I scrapped. Throughout the project I had to remake 2 thigh pieces, 1 forearm, both hand plates, and the chest piece. I also bought some extra cans of spray paint that I didn't need. Sometimes I straight up bought the wrong thing. For example, I bought very slow-drying and toxic contact cement that I didn't use. That was 20 buck down the drain right there.

The other list is Amount Needed and is how much this project would have cost me if I didn't make any mistakes. It only includes things that I used in the final project.

btw, all these numbers are not spot on, but I believe they're pretty close.
Cost Analysis of Master Chief Suit-page-001.jpg

There are a lot of numbers here, but the ones we're interested in are the ones in the boxes. This project cost me $968.66 which... is a BUTT TON more than I thought. I think a number as big as this one would have scared me away from making this project, but now that It's over I'm actually really glad I made the suit. For someone like me to make this much I would have to work 72 hours.

I am aware of how much money this is, and how impractical this project was but here is my justification:
This wasn't just me paying $970 for a master chief suit. I wanted to make a master chief suit. I was just as excited to spend all summer working on this project as I was to have the finished suit. The way I see it, is I paid this much to spend the summer doing what I wanted to do. Also, I figured that I would have spent just as much over the summer if circumstances were normal, and I was traveling and hanging out with friends. So I really just spend my budget in a different way because of circumstances. In my eyes, it was worth every penny. Also, my brothers said that next year, I will be going into university and I will be spending way more money on things I don't like, and they wish they could spend $970 to do their own thing for two months. Basically they were saying this project was a bit of a waste of money, but I had fun doing it and university is a bigger waste so it's ok.

There is hope to bring the total for projects like this down though. First of all, if I didn't buy things I didn't require you can see the total would have been $660. which is much better that the $970. Also remember these are good ol' Canadian prices. If I was speaking in bald eagles (aka USD) the total would be just over $510. This number looks a lot lower than than my actual total, and it would have been possible for me to make my exact suit without taking ANY shortcuts and end up with this total.

But If I was trying to cut costs in general then I would have made the helmet out of foam and used a motorcycle visor instead of my vacuum formed one. That would have saved a lot of money. I also could have tried to avoid using the primer on top of the plasti dip, and I think I could have tried to find some cheaper foam. Perhaps I could have made the suit without a dedicated pair of shoes too. I really wanted a nice suit though, so I didn't take these shortcuts.

I know I can go the other way as well, and make the suit more expensive. But as you spend more on a suit, it also takes longer to complete. I wanted to get the suit done before school started, so I didn't want to drag it out. Other than adding extra foam details I could have added lights, a proper under suit, nicer gloves, and other things. I think the suit looks just fine the way it is though, so I don't think I'll be making these additions anytime soon.

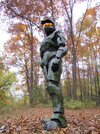
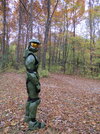
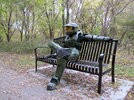
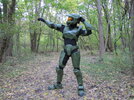
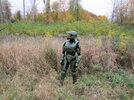
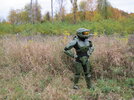
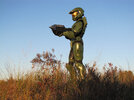
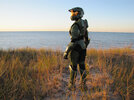
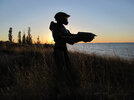
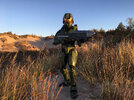
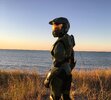
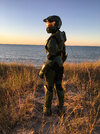
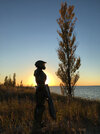
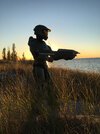
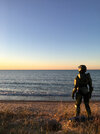
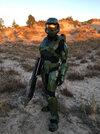
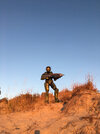
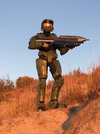
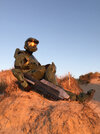
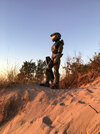
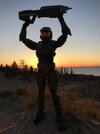
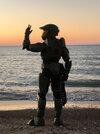
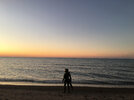
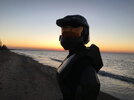
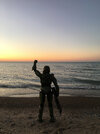
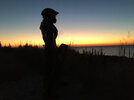
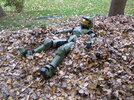
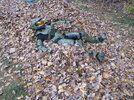
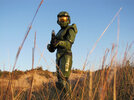
Now that I've completely bored you all to death with so many words, here's some pictures of the suit. Most of them were in the video, but I figured I'd post em here too.
IMG_0844.JPGIMG_0855.JPGIMG_0860.JPGIMG_0872.JPGIMG_0881.JPGIMG_0886.JPGIMG_0892.JPGIMG_0894.JPGIMG_0794.jpgIMG_0795.jpgIMG_0806.jpgIMG_0810.jpgIMG_2223.jpgIMG_3763 - Copy.jpgIMG_3763.jpgIMG_3764.jpgIMG_3767.jpgIMG_3774.jpgIMG_3775.jpgIMG_3778.jpgIMG_3787.jpgIMG_3797.jpgIMG_3800.jpgIMG_3801.jpgIMG_3803.jpgIMG_3807.jpgIMG_3812.jpgIMG_3833.jpgIMG_3837.jpgIMG_3842.jpgIMG_3844.jpgIMG_3917.jpgIMG_3920.jpg
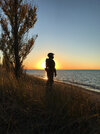
Most of these pictures were taken at the Pinery provincial park on Lake Huron. It's a few hours from my house but totally worth the drive to get these pics.

Halo poster golden 1sdt time.png
an attempt at haloSAVE.jpg

On the left is a CE poster that I traced in inkscape many months ago to mark the very first time I played halo. On the right is a photoshopped picture of me in my Master Chief suit on October 12... just shy of 7 months after I played halo for the first time. And in a few days it will have been one year since I saw a 3D printer for the first time, which is what led to me having an interest in halo. What a year it's been.
 
Guys something cool just happened....
a new sub.PNG

The one who started it all.... the man, the myth, the legend, Impact Props, the reason I decided to make a halo suit, watched my video and subbed to my channel! You may not think this is such a big deal, but man, for me this is just so cool.

Some other neat things that happened
screencap2.PNG

Harry Drake, the guy who modeled the thingiverse mk6 helmet left a comment. Super cool!

Here's another that I really like!

screencap3.PNG

There's so many other comments that just made my day, but I didn't want to bore you guys to death putting them all here. I just wanted to share these comments with people who can understand how cool it is to have these sorts of interactions.
 
Status
Not open for further replies.
Back
Top