Name that Armor........ It's the ARGUS!!!

Status
Not open for further replies.
So what I think I would do with the separate parts is (if I understand this, I am half asleep, lol) when you resin and glass them, do it together, so they are all combined into one piece.
 
dang i got to buy another printer just to do the helmets i want while im trying to make my master chief lol. Moe you are just awesome i will put this one on my list...
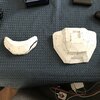
Oh good grief Charlie Brown!!! Once again someone has usurped my thread with a better piece of my armor.....one that I haven't even started yet.

giphy-downsized.gif
 
Hey guys, I have a small update. I was in the middle of doing my right forearm when I came across a few pages where the template pieces were not the correct size....meaning that when I tried to assemble, the pieces were not matching up to the correct end points. Its the weirdest thing I have ever had happen to me. I know that I had to reprint a page or two here and there but there are still off the same PDF file so I can't for the life of me figure out why this would happen. And yes, I know that there are different printer settings and I'm very careful to use the same one. So now I have to reprint the whole thing........In the mean time, I got my butt and ab plates ready to go:

IMG_0933.jpg

I'm getting on towards the more difficult parts......I'm OK with the shoulders next.....its the chest piece that is going to be my biggest challenge. No...I have to correct myself. The next biggest challenge is to my basement. Going to turn the whole thing into a den for the kids to entertain their friends. I started a while back, but always got distracted with other things and other builds....But now its going to be a full court press to finish.....Good thing is that I'll have a bit more room for storage...and for working on larger pieces.
 
Yes, that piece was accidentally thrown away.....kids were "cleaning" the house....and, yeah....out with the garbage. I managed to create a filler on one side. This was taken before I filled in the side that was missing.....looks ugly, but it works.
 
Lord please help me find my brain.....I think I left it on the F train somewhere between Grand Central Station and Ave N...I know it’s a big route...but I could really use it back. And if everyone is wondering why:

I just finished peeping the shoulders
6ABE1938-9FFC-449A-A980-C0BFC9F29C9C.jpeg


I also got one of my forearms done.....
D3DF23A4-D774-424B-AFFA-24548D5AAEC8.jpeg
but then I realized that by accident I printed out a second set of “left boot“ instead of “left forearm”!!! It was around the time I was taking the train back and forth from work...an unfortunate incident with my EZpass account, which is still pending, and I think I left my brain on the train because since then...I have been messing up on all fronts. You name it, I screwed it up. So in the mean time till I get my printer up and running, another personal mishap, I started on the helmet. And we all know how well I do my helmets don’t we!!!
So god, if you are listening, I could really use my brain back at this point. Thank you.
 
UPDATE!!!!!

Between the company I worked for going Chapter 11, and my new profession of handiwork, I’ve not had much time to build and/or post things so ........

My helmet issues still persist......and I remain consistent in my inability to size a helmet correctly:
2B71FDC3-2AFA-4AB0-B995-EC4A8E60FB78.jpeg


8BBAEAC6-A73E-4A5B-98EF-74F311136D0D.jpeg


So I resized and started again:

Turned out to be just about the same size as the other:

E941DA5F-E937-46BA-80C9-D3417BA0EE4B.jpeg


So after kicking myself repeatedly for several days, I found my original file for the whole suit I unfolded. All the pieces I worked on from that fit me perfectly so I just upped it by 20%.......I hope it’s the right size now.....I also printed out my left forearm (hooray!!!!!), but while I was waiting for some warmer weather to work in my workshop (outdoor shed), I assembled my chest piece:

999091A7-C5A0-48A3-A24D-E9749B7108E9.jpeg

6492275A-EF24-45A9-B6D7-1E00C58C8218.jpeg


Does it fit? I haven’t tried it on yet...... I’m scared. I need to put my skin tight under suit top on and try not to tear the whole thing apart while wriggling into it. Once it’s glassed, I’m going to cut it and put hinges at the shoulders. My other issue is how to attach the boosters and that center back piece. Almost done with the left one:

670CE898-F681-4EA2-9FCD-C0294707DA67.jpeg


8F16BFD3-DDCC-4F51-AB50-8CC6790DD0BD.jpeg


I was thinking to leave the back part open, glass the inside and then close it up.....but how to attach it to the back of the chest? I could try an adhesive....... but I’m looking for something a bit more mechanical? Something along the line of nuts and bolts so if I have to repair I can remove and put back w/o issues.....
One thing I can say with certainty, my timetable is spot on.... almost done with all my pieces and I can get started with glassing them up. Going to be a busy summer!

And as a side note, I’ve started updating the cons list finally....... it’s really sad seeing some of the cons closing up shop for good due to the pandemic. They just didn’t have the financial backing to wait till it was safe to allow a large number of people to warrant a restart of their con.....hopefully those that are still on the fence will return soon and we can get back to some semblance of normalcy......in the meantime, be safe, be healthy and build on!
 
Well as you all know, sizing my helmets has been my weakest attribute. I did a great job on my daughter’s and son’s helmets....but sadly that did not spill over onto my own. Till now. Ladies and gentlemen....boys and girls of all ages.....I give you the ARGUS helmet proper

Here is attempt #1...(I tossed out attempts 2&3) and went crazy with the sizing aspects and came up with #4!!!
D062B308-8F72-4534-B0C6-D6337AFFB7D0.jpeg


5B1A8D8D-2B97-4DB2-9BF5-9121CDA8DDC4.jpeg

So just in comparison to the original:

8A0120EC-AC87-4AFB-961C-9384F9C5AB6C.jpeg

Yeah...it’s a baby helmet.....
Now, It’s 20% larger than the original and it’s just about the same dimensions as my Centurion helmet....Thank you Duke!!..... but how does this one fit me?:
04637300-3B38-4580-9B37-69B7E0E5E293.jpeg

Pretty dam good I’d say. I’ve already started working on the exterior attachments but I might switch to foam board for those. If the helmet is going to be anywhere near the weight of the centurions......I’m gonna need to either wear a neck brace or loose some layers of fiberglass and bondo in the hardening to keep the weight down. And yes that is a Mexican flag in the background....my son is exercising his right to enjoy his 1/2 heritage of being 1/2 Mexican for the 5th of May...come July, the American flag comes out and then after that the Israeli flag.
I know what you are all thinking....the math doesn’t add up. 1/2 American 1/2 Mexican where does the Jewish part fit in?....but being Jewish isn’t a nationality....it’s a religion ..you can be American/Mexican but still be 100% Jewish. But I digress...this is the story of the Argus and how well the suit is progressing. On a side note, I have the left forearm printed out but that will have to wait till I get the right booster and central back piece done. I’m almost tempted to do a suit up of what I have so far. In the coming days, I just might do that.
 
I was about to say, do you need me to jump in again!? :)

I'm so happy to see you're latest achievement. I agree with the weight issue too. I was just too afraid of my helmet (and yours) being weak after all that work. Maybe just fiberglass in specific areas, like a skeleton. Create structural integrity without covering the whole thing..

Just remember not to rush the first few thin layers of resin to avoid warping as it hardens.

Looking forward to seeing more.
 
Thanks PerniciousDuke!!! wouldn't have been a Centurion w/o you!!! I was determined to get this one on my own....as I've already started thinking about putting in some ribs on the inside like a skeleton.....I was going to use either flat wooden coffee stirrers or thin bamboo shoots from a Sushi rolling mat i have.......Either one will give me great support in the helmets integrity....I'm just concerned what will happen once resin is introduced to those thin pieces of wood....like curling up when drying. That would pull the helmet in all sorts of directions.....I can't us plastic strips because the resin will melt those.....perhaps thin strips of fiberglass?
 
Thanks PerniciousDuke!!! wouldn't have been a Centurion w/o you!!! I was determined to get this one on my own....as I've already started thinking about putting in some ribs on the inside like a skeleton.....I was going to use either flat wooden coffee stirrers or thin bamboo shoots from a Sushi rolling mat i have.......Either one will give me great support in the helmets integrity....I'm just concerned what will happen once resin is introduced to those thin pieces of wood....like curling up when drying. That would pull the helmet in all sorts of directions.....I can't us plastic strips because the resin will melt those.....perhaps thin strips of fiberglass?

Yeah, I was thinking like 1" strips of fiberglass. I don't think those others would be good substitutes.
 
image.jpg

Ladies and gentlemen, the Argus helmet. 3 layers of exterior resin, 2 interior layers of the same and 1 layer of fiberglass with more to go.
I’m currently on the tail end of having Covid for the first time and boy did it suck. I had gotten the vaccination a while back and glad that I did. I’ve heard that w/o it, having Covid was much worse. But it also gave me time to work on my helmet.
Now I know that the nose section is a little off, I’m going to fix that with some bondo, but over all, it’s coming along nicely. I have decided that the camera attachments will be made with foamboard. Making them with fiberglass and bondo will make the helmet way too heavy. It’s going to be a massive piece in of itself, so any weight I can shed will be a welcome one.

Plenty of room on the inside for all my little plans. Fans, mic, lights, walkie-talkie (to communicate with my (family) unit while out of ear shot at a con) and plenty of padding. I’ll be doing the same insert I did with the Centurion helmet. Very comfortable and adjustable as needed. I’ll be able to wear it for long periods of time w/o issues.

So, now that I’m a full time self employed Handyman, I have time for myself to get things done. My timetable hasn’t changed yet because demand for my services is just increased thank god and I’m doing good for myself and my family. Still have my eye on a 3 D printer….just have to convince the wife that it’s a doable item that the whole family will benefit from….have to put that spin on it.

so the next piece that I though to do will be the boots….I’m going to paper rivet the pieces together before I resin and fiberglass them. I think that will hold better than glueing them after. What is the general consensus of the best way of attaching fiberglass item to foam? I’m going to add at least 1 inch of foam to the soul of the boot. I though perhaps shoe-goo. Any thoughts?
 
Still have my eye on a 3 D printer….just have to convince the wife that it’s a doable item that the whole family will benefit from….have to put that spin on it.

3D printer = more time with the kids

you're welcome. :)


PS: Glad to hear you're recovering okay and excited to hear about your self employment!
 
Last edited:
This build is looking great!!

After seeing how you do your torso, I may have to size mine up for my MK6 build.
 
This build is amazing. Your pep work is so clean!

I haven't tried shoe goo, but the only adhesive I have found that sticks reliably to resin, bondo, or rondo is rondo. I have been using it as an adhesive bc everything else has failed.

Curious if sho goo will work tho, cause rondo is not easy to mix up in small amounts. Is shoe goo the same as E600?
 
Status
Not open for further replies.
Back
Top