1st Build [PIC HEAVY] First Cosplay - ODST - [ongoing]

I’m going to try to get a lot done tomorrow, starting with finishing both thighs’ foam. I’m not sure how to paint it yet (or even if it’ll need paint?) but the construction will be at 100%!

For anyone who’s curious, I connect the outer part with Berg Contact Cement, and tape it down while it cures.

It sticks solidly after 5 minutes, but there’s a noticeable difference the next day when it feels very sturdy.

IMG_8677.jpeg


While I’m working on finishing the main armor for the 31st. I’m printing the backpack, and will hopefully have that ready by then as well. I’m not too worried if I miss the cut off for that piece, but I might just make it in time
 
Last edited:
100% completed one thigh this morning. Working with foam is no joke.

Im very pleased with the end result and will be finishing the second soon.

IMG_8682.jpeg


IMG_8680.jpeg


IMG_8679.jpeg


IMG_8681.jpeg
 
Last edited:
- Both thighs now have foam.
- Shoulders are glued together and ready for fabric
- I put 2mm foam lining the waist armor so it doesn’t make noise when walking and doesn’t scratch up other armor from movement
- lower back foam complete
- groin armor has the same 2mm lining for the same reasons as above
- belt buckle has 10mm pad behind it like the reference images.

The only foam I need to do now is:
- thicker padding inside bracers, calve armor, and helmet
- 2mm lining for shoulders, neck, and kidney armor
- 5mm lining for back armor so I can just don it as one piece instead of some other method
- full-body webbing harness to attach everything to


IMG_8683.jpeg
 
Last edited:
Just got a Cricut machine. (The Joy Xtra, if you’re interested)

Now for some game-accurate decaling (tested on the Serial Number decal on the ODST bracers first)

IMG_8693.jpeg


In-game reference.

image.png


The white circular design and lettering, as well as the white u-turn-like arrow, and the yellow chevron looking decals will all be added for accuracy.

It shouldn’t take more than an hour to print and apply every decal on the full armor; which I’ll do tomorrow
 
Last edited:
ALRIGHT! Got all the decal work for the bracers finished, and half of it for the chest.

I’m going to print the 0+ blood sticker so that it’s color-matched to the specific in-game colour (#98A4AE). White would just be far too bright.

Speaking of which, the chest armor is supposed to have light grey decals, but I could only find white vinyl, so I’m going to dust the decals with some black airbrush to blend them in better.

You’ll also notice that the UNCS eagle isn’t on there yet. This is also grey, and the version I have is not as game-accurate as I’d like, so I’m going to make it from scratch and see if I can do a stencil to air brush it on (might just go with white, though).

I’ll have all decals available to download for free once they are perfectly accurate.

IMG_8715.jpeg


IMG_8716.jpeg


IMG_8717.jpeg


IMG_8718.jpeg
 
Last edited:
Fitting everything together now while learning how to sew. Fortunately, it’s just webbing and figuring out how everything should connect together.

After testing walking with the leg Armor, I realized the shins would give way to gravity, so I connected them to the thigh Armor with two connecting points on either side of the knee. Next is going to be building the belt and a full harness so that the legs can be supported by it, and the rest of the Armor as well.

The forearms are tight enough to stay put with just the foam.

Here’s a test fit. Knee popped off so I’ll need to add more reinforcements such as screws

IMG_8746.jpeg


IMG_8748.jpeg


IMG_8751.jpeg


IMG_8752.jpeg


IMG_8753.jpeg


IMG_8754.jpeg


IMG_8755.jpeg


IMG_8756.jpeg


IMG_8757.jpeg
 
Last edited:
Well! I won't reach my deadline for 100% completion (Halloween 2024), since it's 10 days away. But, I should still have the armor wearable, just not with the detailed undersuit.

Below is a test fitting for the chest armor (without the straps being able to hold themself up) and the mostly-rigged version. I'm going to try to finish either the belt system or shoulders tomorrow.

IMG_8799.jpg


IMG_8810.jpg
 
Last edited:
Alright, shoulders are rigged. Last thing is the core and then everything’s wearable.

I’m still going to work on a proper undersuit after as well, but want it wearable for Halloween

IMG_8840.jpeg


IMG_8837.jpeg


IMG_8841.jpeg
 
Last edited:
First time trying on the full armor!

I’m very happy how it’s turned out, but I did end up reprinting the helmet (which is not complete) to shrink it a few percent, which I feel will provide for a slightly better silhouette.I also need to finish the undersuit, which will add that subtle detail that really makes it look like the suit has stepped right out of the game.

1730166192211.png
 
Last edited:
That colour palette truly looks sick, love your application of weathering too.

Are you planning to do more armour pieces for the boots? Seems like there's pieces missing in the midsection, which might help with how big the toe pieces look off-rip. It was the first thing my eyes went to when viewing the whole image. Might just be the stance/contrasting background exaggerating it too.

Insanely impressive and inspiring work dude.
 
Tha
That colour palette truly looks sick, love your application of weathering too.

Are you planning to do more armour pieces for the boots? Seems like there's pieces missing in the midsection, which might help with how big the toe pieces look off-rip. It was the first thing my eyes went to when viewing the whole image. Might just be the stance/contrasting background exaggerating it too.

Insanely impressive and inspiring work dude.
Thank you, Cyne. Yes, I do want to add foam to the boots so they're filled in. I may need to model my own toecaps and reprint them for my shoes specifically to get the exact scale. They're probably 10% too large, IMO. But if they were filled in it wouldn't look so shocking.

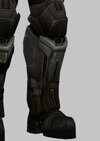
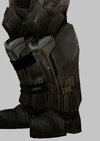
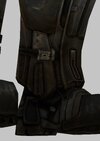
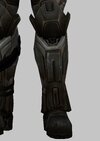
Leg 3Q left.jpgLeg 3Q right.jpgLeg Detail.jpgLeg Front.jpg

The biggest changes I need to make are those boots and the Helmet scale. Right now I have the Helmet scaled to 103% (as opposed to 100%). I believe 95% would be the closest match.

image.png
 
Last edited:
With that clear side-by-side comparison photo you've made, I really do think it's the angle of the camera doing your toe pieces dirty. Once the other boot parts are in, IMO it'll look near perfect.

I'd be curious to see the helmet in that image manually scaled down, just cutting it out in photoshop and shrinking.

Pumped to see your next developments, I'll be sure to have this thread saved for when I inevitably do my own ODST suit, since you've done some sick progress photos and documentation that'll help heaps.
 
Seriously great work, I love the dedication to perfectly matching the camo textures! You probably don't need the under suit for Halloween, but if you feel you must have something you can do what I did and cut the cushion part of an old backpack and hang it from the chest piece with the cushions facing forward. Its quick and cheap, and at least fills in the gaps with something similar to the in-game texture. That said, I don't think you need it, it looks so good right now!
 
Seriously great work, I love the dedication to perfectly matching the camo textures! You probably don't need the under suit for Halloween, but if you feel you must have something you can do what I did and cut the cushion part of an old backpack and hang it from the chest piece with the cushions facing forward. Its quick and cheap, and at least fills in the gaps with something similar to the in-game texture. That said, I don't think you need it, it looks so good right now!
Thank you for the suggestion, Misty.

I've only taken a glance at the in-game undersuit, and if I remember correctly they have some kind of vertical ridge/creases on them that I'd like to replicate. I was planning on reproducing that look with foam and black/grey feux leather for color matching
 
Thank you for the suggestion, Misty.

I've only taken a glance at the in-game undersuit, and if I remember correctly they have some kind of vertical ridge/creases on them that I'd like to replicate. I was planning on reproducing that look with foam and black/grey feux leather for color matching
valkydesigns has a great post about their efforts with this and even a video link on their post. Highly recommend checking it out!
 

Your message may be considered spam for the following reasons:

If you wish to reply despite these issues, check the box below before replying.
Be aware that malicious compliance may result in more severe penalties.
Back
Top