Rakshasa Grenadier

Could you not use a semi-gloss or satin clear coat? That way you could get really good coverage and still have it be non-too-glossy
That's probably a good idea. I just haven't seen semi-gloss at Home Depot. I'll have to try that out!
 
With my flight for C2E2 in 3 days, a lot is happening fast. I glued the top and bottom half of the chest together then welded them. Normally they would flex with strapping, but with the AAP/kard plate they wouldn't be able to flex. With the help of my dad, we sewed straps for the chest and back. I put clips on the underside of the chest so I could slide it over myself, then clip the bottom. We also sewed straps for the shoulders and connected them with a single strap from the back to prevent them from leaning outward.
1000008204.jpg

1000008205.jpg


The straps on the top of the chest are adjustable, but would be covered when i attach the kard plate. I decided to make the kard plate removeable. I used JB weld steelstick to attach neodymium magnets to the chest. I then used clear wrap to place in between the magnets so I could line up the two sides while JB welding them to the kard plate, without JB welding the magnets together.
1000008206.jpg

1000008207.jpg


I was going to use my magnet attachment system from my last grenadier suit build, but I did not have enough magnets or time to order new ones. Instead, I added a piece of 10 lb Velcro to the widest surface area. This allowed the magnets to pull the attachment into the correct position, while the Velcro prevented the attachment from sliding or rotating.


Elastic straps were hot glued onto the forearms. I crosshatched the contact points for the glue on the armor with am xacto knife.
1000008208.jpg


Elastic straps were hot glued into the boot covers then reinforced with shoegoo.
1000008209.jpg

1000008210.jpg
 
For the knees I JB welded buckles onto the back then glued padding on top.
1000008231.jpg

1000008232.jpg


It wasn't mentioned in yesterday's post, but straps were added to the back of the shins. Today padding was added. Here are the boot, shin, and knees together.
1000008237.jpg


For the belt a velcro strap was made to tightly secure the belt above my hip. Loops with clips were attached to the belt. The pouches have loops with buttons and can be clipped into place.
1000008241.jpg


The buckles inside the thighs were JB welded too high, so the clips were attached with copper wire and JB weld to make a shorter connection point.
1000008242.jpg


Padding was added to the thighs, decorative straps were added to the thighs, and electrical tape was added to the boots. Here is my first full suit up for this armor.
1000008240.jpg
 
The armour looks near perfect man, I can't wait to see how you put the cherry on the cake to finish it now!
Are you thinking of adding any accessories? (throwing knives, extra grenades (ignoring your shoulder of course), that sort of thing)
 
The armour looks near perfect man, I can't wait to see how you put the cherry on the cake to finish it now!
Are you thinking of adding any accessories? (throwing knives, extra grenades (ignoring your shoulder of course), that sort of thing)
I still need to figure out which utility and wrist attachment I want to use. I do plan on makining a new Grenadier helmet with a color scheme that matches in game. Eventually I'm going to learn how to sew and make the undersuit, for now I'm using my MK V B undersuit.
 
I'm back from C2E2 and had a blast! Closer to the con weeken, I didn't get to document in as much detail as I wanted to due to the time constraint. While at the con I received some repeated questions on how certain parts of the suit were made. This post will hopefully answer some of those questions!

The first question was "How were the boots strapped together?" The boots had loops for elastic modeled into them. I fed strips of elastic through the loops and hot glued the ends to hold them in place, then coated them in shoe goo to reinforce them.
1000008352.jpg
1000008353.jpg


Unfortunately some of the loops printed too thin and had gaps. This was because I had to scale the boots down to fit my shoe size. To fix that, I closed the gap using a 3d printing pen.
1000008354.jpg


Here is a video of how the boot covers are attached to the boots.


The second question, "How did you make it look like metal?" For this question, the answer is the silver Rub'nBuff. I mentioned using Rub'nBuff earlier in this build thread, but I didn't show how I applied it.

I personally use q-tips to apply my Rub'nBuff. I start by hitting edges and high points then tap to feather and thin out the edges. Some areas get large smudges or get scratches. These areas also get feathered and thinned edges.

This video shows my application process of Rub'nBuff on areas of the boots where the paint was naturally worn down by friction.


Bonus content:
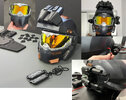
I started printing a new grenadier helmet today. This one won't be directly for this Rakshasa build, but I will use it to test the scale of the one I will use.
1000008362.jpg
 

Attachments

  • 1000008356.mp4
    104.5 MB

Your message may be considered spam for the following reasons:

If you wish to reply despite these issues, check the box below before replying.
Be aware that malicious compliance may result in more severe penalties.
Back
Top