You are using an out of date browser. It may not display this or other websites correctly.
You should upgrade or use an alternative browser.
You should upgrade or use an alternative browser.
Reach Jun Build (Foam/fibreglass + custom undersuit)
- Status
- Not open for further replies.
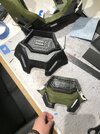
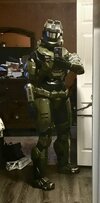
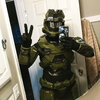
So I increased the size of the stomach plate, honestly I’m so happy with how at looks now. I’ll leave the cod alone haha, maybe give it a paint job.
I also finished the thighs attachment. They just clip to belt and they’re holding up better than expected.
Con is in just over a month so I’ll for sure need to get the helmet padding done.
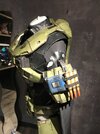
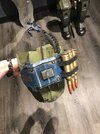
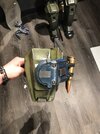
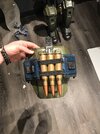
I’ve also started the sniper attachment to my bicep, it’s primarily made of foam and urethane resin cast bullets. It’s significantly heavier despite the bullets having foam cores. Hopefully the snaps on my undersuit are up for the challenge.
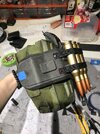
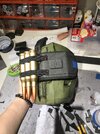
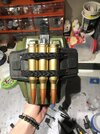
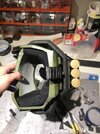
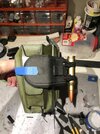
I also finished the thighs attachment. They just clip to belt and they’re holding up better than expected.
Con is in just over a month so I’ll for sure need to get the helmet padding done.


I’ve also started the sniper attachment to my bicep, it’s primarily made of foam and urethane resin cast bullets. It’s significantly heavier despite the bullets having foam cores. Hopefully the snaps on my undersuit are up for the challenge.


Last edited:
Some good progress this weekend. Finished the sniper shoulder. It’s hot glued to the bicep. Hopefully there’s never going to be a reason to remove it.. because it’s not going anywhere.
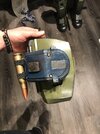
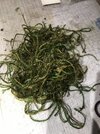
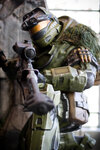
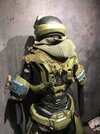
I’ve started the ghillie hood as well, lots of dying things green and yellow. I’ve got the mesh to attach all my grassy twine stuff to and the darker green will be the hood part. Im going for a more realistic ghillie look than is in game, like this figure is the goal.
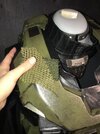
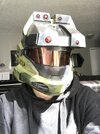
Also, the this is the new window tint color, couldnt find a copper one so bronze it is.


I’ve started the ghillie hood as well, lots of dying things green and yellow. I’ve got the mesh to attach all my grassy twine stuff to and the darker green will be the hood part. Im going for a more realistic ghillie look than is in game, like this figure is the goal.


Also, the this is the new window tint color, couldnt find a copper one so bronze it is.

Last edited:
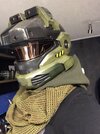
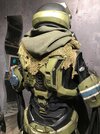
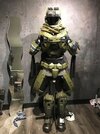
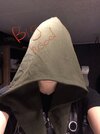
Sniper scarf is complete, it started as a sandy coloured sniper veil off Amazon and I had some convenient dark green fabric in my stash. Dyed both of them more green, distressed the veil and sewed a hood. I might stick some foliage in the veil for a little more texture but for now it’s con ready. I didn’t end up using the twine. Wasn’t going the way I wanted. I think I should’ve used moss actually. Also why does it look so brown in photos. I promise it’s green irl.
I think I’ll smash out the UGPS next. I even made this little animation last Night. Not sure if I’ll be able to use it. But if you’re making a UGPS too feel free to use it. I was thinking if I could get one of my old phones to work I could have it looping as a gif. Or get a raspberry pie and a screen.. dunno..
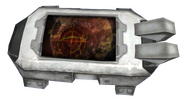
Here’s what the loop looks like:
Full res:


I think I’ll smash out the UGPS next. I even made this little animation last Night. Not sure if I’ll be able to use it. But if you’re making a UGPS too feel free to use it. I was thinking if I could get one of my old phones to work I could have it looping as a gif. Or get a raspberry pie and a screen.. dunno..

Here’s what the loop looks like:
Full res:
I drew em on with a copper sharpie hahahaLooking fantastic! I love the visor, how did you get the lines in it? Did you do it yourself, or did it come that way?
I guess I never said how I made the visor, it’s a sandwich of window tints.
I started with a clear face shield, COVID face shield nothing fancy.
35% car window tint on one side
Bronze residential tint on the other side,
Sharpie lines.
It’s still flexible but Jun visor isn’t very big so it’s strong enough. it also doesn’t have any compound curves either so it was really easy to make in comparison to most other halo visors.
Last edited:
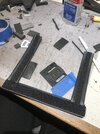
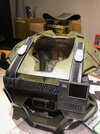
Ok so I lied about doing the UGPS next. I padded my helmet properly so it’s not wobbly, and I finished the tac/patrol chest.
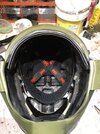
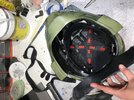
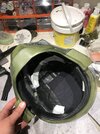
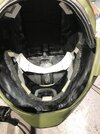
To pad the helmet I chopped up a cheap pin lock hard hat to get the suspension clips out. Used epoxy putty to attach the clips inside my helmet. Suspension will hopefully allow lots of air flow and maximum comfort.
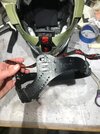
The tac/patrol chest is just vinyl and webbing sewn together with 2mm foam buckle and iPod lookin thing. It attaches with wire through holes I sneakily drilled in the sides of the armor. I want the whole thing removable without leaving a mess. The top buckles were 3D printed ages ago by TurboCharizard back before I had my own printers to work with. I’m amazed I never lost them. Anyway they’ve got magnets to hold them down to the armor. They cover my UNSC logo im so sad.
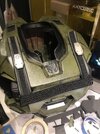
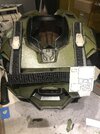
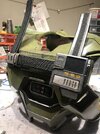
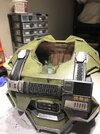
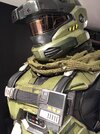
To pad the helmet I chopped up a cheap pin lock hard hat to get the suspension clips out. Used epoxy putty to attach the clips inside my helmet. Suspension will hopefully allow lots of air flow and maximum comfort.


The tac/patrol chest is just vinyl and webbing sewn together with 2mm foam buckle and iPod lookin thing. It attaches with wire through holes I sneakily drilled in the sides of the armor. I want the whole thing removable without leaving a mess. The top buckles were 3D printed ages ago by TurboCharizard back before I had my own printers to work with. I’m amazed I never lost them. Anyway they’ve got magnets to hold them down to the armor. They cover my UNSC logo im so sad.


- Member DIN
- S226
Im late to commenting on this thread but ahhh this looks so good! A long time in the making and it was absolutely worth it!
I cannot say enough about this build, its gorgeous. Makes me excited but intimidated to finish mine!
So I do have a few questions for you... Because everything is stunning
-Can we please get a photo of your entire build from the side profile because its gorgeous?
-how did you size your codpeice while keeping in mind how much space you needed for the "extra padding" on the back? I am thinking about doing something like this as **MY** chest looks way to big and ill fitted from the side without it.
Last edited:
Thanks! KaeSpoon, i dont have a side view of me wearing it just yet but i took some pics on the dummy.
Mathematically, you’ll need to add 2cm (or foam thickness x2) to the inside diameter of the belt. Assuming your belt fits you.
Since you already have your belt (i think) The easy way is to use the side back piece to make the belt a little longer. Same deal like 2cm longer or whatever seems to fit. My belt is mostly foam so it’s pretty forgiving.
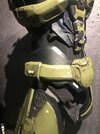 Get a rough cut floor mat or whatever you’re using and like tape it around you. Then put your belt on over it and see how much length you need to add. If it’s more than 4 cm you might wanna distribute it more evenly around the belt but if it’s pretty minor use the side back pieces. They’re the easiest shape to remake.
Here’s some turnaround pics on the dummy, the last one is without the pad you can see the gap there.
I think if you belt fits you just above your hips adding padding will make it sit a little higher closer to your waist. I use mine to hold up my thighs too so they end up pulling is down again.
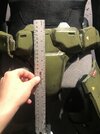
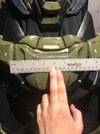
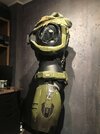
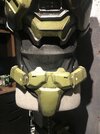
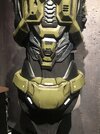
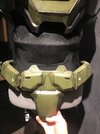
Ya i dunno how helpful that was… tbh I didn’t plan any of this… I made the belt, then the pad and hoped it still fit me..
Mathematically, you’ll need to add 2cm (or foam thickness x2) to the inside diameter of the belt. Assuming your belt fits you.
Since you already have your belt (i think) The easy way is to use the side back piece to make the belt a little longer. Same deal like 2cm longer or whatever seems to fit. My belt is mostly foam so it’s pretty forgiving.
 Get a rough cut floor mat or whatever you’re using and like tape it around you. Then put your belt on over it and see how much length you need to add. If it’s more than 4 cm you might wanna distribute it more evenly around the belt but if it’s pretty minor use the side back pieces. They’re the easiest shape to remake.
Here’s some turnaround pics on the dummy, the last one is without the pad you can see the gap there.
I think if you belt fits you just above your hips adding padding will make it sit a little higher closer to your waist. I use mine to hold up my thighs too so they end up pulling is down again.


Ya i dunno how helpful that was… tbh I didn’t plan any of this… I made the belt, then the pad and hoped it still fit me..
- Member DIN
- S226
Oh wow, thank you so much this is actually very helpful! The belt I made awhile ago has been scrapped and its getting resized and redone eventually now that I finally got some thighs to fit!
I honestly cannot praise this build enough, its so stunning it brings tears to my eyes! We need photos together someday or so help me...
I honestly cannot praise this build enough, its so stunning it brings tears to my eyes! We need photos together someday or so help me...
Oh ya, I forgot to post some cool pics here, instagrams been taking over my attention. I posted it for 405th day.

It’s not done yet tho
I added the little elbow pads and have been working on fans and guns lately.
It’s not done yet tho
I added the little elbow pads and have been working on fans and guns lately.
Last edited:
It’s mostly not foam, everyone thinks it’s foam but it’s mostly fibreglass covered in 2mm foam. I am not a very good foamsmith. Only the thighs, the sides of the belt and sniper shoulder are completely foam.I still can't get over that you crafted this from foam. You have done an absolutely incredible job!
That's maybe even more impressiveIt’s mostly not foam, everyone thinks it’s foam but it’s mostly fibreglass covered in 2mm foam. I am not a very good foamsmith. Only the thighs, the sides of the belt and sniper shoulder are completely foam.
K so I’ve been working on converting my destiny LDR into a passable SRS-99 because I won’t have enough time to finish the actual sniper rifle before the con. So this a temp gun.
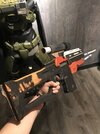
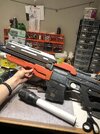
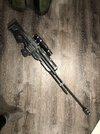
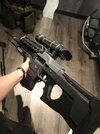
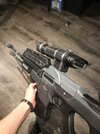
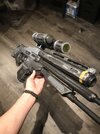
I’ve also been working on the fans, I don’t have all the parts I need but it’ll be 5v 3D printer fans mounted to the top of the helmet.
I don’t feel like they blow enough air so i might overpower them with a 12v PS and a dial.. any objections?
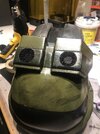
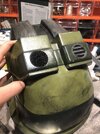
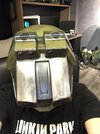


I’ve also been working on the fans, I don’t have all the parts I need but it’ll be 5v 3D printer fans mounted to the top of the helmet.
I don’t feel like they blow enough air so i might overpower them with a 12v PS and a dial.. any objections?


We have con pics, after all this time
Some of my favorites:
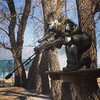

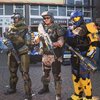
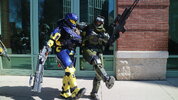
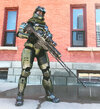
We also found our mighty leader FANGS
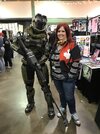
So turns out i can kneel and lay down and not break anything! All good tests. Im an agile little trucker woohoo! And the fans worked great!
Theres another con in a month that ill hopefully have a pouch ready for ahahaaa i would've be lost without my handlers who held everything i needed.
Ok back to building..
Some of my favorites:


We also found our mighty leader FANGS

So turns out i can kneel and lay down and not break anything! All good tests. Im an agile little trucker woohoo! And the fans worked great!
Theres another con in a month that ill hopefully have a pouch ready for ahahaaa i would've be lost without my handlers who held everything i needed.
Ok back to building..
- Member DIN
- S119
It looks so good!! Looks like you all had a real fun time!We have con pics, after all this time
Some of my favorites:
View attachment 317196View attachment 317197View attachment 317198View attachment 317199View attachment 317204
We also found our mighty leader FANGS
View attachment 317205
So turns out i can kneel and lay down and not break anything! All good tests. Im an agile little trucker woohoo! And the fans worked great!
Theres another con in a month that ill hopefully have a pouch ready for ahahaaa i would've be lost without my handlers who held everything i needed.
Ok back to building..
- Status
- Not open for further replies.
Similar threads
- Replies
- 4
- Views
- 313
- Replies
- 20
- Views
- 945
- Replies
- 7
- Views
- 594
