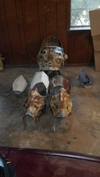
Starcraft Marine

Status
Not open for further replies.
Looking awesome cant wait to see this finished. As for the shaping the rounded spots you can try sanding the area to give the bondo an extra little bit to hold onto, also I wouldnt use rondo cause it might be to runny just strait bondo and as everyone will say apply a little bit then sand and apply some more. As for your fingers for the armor you could go the route of the robot hand toys from back in the day where ya have the things you put your fingers through to make the robot fingers function. I don't think your thumb would function but least you could set it up to be able to grip a gun. Heres a link of one im kinda talking about.
As for the gun if you plan on making one I have a pdf file of the gun the marines use from starcraft 2 its all colored and theres alot of small pieces but as far as I know its pretty close to scale if you want it shoot me a pm and ill mail you the files. It also comes with a stand to display the gun, witch is pretty cool. Here's a link of some guy that completed it so you can see the detail and scale. It measures H253mm/D93mm/L735mm I am not sure if you would need to resize it to fit your armor's hand, but you can probably go to a printing shop like staples or office depo and have them print it out on poster board to make it a bit larger. looking at it again makes me want to try and make the thing but it is far more complicated than my sniper I am currently working on...

Looks like the link that shows the gun also has the files for it so there ya go! :D im currently printing out the pages now, im such a glutton for punishment on building complicated weapons /sigh
 
Hi all,

I spent a lot of time this last weekend working on the project, and I made important progress. Not a lot of progress, mind you, but important nonetheless.

Blorin, it looks like great minds think alike. I had the same idea as you. A while back I made a proof of concept out of K'Nex of a glove that I could wear and move the fingers via a system of pulleys and strings. I spent the weekend working on one made of a wood skeleton. Sadly, it looks like I may have to scrap most of my progress that I made. This is what I meant by making important progress. I learned a lot about how I could improve on my method when finally making it. To show you the glove in action, here's a video.


I'm almost ashamed to show you this video because of the terrible quality, but it is what it is. Only one finger was hooked up which is why the rest look so gangly. It's in a very rough stage, there's a lot of work to be done on it. Anyways, here's some shots of the bigger pieces on me, to give you a sense of scale:

2013-11-18_20-58-06_601_zps6e4d1796.jpg

2013-11-18_21-02-50_968_zps57383884.jpg


As always, thanks for reading, and I really appreciate your input.

-Java

2013-11-18_20-58-06_601_zps6e4d1796.jpg


2013-11-18_21-02-50_968_zps57383884.jpg
 
Last edited by a moderator:
Loved playing Starcraft so I'm gonna be following this thread, and can't wait to see the finished project. So far its looking good.
 
Just another routine update. Got a lot of fiberglassing done this weekend. I 'discovered' a new method of supporting the model while I fiberglass it:

2013-11-23_15-58-45_919_zps4d0b2b08.jpg


It works really well, especially considering the size of the pieces. Here's most of the pieces I have so far:

2013-11-24_15-04-58_99_zps31efa022.jpg


The biggest concern right now is the body filler stage. It would take a huge amount of bondo to cover each of these pieces, and the result would be ridiculously heavy. Does anyone have any recommendations for an alternative method? Right now I am looking into using some mix of rondo with a covering of thick primer before putting on the final coat of paint. Let me know what you think.

-Java
 

Attachments

  • 2013-11-23_15-58-45_919_zps4d0b2b08.jpg
    2013-11-23_15-58-45_919_zps4d0b2b08.jpg
    45.6 KB · Views: 121
  • 2013-11-24_15-04-58_99_zps31efa022.jpg
    2013-11-24_15-04-58_99_zps31efa022.jpg
    57.2 KB · Views: 125
The biggest concern right now is the body filler stage. It would take a huge amount of bondo to cover each of these pieces, and the result would be ridiculously heavy. Does anyone have any recommendations for an alternative method? Right now I am looking into using some mix of rondo with a covering of thick primer before putting on the final coat of paint. Let me know what you think.

-Java

Sadly the only thing I can think of to not make the armor so heavy is to make molds of each piece after you have bondo'd and sanded each piece and cast them out of fiberglass, or plastic. The video looked great its exactly what i was thinking. One thing you could use to make the hand out of is an Erector set useing its metal pieces and such to make the skeleton. As far as I remember they were fairly sturdy for constructing stuff out of. i tried looking up a video of one and the only one i found was kinda crappy but shows a proof of concept that it could be done
Here's the video you see the hand about 3 mins in and the guy spends most of the video eating cake heh.
 
Hi everybody! It has been so long since my last post, but I haven't been idle. This post is more of a mishmash demonstration of my progress, showing what I've been working on. Hopefully updates will come more regularly in the future.

First up:

2014-01-04_14-31-35_305_zps3ce56c6d.jpg


Just one of the shoulder pieces.

2014-01-04_13-38-44_532_zps14cb8f6f.jpg


This is a new technique I'm investigating. More on it later.

2014-01-06_19-12-52_548_zps5667d40f.jpg


The result of the experiment, sort of. The affected area is on the left piece.

2014-01-19_10-51-36_977-1_zps92a655f2.jpg


A random picture I threw in. This is a Dayz Hero skin I threw together with stuff I already had.

2014-01-20_20-20-33_836_zpsf0135176.jpg


This is another piece I made using the aforementioned technique which I will explain here. To be honest, the pieces aren't quite coming together like they are in my head. Essentially I got lazy in the pep stage and I'm facing the consequences of that now. The armor should be smooth, flowing, and organic, but there's pretty noticeable angles here and there. To try and avoid that I decided to experiment with spackle. It's really easy to apply, and I bought a brand that changes from pink to white when it is dry. Once dry, it's easy to sand, and then a layer of rondo can be applied on top later. I made a pretty runny mix of rondo and applied it to the outside with a brush. It worked so well in the small area experiment (shown in pictures 2 and 3) that I will use it on the rest of the suit. Again, it's not a best case scenario, and I wouldn't have had to do it if I had done the pepping correctly in the first place. By the end of the week my order of clips and straps should come in so I can begin roughing out how the suit will hang. But more on that later.

-Java
 

Attachments

  • 2014-01-20_20-20-33_836_zpsf0135176.jpg
    2014-01-20_20-20-33_836_zpsf0135176.jpg
    71.1 KB · Views: 116
  • 2014-01-19_10-51-36_977-1_zps92a655f2.jpg
    2014-01-19_10-51-36_977-1_zps92a655f2.jpg
    9.5 KB · Views: 100
  • 2014-01-06_19-12-52_548_zps5667d40f.jpg
    2014-01-06_19-12-52_548_zps5667d40f.jpg
    42.6 KB · Views: 99
  • 2014-01-04_13-38-44_532_zps14cb8f6f.jpg
    2014-01-04_13-38-44_532_zps14cb8f6f.jpg
    40.8 KB · Views: 96
  • 2014-01-04_14-31-35_305_zps3ce56c6d.jpg
    2014-01-04_14-31-35_305_zps3ce56c6d.jpg
    67.2 KB · Views: 100
  • 2014-01-04_14-31-35_305_zps3ce56c6d.jpg
    2014-01-04_14-31-35_305_zps3ce56c6d.jpg
    67.2 KB · Views: 98
I too learned the hard way about fixing problems in the pep stage first. Kind of like a rite of passage in armor building I guess.
 
I too learned the hard way about fixing problems in the pep stage first. Kind of like a rite of passage in armor building I guess.

Me too :p I now religiously tell everyone on here that pepping is THE most important stage, because it's the hardest to go back and correct later on if you did something wrong!
 
@ISU_DPS - Thanks so much, that's really encouraging to hear that. I was pretty frustrated with myself earlier, but I've pretty much come to grips with the fact that it won't be what I envisioned it to be. Comments like yours really help keep me going. It won't look bad, and I'm hoping to be able to hide some of the blemishes with details and such.

@glasscutter and JayOneSeven - Well I've certainly learned my lesson. This is my first build after all, so in the future I'll be much more careful. In fact, I still have a couple more pieces to pep, and I'll definitely do them properly. It's the two feet, and lots of detail will be required there.

And now for the update. The rondo-on-the-outside technique is going well, and I think it will really help reduce the amount of sanding I will have to do. Here's a few pictures, before sanding.

2014-01-25_17-46-37_95_zpsedc298f6.jpg


The cod piece. I'll put at least one more coat of straight body filler on the face, as it will be quite visible.

2014-01-25_17-47-26_859_zps59bdcf33.jpg


2014-01-25_17-47-43_41_zpsfa5d28a9.jpg


The two calves. I was the most worried about these pieces, but they are turning out alright I think.

2014-01-25_19-54-23_29_zpsea7c12a7.jpg


An idea struck me the other day for the hands. Instead of painstakingly making each finger piece one by one I thought I could steal an idea that they used on Mythbusters one time. They needed to make a robotic hand, and they used roller chain. By welding certain links and leaving others unwelded they could easily make joints of different lengths. This is a cheap bicycle chain that I picked up and took links off to make the fingers. They should be smaller, more durable, easier to assemble, and in fact lighter than the wood ones I made earlier.

Today in the mail I got my package of straps and clips. Pretty soon I should have a plan roughed out on how I will conjoin the pieces.

2014-01-25_17-48-37_290_zps321f9095.jpg


That's all for now. I look forward to hearing what you guys have to say.

-Java
 

Attachments

  • 2014-01-25_17-46-37_95_zpsedc298f6.jpg
    2014-01-25_17-46-37_95_zpsedc298f6.jpg
    66.4 KB · Views: 97
  • 2014-01-25_17-47-26_859_zps59bdcf33.jpg
    2014-01-25_17-47-26_859_zps59bdcf33.jpg
    34.1 KB · Views: 93
  • 2014-01-25_17-47-43_41_zpsfa5d28a9.jpg
    2014-01-25_17-47-43_41_zpsfa5d28a9.jpg
    47.3 KB · Views: 112
  • 2014-01-25_19-54-23_29_zpsea7c12a7.jpg
    2014-01-25_19-54-23_29_zpsea7c12a7.jpg
    68.9 KB · Views: 88
  • 2014-01-25_17-48-37_290_zps321f9095.jpg
    2014-01-25_17-48-37_290_zps321f9095.jpg
    70.3 KB · Views: 102
@glasscutter and JayOneSeven - Well I've certainly learned my lesson. This is my first build after all, so in the future I'll be much more careful. In fact, I still have a couple more pieces to pep, and I'll definitely do them properly. It's the two feet, and lots of detail will be required there.

-Java

Yeah it really comes with practice. I'm still noticing flaws on my helmet and it's like the 8th full item I've made in pep so far. That being said, it's a thousand times better than my first!! Practice definitely makes perfect with pepakura :]
The feet are looking great. What's the bike chain for?
 
@JayOneSeven

The bike chain will eventually become the fingers of the hand. Here's a photo of all the fingers for one hand completed:
2014-01-26_09-09-10_314_zpse30a0a93.jpg


Earlier I had a picture of a wooden mockup that I had made, and it was pretty bad. They were clunky, heavy, didn't turn well, and actually weren't going to work like I had planned ultimately. I learned a lot from making that proof of concept though, so this next one should be even better. I got the idea from using chain as fingers from Mythbusters. I may have some update on the hand today, or else on the strapping system.

I did have a question though. It has become apparent to me that I will have to split the chest piece into two parts. I am scared to death of cutting it, though. Does anyone have any tips on how to do it? Should I rondo the whole thing first and then cut it, or should I do that after? Thanks in advance.

-Java
 

Attachments

  • 2014-01-26_09-09-10_314_zpse30a0a93.jpg
    2014-01-26_09-09-10_314_zpse30a0a93.jpg
    70.7 KB · Views: 101
Hi everyone! As promised, here is my update for the day. I spent about 4 hours today sewing together straps for the suit. The idea, pretty much, is that the legs will basically be a giant pair of pants that I will wear that has suspenders up over my shoulders to hold them up, because they are heavy. Without further ado, here's some photos. I apologize for the horrendous quality of the photos but I am really tired and I don't want to redo them.

2014-01-26_20-19-40_305_zpsf1f8b480.jpg


2014-01-26_20-18-09_14_zpsb8504167.jpg


2014-01-26_20-20-05_257_zps1276a9e3.jpg


I am actually pretty proud of the straps that I came up with. I hand sewed them one by one, and they are quite strong. Essentially, I wear the codpiece and butt piece like a belt, and the thighs hang off the belt, and the calves hang off the thighs.

2014-01-26_20-21-22_689_zpsf367c1ef.jpg


2014-01-26_20-21-40_549_zps6e9346b0.jpg


2014-01-26_20-23-59_401_zps9a0f3519.jpg


2014-01-26_20-23-41_949_zpsf54e9794.jpg


2014-01-26_20-22-26_721_zps1a00e045.jpg


Well, I've had a long day. I'm off to bed now so I can be fresh for 'real' work tomorrow. Let me know what you think!

-Java
 

Attachments

  • 2014-01-26_20-19-40_305_zpsf1f8b480.jpg
    2014-01-26_20-19-40_305_zpsf1f8b480.jpg
    71.8 KB · Views: 90
  • 2014-01-26_20-18-09_14_zpsb8504167.jpg
    2014-01-26_20-18-09_14_zpsb8504167.jpg
    69.8 KB · Views: 102
  • 2014-01-26_20-21-22_689_zpsf367c1ef.jpg
    2014-01-26_20-21-22_689_zpsf367c1ef.jpg
    105.2 KB · Views: 96
  • 2014-01-26_20-20-05_257_zps1276a9e3.jpg
    2014-01-26_20-20-05_257_zps1276a9e3.jpg
    74 KB · Views: 102
  • 2014-01-26_20-21-40_549_zps6e9346b0.jpg
    2014-01-26_20-21-40_549_zps6e9346b0.jpg
    67.8 KB · Views: 102
  • 2014-01-26_20-23-59_401_zps9a0f3519.jpg
    2014-01-26_20-23-59_401_zps9a0f3519.jpg
    40.6 KB · Views: 111
  • 2014-01-26_20-23-41_949_zpsf54e9794.jpg
    2014-01-26_20-23-41_949_zpsf54e9794.jpg
    59.3 KB · Views: 96
  • 2014-01-26_20-22-26_721_zps1a00e045.jpg
    2014-01-26_20-22-26_721_zps1a00e045.jpg
    76.2 KB · Views: 96
Real quick update, I finished the straps on the other leg. I feel ridiculous wearing these, but in a good way!

2014-01-29_18-26-47_898_zps6cdeb091.jpg


2014-01-29_18-27-45_261_zps247766bd.jpg


As always, I welcome any comments you have.

-Java
 

Attachments

  • 2014-01-29_18-26-47_898_zps6cdeb091.jpg
    2014-01-29_18-26-47_898_zps6cdeb091.jpg
    67.2 KB · Views: 107
Even though I've never played StarCraft [It's still on my list of games I need to play] I'm digging this suit. One of the best things is that even though it's huge, you find a way to pull it off and look natural! Keep up the good work!
 
Hey everyone, another update. A lot of the work I did today didn't produce a lot of visual results. But I wanted to share a short tutorial for a method that I developed that might be helpful. I wanted to put a recessed detail on the front of the chest. I made a cross out of tongue depressors and fixed it to the front with a screw. Then I layered body filler around the whole area so that it was about level with the side of the wood.

2014-02-01_16-40-53_522_zps7f5ee4d2.jpg


After the body filler dried it was only a matter of pulling away the wood and the detail was left behind.

2014-02-01_21-02-49_248_zpsaf7be4f8.jpg


2014-02-01_21-06-47_719_zps645fe2a5.jpg


There's some damage at the edges of the detail. This was mainly because I didn't let every layer of body filler dry completely before I put another layer on it. Also, I damaged the bottom of the detail with my tools when I was pulling the wood away. I'm confident that I can repair those areas with some more body filler. All in all I'm pretty happy with how it came out.

About the plastic cup and can goofiness, I'm trying to maintain a perfectly circular hole at that spot while I layer body filler around it. I'll have to figure out some way to remove them without damaging the area.

As always, I appreciate any comment you have.

-Java
 

Attachments

  • 2014-02-01_16-40-53_522_zps7f5ee4d2.jpg
    2014-02-01_16-40-53_522_zps7f5ee4d2.jpg
    46.9 KB · Views: 121
  • 2014-02-01_21-02-49_248_zpsaf7be4f8.jpg
    2014-02-01_21-02-49_248_zpsaf7be4f8.jpg
    65.6 KB · Views: 94
  • 2014-02-01_21-06-47_719_zps645fe2a5.jpg
    2014-02-01_21-06-47_719_zps645fe2a5.jpg
    68.9 KB · Views: 100
Status
Not open for further replies.
Back
Top