antrodite
Jr Member
Hey, everyone, it’s Antro!! I’m almost halfway through my first ever foam build, so I figured now would be the time to finally make a thread!
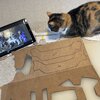
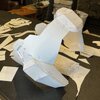
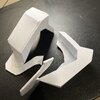
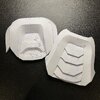
This project started off horrendously slow with foam way too thick to deal with, confusing patterns, messed up angles, and screwed up scales. After getting some fresh patterns from BroNavarro, I started going to town. As a fellow “no pictures in brain” person, cutting out everything on cardboard first and jankily hot gluing it together helped me with visualizing angles so much. It saved me a ton of time and materials since I’m not having to redo foam pieces or trying to add shims behind seams.
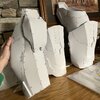
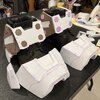
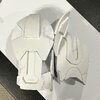
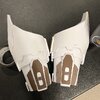
Currently I have both shins, thighs, and boots done. I’ll be going back through everything before I plasti-dip to add details, but I’m honestly proud of how quick I was able to do those! I set myself a deadline for fanexpo cleveland on april 12th… we’ll be down to the wire, that’s for sure. As in, the paint is drying in my truck bed on the way there lol.
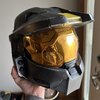
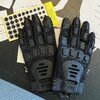
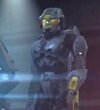
Anyway! Enjoy the progress update along with my pride and joy, a helmet from Branfuhr Studios. All hail.
This project started off horrendously slow with foam way too thick to deal with, confusing patterns, messed up angles, and screwed up scales. After getting some fresh patterns from BroNavarro, I started going to town. As a fellow “no pictures in brain” person, cutting out everything on cardboard first and jankily hot gluing it together helped me with visualizing angles so much. It saved me a ton of time and materials since I’m not having to redo foam pieces or trying to add shims behind seams.
Currently I have both shins, thighs, and boots done. I’ll be going back through everything before I plasti-dip to add details, but I’m honestly proud of how quick I was able to do those! I set myself a deadline for fanexpo cleveland on april 12th… we’ll be down to the wire, that’s for sure. As in, the paint is drying in my truck bed on the way there lol.
Anyway! Enjoy the progress update along with my pride and joy, a helmet from Branfuhr Studios. All hail.