Constructing marine armor

Status
Not open for further replies.
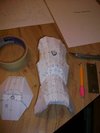
Since the weather is cold and it may be until late April that I begin fiber glassing, I am testing my skills on the smallest piece of the marine armor. The elbow pad. As I cut, I noticed my aim was a bit off but thankfully over the line. Does cutting the pieces truly have to be extremely precise or it doesn't matter since it will be fiber glasses, bondoes and painted and sanded?
 
testing_skills_by_gyro5-d37ad4y.jpg


Here are my first two tests of the elbows. I know I need to improve my skills but look at it this way. I do not have the peparaka software to guide me. So not to shabby going blind so to say.
 

Attachments

  • testing_skills_by_gyro5-d37ad4y.jpg
    testing_skills_by_gyro5-d37ad4y.jpg
    79.2 KB · Views: 132
Hence why these are tests. On top of that, I did not appropriately folded a piece nor allowed the glue to dry properly. So on #3, it shall be perfect. Shall be.
 
testing_skills_2_by_gyro5-d37czsk.jpg

It took me a while but I am getting the hang of it. I found out the key was building and folding the small pieces first. The first three were generally big first but those were the outside pieces. The smaller ones made up "the core" so the fourth is to my satisfaction. Now the next step is the proper paper.
After looking for something unrelated, I stumbled upon a near full can of fiberglass resin bought for a model railroad project years ago. All I need now is a respirator, hardener and warm weather. The single most expensive item has been found. Things are looking up. Next update: who knows?
 

Attachments

  • testing_skills_2_by_gyro5-d37czsk.jpg
    testing_skills_2_by_gyro5-d37czsk.jpg
    105.1 KB · Views: 131
Nice progress my friend. I think you should do the resin work outside. Most resin has to be used in temps over 60, so this might not be the best time of year... But you still have plenty of Pep work to do. Are you happy with the size?
 
Yes I am. They seem to fit my elbow well but I plan on using existing elbow pads. Easier to wear. The question now is what type? Or shall I make my own strap and padding?
 
I have received from Mr. Jeff the last file and I am nearly 100% ready to build. But now I have t build two of them. One for me and one for my brother. Thankfully he is nearly the same size as me just a bit taller. i reviewed as much material as possible and have a game plan for how to go about this. I even started a journal on my progress as well as tips on the do's and don'ts. I am unsure still on how to go about the small elbow pads. Maybe padding and straps but I don't know. I am considering weaponry now but there seems to be a lot in that field. I need time to figure out which ones and to read up on weaponry since they are different than armor.
 
When it comes time of folding, how do you guys go about it? I take a very sharp x-acto and cut along the lines to help fold it.
 
When it comes time of folding, how do you guys go about it? I take a very sharp x-acto and cut along the lines to help fold it.

I use the screwdriver of my Swiss Knife and a metal ruler to indent all fold lines really deeply before I cut the pieces out (careful with tiny flaps, they tend to fall off afterwards). The pieces will almost fold themselves after that. However, don't twist them by 180° and especially don't crease them, just give them a slight bend in the right direction and increase the angle if they don't fit together while glueing.
 
After a bit of reading on the site, I have came up with many solutions to my problems.
1: The elbow and shoulder pads will not be fixed to existing pads but rather will be padded with a dark color foam (if such a thing exists) or have the foam covered in a dark fabric that is thin and in between the elbow and shoulder pads will be a velcro strap and a loop so it can fit snugly to the arms/ elbow. The same will go for the knees and shins.
2: I will follow the advice of the forums to use the not so sharp side of an x-acto and a metal ruler to help score the folds. This should solve the gad headache as seen on my tests.
3: Since the insides will be padded, I think I can get away with normal but military colored clothing.
4: I found my black boots that still fit me. All though they are not military style, I will still fabricate armor for them. Design to follow.
5: I have found on ebay flat top rimmed shooting glasses. This will be great for my helmet as all I have to do is cut the arms off and glue the rest onto the helmet.
6: As for the mouth piece, I always have one for my cell phone and always wear it when I'm out. Plus, I used medical tape to reconnect some split wires so points for battlefield repairs. Before anyone freaks out, my dad is an automotive mechanic and model railroader, we do this all the time with various other tapes; just the medical was closest to me at the time.
7: I have not decided if I shall have a new, straight from the factory look or a rough, battle worn look to my armor. I'll see after the first coat of bondo goes on.
Well, that's that guys and gals. I'll update you all if anything significant happens. Oh yeah, before I go. My printer printed on the 65 lb paper blue, not black. Could be an ink problem or something else.
 
This just in. I'm getting my cardstock tonight. Ink may be an issue since the cartridge is getting old. Will do another practice using the elbows tonight and I'll report again tomorrow.
 
UPDATE!!!!
Yeah. I've been slightly busy.
halo_3_unsc_armor_build_1_by_gyro5-d39s14n.jpg

A straight piece of metal, x-acto and a pencil. My tools to mark, score to fold and cut.
halo_3_unsc_armor_build_2_by_gyro5-d39s1as.jpg

A closer view of my marking. It helps SO MUCH!
halo_3_unsc_armor_build_3_by_gyro5-d39s1it.jpg

I love the punch out look. Love x-acto's.
halo_3_unsc_armor_build_4_by_gyro5-d39s1m2.jpg

Ah, the elbow pads. As noted, the left one is my final test and the other two are the official builds.
halo_3_unsc_armor_build_5_by_gyro5-d39s1pp.jpg

These things are a lot of work. Don't expect any updates on the weekends. And now a few tips.
I noticed some of the lines are not the same from one part to the next so a reference pic is so helpful.

And now, an update. My dad found a WHOLE package of fiberglass cloth. I have my paper, my fiberglass cloth and my fiberglass resin. All I need now is some hardener and a good sunny, warm day. That's it for now my friends and followers. God bless.
 

Attachments

  • halo_3_unsc_armor_build_1_by_gyro5-d39s14n.jpg
    halo_3_unsc_armor_build_1_by_gyro5-d39s14n.jpg
    122.1 KB · Views: 110
  • halo_3_unsc_armor_build_2_by_gyro5-d39s1as.jpg
    halo_3_unsc_armor_build_2_by_gyro5-d39s1as.jpg
    115.8 KB · Views: 96
  • halo_3_unsc_armor_build_3_by_gyro5-d39s1it.jpg
    halo_3_unsc_armor_build_3_by_gyro5-d39s1it.jpg
    90.8 KB · Views: 102
  • halo_3_unsc_armor_build_4_by_gyro5-d39s1m2.jpg
    halo_3_unsc_armor_build_4_by_gyro5-d39s1m2.jpg
    92.2 KB · Views: 100
  • halo_3_unsc_armor_build_5_by_gyro5-d39s1pp.jpg
    halo_3_unsc_armor_build_5_by_gyro5-d39s1pp.jpg
    95.4 KB · Views: 95
You can also change the pattern or colour of valley and mountain fold lines in Pepakura Designer. I am print the lines in blue and red, for example.

You may also want to remove the personal information from your photos. PM me if you don't see it.
 
Time to think ahead again. How do you fellow 405thers attach your shoulder pads to yourself? I have seen a SPartan use some sort of a strap but my marine shoulder apds are smaller and more open.
Plus, when it comes time of applying the resin and sanding, do the straight lines of the paper have to be there or can it be curved?
Also, a hidden problem for all of us from beginers to pros. How or where do you store your armor costumes?
 
Ten hours of work as of Thursday, February 17, 2011. Two pairs of elbow pads and two pairs of shin guards.
halo_3_unsc_armor_build_6_by_gyro5-d39ujgz.jpg

And as of today. Friday, February 18, 2011. 13.5 hours of work and a lot more to go. Tomorrow is saturday and I'll be on break or continue a bit on shoulder pad left which I have printed as well as right knee armor.
halo_3_unsc_armor_build_7_by_gyro5-d39ujln.jpg


Stay tuned 405th fans for updates will continue monday, February 21, 2011.
 

Attachments

  • halo_3_unsc_armor_build_6_by_gyro5-d39ujgz.jpg
    halo_3_unsc_armor_build_6_by_gyro5-d39ujgz.jpg
    103 KB · Views: 103
  • halo_3_unsc_armor_build_7_by_gyro5-d39ujln.jpg
    halo_3_unsc_armor_build_7_by_gyro5-d39ujln.jpg
    119.3 KB · Views: 98
Oops. It's Tuesday, February 22, 2011. Sorry for the delay but building the knee armor or greaves was a pain. And next is the torso armor. Joy. Well, here is the result of the past three days.
halo_3_unsc_armor_build_8_by_gyro5-d3a4dca.jpg

Yes. That is me. The evil genius at work. I may be wearing the shoulder pads or pauldrons wrong. This was taken on saturday.
halo_3_unsc_armor_build_9_by_gyro5-d3a4ddu.jpg

More images. I wish I could change the title. Oh well. This is the result of Sunday and Monday.
halo_3_unsc_armor_build_10_by_gyro5-d3a4dfk.jpg

And the result of one week worth's of cutting, folding, gluing and test wearing. I knew this would not be easy but man, it's a bit harder than expected.

As for the other pieces, I will continue with my daily reporting but not today. I'm going on break to prepare for the largest build yet.
 

Attachments

  • halo_3_unsc_armor_build_9_by_gyro5-d3a4ddu.jpg
    halo_3_unsc_armor_build_9_by_gyro5-d3a4ddu.jpg
    112.2 KB · Views: 93
  • halo_3_unsc_armor_build_8_by_gyro5-d3a4dca.jpg
    halo_3_unsc_armor_build_8_by_gyro5-d3a4dca.jpg
    112 KB · Views: 112
  • halo_3_unsc_armor_build_10_by_gyro5-d3a4dfk.jpg
    halo_3_unsc_armor_build_10_by_gyro5-d3a4dfk.jpg
    102.5 KB · Views: 102
Status
Not open for further replies.
Back
Top