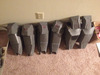
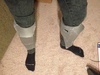
I don't have any experience building MJOLNIR suits, but this doesn't seem right to me. Depending on your proportions, you may also want/need some sort of seperation on the vambraces and calf sections, to get your hand/foot through the wrist/ankle point. Also, I have never seen anyone regret having a quick-release on their codpiece for easy restroom access.
I think he meant having the chest either in a "clamshell"-like build where there are clips on the bottom portion of the chest piece that comes under the arms, or a 2-piece build where you have 4 areas to clip together. The reason being is for most people (unless you're built like a spartan), the chest piece fits height wise, but not depth wise. In my carter build, I hade to take the chest in a full 4 inches for it to fit snugly. I went with the 2-piece chest style on that build. On my second foam build I went with the clam shell. For me, I think the clamshell is a bit better because you don't have to worry about clips breaking, or coming undone. Even if one does happen to come un done, it's under your arms so your chest piece isn't hanging off. My carter build had this problem the first year I used it so I had to buy stronger clips that I actually screwed into the armor.
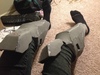
The quickrelease on the cod piece is a must, as putting the leg armor on after putting the cod piece on can be a bit tricky...it also helps when you have to go. You'll only have to take off one piece to do your business.
Since this is your group's first build, I would also suggest starting on a piece lower or smaller on the armor to hone in your foam working skills, for instance a hand plate, or a boot. This way, by the time you get to the harder and more technical pieces like the chest piece, or biceps (the biceps are a pain in the a**) you'll feel more comfortable and capable.
I would also suggest making the helmet out of pepakura, if you find that you're not acheiving the detail you want with foam. You'll have to buy multiple thicknesses of foam to get the detail in. You have your base EVA foam, and your varying thicknesses of craft foam aka "foamies". You can also carve out details into the foam if you have some sort of hot knife attachment, something like a wood burning tool, looks like this
https://bevfabriccrafts.us-dc1-edit.store.yahoo.net/I/bevfabriccrafts_2195_293654206 .
Best of luck you to guys! I can't wait to see some progress pics! I've wanted to do a group build with friends for so long, but none of them have the dedication to see a whole project through. You my friend are very lucky!
")