You are using an out of date browser. It may not display this or other websites correctly.
You should upgrade or use an alternative browser.
You should upgrade or use an alternative browser.
Halo Reach Spartan Build
- Thread starter S225
- Start date
- Status
- Not open for further replies.
I did my prior foam attempt in this rustolium lagoon. I bought this can in like 2018 and another last year for my knees. The pictures have bad lighting but it's a good color in person. Overcast natural light in the first and white led in the second.Out of curiosity, S225, what color teal are you using, because i'm going to be teal as well for my spartan, and i'm just wondering if i can save myself some trial and error. If you don't have anything, and I happen to find something, i'll see if I can remember to let you know.
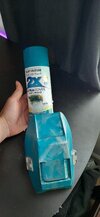
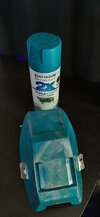
Quick edit, there's bondo, filer primer, 2 or so coats of black satin and then another 2 or 3 of the lagoon in that order.
Same, here's hoping XDAh, thank you, that is very helpful! I am really excited to see your suit done!
Just so I can say I was honest about the next update being about the shoulder pads I went ahead and scaled Moes MK6 model down to 90%. this is a significant size upgrade from my first attempts and will look much better with the rest of the armor.
Now for the obligatory tangent that my posts include!
I've been playing a lot of Destiny 2 recently and pulled my old True Prophecy hand cannon out of the vault to mess around with. ( Overflow+Demolitionist with a stability masterwork) and thought it would be a fun thing to print. While I was looking for a .stl I found mblackwell1002 s thread on the same model design! I am hoping to make it somewhat interactive, rotating cylinder that moves with a trigger pull, removable ammo drum, and adding a dove tail or something to the hammer so it can be "fired" double or single action. Even a titan can be a space cowboy now and again.
I have a good idea of the mechanics behind this and would like to keep everything accessible. The working bits on my carbine for example are sealed away and impossible to get to without tearing it apart. I'd like to avoid this in the future.
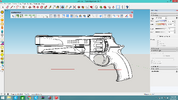
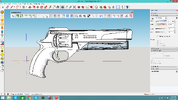
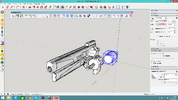
While I was cleaning things up I noticed that this model has a rail under the barrel but inside the lower geometry almost as if it was going to be a feature or design choice. I almost want to keep it there and make it "usable".
Getting the cylinder to roll out should be the easiest thing to accomplish. The ammo drum is going to get a gear put on so that a lever can spin it when the trigger is pulled and the plunger is going to be spring loaded somehow to eject the drum. Super cool.
Now for the obligatory tangent that my posts include!
I've been playing a lot of Destiny 2 recently and pulled my old True Prophecy hand cannon out of the vault to mess around with. ( Overflow+Demolitionist with a stability masterwork) and thought it would be a fun thing to print. While I was looking for a .stl I found mblackwell1002 s thread on the same model design! I am hoping to make it somewhat interactive, rotating cylinder that moves with a trigger pull, removable ammo drum, and adding a dove tail or something to the hammer so it can be "fired" double or single action. Even a titan can be a space cowboy now and again.
I have a good idea of the mechanics behind this and would like to keep everything accessible. The working bits on my carbine for example are sealed away and impossible to get to without tearing it apart. I'd like to avoid this in the future.


While I was cleaning things up I noticed that this model has a rail under the barrel but inside the lower geometry almost as if it was going to be a feature or design choice. I almost want to keep it there and make it "usable".
Getting the cylinder to roll out should be the easiest thing to accomplish. The ammo drum is going to get a gear put on so that a lever can spin it when the trigger is pulled and the plunger is going to be spring loaded somehow to eject the drum. Super cool.
Oh snap! I forgot about that thing! Hope you do some cool stuff with it! Looking good so far!Just so I can say I was honest about the next update being about the shoulder pads I went ahead and scaled Moes MK6 model down to 90%. this is a significant size upgrade from my first attempts and will look much better with the rest of the armor.
Now for the obligatory tangent that my posts include!
I've been playing a lot of Destiny 2 recently and pulled my old True Prophecy hand cannon out of the vault to mess around with. ( Overflow+Demolitionist with a stability masterwork) and thought it would be a fun thing to print. While I was looking for a .stl I found mblackwell1002 s thread on the same model design! I am hoping to make it somewhat interactive, rotating cylinder that moves with a trigger pull, removable ammo drum, and adding a dove tail or something to the hammer so it can be "fired" double or single action. Even a titan can be a space cowboy now and again.
I have a good idea of the mechanics behind this and would like to keep everything accessible. The working bits on my carbine for example are sealed away and impossible to get to without tearing it apart. I'd like to avoid this in the future.
View attachment 317232View attachment 317233View attachment 317234
While I was cleaning things up I noticed that this model has a rail under the barrel but inside the lower geometry almost as if it was going to be a feature or design choice. I almost want to keep it there and make it "usable".
Getting the cylinder to roll out should be the easiest thing to accomplish. The ammo drum is going to get a gear put on so that a lever can spin it when the trigger is pulled and the plunger is going to be spring loaded somehow to eject the drum. Super cool.
Started printing the true prophecy! Nothing fancy with the barrel so that's going first. Spent a lot of time getting the model printable, soothing the edges and only had to tweek a few tings in the design. Opted for 3 walls and 5% infill, the infill will bump up to 20% at the top so everything prints really flat like. I also haven't adjusted the scaling, kinda assuming it's the same scale as in game. I did compare the handle of my m6 to the revolver and it should fit my hand comfortably. Pics tonight once it's finished
Working on getting the a few things in place for the cylinder. I crafted a little peg and slide button that should keep everything in place while its closed. The peg will be in front of a spring allowing it to reset its position and I also made space for a screw to act as a pivot for the cylinder. This will screw into a hex nut that will drop into a cutout before the trigger guard.
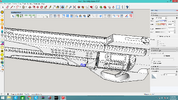
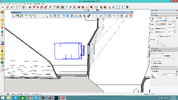
Now this is where things are getting tricky, I'm happy with the gear I drew on the back of the ammo drum. The drum itself will lock into the cylinder with a hexagonal cutout and I'm working on the idea of a lever connected to the trigger that will rotate everything.
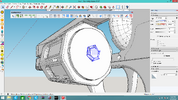
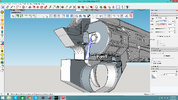
This SHOULD work if I can get everything to play nice. The gear in angled so the lever will only be able to push it clockwise on a trigger pull and on a reset it will slide over the ramp and contact the next face. No clue what to do about the hammer. Maybe a second lever attached to the first that will push it back and release it after a point? Also not sure how to give access to all these bits once its finished. I wanted to avoid the whole trigger pack being removable but this is likely whats going to happen.


Now this is where things are getting tricky, I'm happy with the gear I drew on the back of the ammo drum. The drum itself will lock into the cylinder with a hexagonal cutout and I'm working on the idea of a lever connected to the trigger that will rotate everything.


This SHOULD work if I can get everything to play nice. The gear in angled so the lever will only be able to push it clockwise on a trigger pull and on a reset it will slide over the ramp and contact the next face. No clue what to do about the hammer. Maybe a second lever attached to the first that will push it back and release it after a point? Also not sure how to give access to all these bits once its finished. I wanted to avoid the whole trigger pack being removable but this is likely whats going to happen.
This is gonna be so cool! Edit: I realized my breathing made it in the video... please keep your sound off for your own peace of mind
Always happy to see parts behave how you want them to after they are printed. I did have to bore out some space for the pivot screw, it seems to be a curse I have with these 3m screws.
Always happy to see parts behave how you want them to after they are printed. I did have to bore out some space for the pivot screw, it seems to be a curse I have with these 3m screws.
Last edited:
Thank you! I really have the modelers and printer to thank for that. A lot of what I do myself is just refining models and subdividing to make things look clean. I occasionally get some custom but heavily inspired parts turned out which is always nice.All of your stuff looks amazing! Great job!
I think it is to game scale, in game the barrel is roughly the same length as my titan's forearm and the same for my own arm and the print. It is almost comically large.Holy crap that thing really is chonky!
And I'm back on track kinda!
One of my friends got me some modeling foam for my birthday back in March. Three months later I realized that I could use it to smooth out the sharp angles on my prints.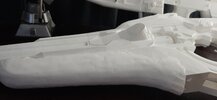
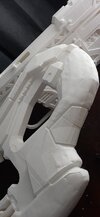
It's a slow process but its working well! After the first layer has gone down and started to dry I add a second layer and smooth out as much as possible after wetting it down a bit. It's super easy to sand down once dry and after bondo and filler primer I should be left with a very nice finish!
One of my friends got me some modeling foam for my birthday back in March. Three months later I realized that I could use it to smooth out the sharp angles on my prints.


It's a slow process but its working well! After the first layer has gone down and started to dry I add a second layer and smooth out as much as possible after wetting it down a bit. It's super easy to sand down once dry and after bondo and filler primer I should be left with a very nice finish!
This is my first time working with modeling foam/clay (don't know if there's a difference, the tub says foam...) and I'm very happy with the results. What follows are the steps I've come up with to get to where I am.
First, get some modeling foam/ foam clay
Kneed a small amount in you hand, about 1-2 tablespoons worth, and apply to low poly/ problem spots on the print. The small gaps between the layers seem to help the foam adhere.
Thin the first layer as much a possible. I seem to be able to get roughly .4mm thickness before the foam is too thin and starts to tear. Smooth as much as possible
After 12-24 (might vary by foam brand) the first layer should be dry enough to add a second layer. For this I take a similar amount of foam and stick some down, stretch it some before pressing the clump down again, do this in a line or zig-zag to better cover the area. Wet the new layer until slick and with wet fingers spread and smooth as needed.
After another 24-48 hours it's dry enough to sand. The above steps can be repeated as needed if hard edges are visible before sanding.
I sanded with 320 grit until mostly smooth, making sure to flatten the edges of the foam as flush to the print as possible. Again, the above steps can be repeated if needed. Be sure to let everything dry well before sanding or you might tear or rip the foam off the print.
If you haven't put your PPE on yet its definitely time to as we are breaking out the bondo spot putty. Apply as needed to smooth dents in the foam and mesh the edges to the print for a seamless look.
After the bondo is dry sand as needed/desired, add bondo or filler primer depending on initial results/personal preference/skill and continue to prep for paint/finishing.
Before foam
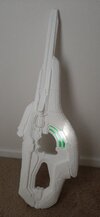
Sharp angles under the barrel, on the stock and cheek rest.
After 2 foam layers
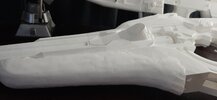
I did add more after this photo was taken. You could still see some of the edges.
First unsanded bondo layer on some of the prop
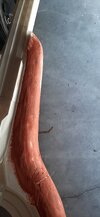
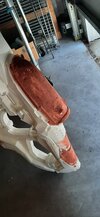
This will smooth out with sanding. Haven't gotten that far yet XD
If this is new information for some I hope it helps! I'm glad that I don't need to reprint bits of armor or break my hand sanding edges now!
First, get some modeling foam/ foam clay
Kneed a small amount in you hand, about 1-2 tablespoons worth, and apply to low poly/ problem spots on the print. The small gaps between the layers seem to help the foam adhere.
Thin the first layer as much a possible. I seem to be able to get roughly .4mm thickness before the foam is too thin and starts to tear. Smooth as much as possible
After 12-24 (might vary by foam brand) the first layer should be dry enough to add a second layer. For this I take a similar amount of foam and stick some down, stretch it some before pressing the clump down again, do this in a line or zig-zag to better cover the area. Wet the new layer until slick and with wet fingers spread and smooth as needed.
After another 24-48 hours it's dry enough to sand. The above steps can be repeated as needed if hard edges are visible before sanding.
I sanded with 320 grit until mostly smooth, making sure to flatten the edges of the foam as flush to the print as possible. Again, the above steps can be repeated if needed. Be sure to let everything dry well before sanding or you might tear or rip the foam off the print.
If you haven't put your PPE on yet its definitely time to as we are breaking out the bondo spot putty. Apply as needed to smooth dents in the foam and mesh the edges to the print for a seamless look.
After the bondo is dry sand as needed/desired, add bondo or filler primer depending on initial results/personal preference/skill and continue to prep for paint/finishing.
Before foam

Sharp angles under the barrel, on the stock and cheek rest.
After 2 foam layers

I did add more after this photo was taken. You could still see some of the edges.
First unsanded bondo layer on some of the prop


This will smooth out with sanding. Haven't gotten that far yet XD
If this is new information for some I hope it helps! I'm glad that I don't need to reprint bits of armor or break my hand sanding edges now!
Last edited:
- Status
- Not open for further replies.
Similar threads
- Replies
- 2
- Views
- 1,405
- Replies
- 3
- Views
- 457
- Replies
- 15
- Views
- 966
- Replies
- 8
- Views
- 649

