Status
Not open for further replies.
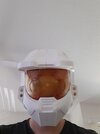
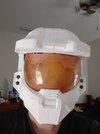
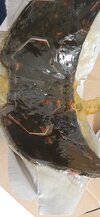
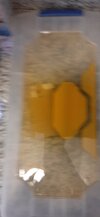
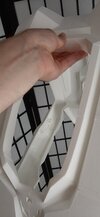
This first resin visor was a successful failure.
20210720_120656.jpg

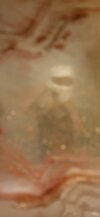
I applied a good amount of spaz stix to the inside and got some decent results!
20210720_120906.jpg20210720_121100.jpg20210720_114435.jpg
The camera doesn't do justice to how well I can see out of this and while it's not perfect, I'm already blind as heck so I'm pretty good at working with impared vision.

Attempt number 2 will get going tonight after work. I've replaced the bondo on the visor print with smoothed, air drying sculpture clay that Hopefully won't stick to the resin like the bondo did. If it does it should be much easier to remove.

(The bondo was meant to fill the print lines so they didn't transfer to the resin. I guess this worked but all the bondo stuck when I removed the cast)
 
Last edited:
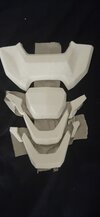
Main part of the chest is finally finished! This thing is massive and I love it.
Printing out two last buckles to keep it all together and then we can move on the the spine and abdominal bits.

There will be another attempt at a one way resin visor at some point. Really not happy with how flat the current one I have is and I will be doing a proper silicon mold and cast for the next one.
Good news for my recon, cqb and commando sisters and brothers who might be trying for a visor. Due to the relatively flat and simple shape of some helmets visors, casting a flat piece of resin and simply bending it around the inside of a helmet would give really good results! Adding liquid dyes also gives the opportunity for whatever color you might want.

Casting a round visor like a MK V, MK VI or eva visor was difficult for me to do without having a proper mold to fill and I should have seen this from the start. Live and learn! (And let my mistakes help prevent yours!)
 
I've started my halo reach spartan journey as well! I dig the armor you have as a reference. More like a sleek and nimble spartan. Mine just looks bulky and a one man army lol. Maybe we can swap photos of each other's finished work!
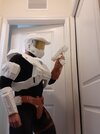
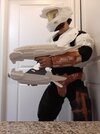
I've finally started building my Reach MKV suit. Years ago I started one with paper and later foam, and now I have begun 3D printing what I hope will be my perfect suit. View attachment 301316
This is my end goal. Last night the left forearm finished and I will be expanding out from there. View attachment 301315
After adding some minor details to a model Im using in google sketchup, and comparing to my foam forearm, I increased the size just a hair and let my printer go to work. I am beyond pleased with how it turned out. It might be missing some detail from the game model but I made the choice to stick with it. It feels a little cleaner with out some of the holes and random details stuck on.
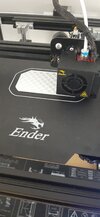
I printed this with an Ender 5 at .2mm layer height using Overture branded PLA at 205c. The print has two inner, and two outer shell walls with the interior being hollow with about 15% infill. I was ball parking with the settings but the end print is rock solid!

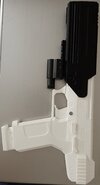
Prior to this I finished a 80%scale plasma rifle as well.View attachment 301317

I'm about 80% the size of a true spartan, 5'7" with my shoes, so most of my scaling begins with this and I proceed to refine as I go.

I'm looking forward to more work and posting updates as I go. The biceps and cod/ belt will likely be next up.

I've also taken a Halo 4 carbine model from thingiverse and am currently slicing it and adding support pegs, "functional" magazine, bolt/charging handle and room for lights and magnets. I'm giving similar treatment to the suit in some spots adding pockets and other functions!
 
I'll definitely be posting more updates and pictures as I progress! My multi-player spartan has been very iconic to me since 2010 when Reach launched, I'm glad to finally get some progress made with him.
 
20210802_201649.jpg
Going to see about working the spine into an undersuit. I'd love to craft something out of thin EVA foam for my mid section and use some thicker mats for the space between the torso and arms. Once I figure out where those spare mats are I'll work on some templates. I sense a lot of plastic wrap and duct tape in my future...
 
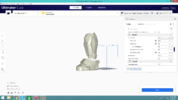
Finally had the courage to print more without a raft.
20210804_201203.jpg

Now that's a level print bed!
Abdominal armor plate is out now and with the little button console here finishing up, the chest is all there! Just left with the boots, knee pads ( the big ones) and one last lower leg. I may end up redoing the belt as it sits a little high and my waist line has been all over the place recently so making it larger could help. I was considering updating the lower legs to a higher poly model but I think I like the idea of accented edges and geometry one them, adds a bit of a worn and weathered look like the paint and ablative coating scuffed off.

Super nervous to Prime and finish these parts! Still going with foam for big sections of the under suit. Not to worried about messing that up at the moment.
 
This is why you measure a few dozen times before hitting print
20210805_221821.jpg
20210805_221805.jpg
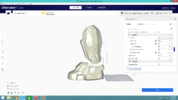
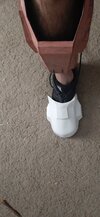
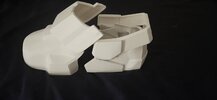
I needed something good this week and the first boot toe delivered! I was thinking about using elastic to hold everything on but I might just glue the parts into place. There's just enough room left on the bottom so the treads meet the ground and the plastic doesn't click clack when I walk.
Should be able to get the rest out in 4 more prints!
 
You could wet sand the inside of the visor with 4000 grit, I used to do resin scapes with oceans and it turned great
 
You could wet sand the inside of the visor with 4000 grit, I used to do resin scapes with oceans and it turned great
I picked up an assortment of low and high grit sandpaper in preparation for the visor. The insides are actually very smooth and transparent. Other than the first one being rough around the edges the bondo I used is super difficult to get out of the cast. I will be revisiting the visors in the future, most likely when I can splurge for some silicon and the helmet is finished.
 
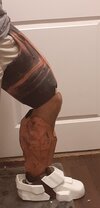
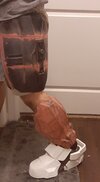
Turns out my work boots fit better inside of the spartan shoes!
20210807_233217.jpg
20210807_233443.jpg

20210807_232923.jpg20210807_232733.jpg

Guess I'll be using elastic after all.
I know that the thighs will stay in place with knee braces on but I'm not sure what to do for the lower armor. Foam will definitely be added to keep them pointed the right direction. I wonder if I can add an insert on the bottom to keep them from riding too low and use my shoes as support.
 
20210808_184533.jpg
An extremely rough template for the soft areas of the shoulders. 1/4 inch foam should be nice and flexible and still hold together. Thinking that wearing this like a vest and clipping the chest on around it will work well. I'll need to do something similar to connect the top of my arm to the opening of this seal.

In other news I found a 1KG roll of PLA while I was cleaning the mess that is my room!
 
Status
Not open for further replies.
Back
Top