You are using an out of date browser. It may not display this or other websites correctly.
You should upgrade or use an alternative browser.
You should upgrade or use an alternative browser.
Huragok (Engineer) Costume
- Thread starter Saber
- Start date
- Status
- Not open for further replies.
- Member DIN
- S028
Awesome work
Thank you!
I'm so impressed that someone is actually attempting this. I love "Contact Harvest" and really liked the character of "Lighter than Some", but would never had thought that someone would do this as a costume. Very interested to see where this goes.
Thanks! I really liked Lighter than Some in the book as well! I still need to figure out whether or not I'm going to name my Engineer something original or if it's just going to be Vergil "Easy to Adjust".
Update Time!
On Saturday this weekend, I went over to my friend's house to work on the neck mechanism.
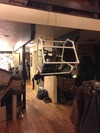
Here is the frame of the Engineer without the neck mechanism.
And here is the neck mechanism after base construction.
We made the neck skeleton out of electrical conduit, MDF board, rubber hosing, and some hose clamps.
The base of the neck is going to be rigid while the top half of the neck towards the head will be able to look left, right, and down.
Here is a close-up shot of the neck parts.
We drilled holes into the MDF board so we can run wire cables through them and be able to use them as tendons to make the neck move from the inside.
We plan on anchoring the neck to the frame using a larger piece of MDF as the base and it will look kind of like a control panel.
We will get back to the construction of this next weekend and hopefully I'll have a video demoing the neck movement!
Moving on... This is the pinkest thing I have ever purchased...
I didn't get a lot done on the harness itself like I had planned, but I did get some stuff glued on the pieces I already made.
Googly eyes are great round surfaces if you're trying to add "screws" or bumps to your armor! They're nice and uniform and all you gotta do is tack them on!
Earlier last week, my very first airbrush machine came in the mail!
I'm so excited to learn how to use this because I love painting!
I didn't get any progress with sculpting done, but that will be something I work on at night after work, Now that I have the neck skeleton made, I can see how much bigger I need to sculpt the body parts so the skeleton will fit inside it.
I hope to get lots more done soon! 73 days until ECCC!
As a side note, I will be trying to post costuming videos every weekend so be sure to keep tabs on that! I'll post a link to my YouTube channel here so you can subscribe and keep on top of videos that I will be posting.
Also, I plan on going to Wizard World Comic Con here is Portland next month but I won't be wearing any Halo gear as my current Reach suit has too much I need to fix but I need to keep my focus on the Engineer.
I will, however, be in a Fallout Vault Suit with my dog, Sarge, who will be wearing his Dogmeat costume.
Thanks everyone for checking out the thread!
Any comments or critique is greatly appreciated!!!
Attachments
-
 googly%20eyes.jpg219.3 KB · Views: 314
 -
 so%20fuzzy%20so%20pink.jpg230.3 KB · Views: 282
 -
 frame%20neck%203.jpg152.6 KB · Views: 297
 -
 frame%20neck%202.jpg188.8 KB · Views: 299
 -
 frame%20neck%201.jpg213.1 KB · Views: 290
 -
 frame%20no%20neck.jpg305.1 KB · Views: 300
 -
 dogmeat.jpg182.1 KB · Views: 300
 -
 airbrush.jpg223.8 KB · Views: 301
Last edited by a moderator:
- Member DIN
- S028
I'll be interested to see how the neck animation turns out. It seems like you have a good framework in place for it. Are you planning to do all hand puppeteering, or are you envisioning servo control?
I think for now --for sake of time and ease-- we'll be making it a puppeteer-based control. When we have the time/money/know-how, we might change it to servos but we're not 100% committed to it.
- Member DIN
- S028
Hey everyone! Here's today's update!
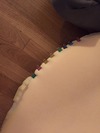
A friend and I put down some upholstery foam around the frame of the Engineer. This is the base form that all the airsacs will be sitting on top of.


The foam didn't like sticking together when we held it together with our hands, so we used little office clips to hold the edges together and we could work on other things while we waited for the hot glue to set.

We also had to make some adjustments to the foam so it was better rounded by cutting out chunks of the foam and then gluing the edges back together.

Then we got to sculpting!
The head that I had already started was too small and needed some shape changes so we piled on a bunch of clay and started working on polishing the shape of the head so it looks most like the reference pictures I have.


I had badly burnt my dominant hand with hot glue while we were gluing together the foam shell so we didn't get as much progress on the sculpt as I wanted, but we were able to get the final size and shape before we called it a night.
I'm hoping to get more sculpting done tomorrow once the burning sensation in my hand goes away.
That's all I got for today! Thanks for checking out the thread!
As always, any and all comments and critique are appreciated.
A friend and I put down some upholstery foam around the frame of the Engineer. This is the base form that all the airsacs will be sitting on top of.
The foam didn't like sticking together when we held it together with our hands, so we used little office clips to hold the edges together and we could work on other things while we waited for the hot glue to set.
We also had to make some adjustments to the foam so it was better rounded by cutting out chunks of the foam and then gluing the edges back together.
Then we got to sculpting!
The head that I had already started was too small and needed some shape changes so we piled on a bunch of clay and started working on polishing the shape of the head so it looks most like the reference pictures I have.
I had badly burnt my dominant hand with hot glue while we were gluing together the foam shell so we didn't get as much progress on the sculpt as I wanted, but we were able to get the final size and shape before we called it a night.
I'm hoping to get more sculpting done tomorrow once the burning sensation in my hand goes away.
That's all I got for today! Thanks for checking out the thread!
As always, any and all comments and critique are appreciated.
Attachments
-
 12642884_10208745765665510_2127839898812929185_n.jpg73.9 KB · Views: 309
 -
 12670204_10208745766425529_2462340438133130916_n.jpg75.2 KB · Views: 309
 -
 12662577_10208745766265525_612458055905981899_n.jpg93.9 KB · Views: 321
 -
 12669532_10208745765865515_2526649226001138309_n.jpg67.1 KB · Views: 315
 -
 12592343_10208745765505506_6613561145501774452_n.jpg55.4 KB · Views: 318
 -
 12654615_10208745766065520_5711009532609142784_n.jpg59.5 KB · Views: 307
- Member DIN
- S028
Prepare for Double-Post!
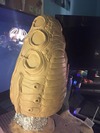
Started adding some detail to the head tonight. Still have the left side to detail and the underside of the jaw and smooth it out as best I can and then it will be ready for molding.


I hope to get more sculpting done throughout the week when I get home from work!
67 Days until ECCC!
As always, any critique/ comments are greatly appreciated!
Started adding some detail to the head tonight. Still have the left side to detail and the underside of the jaw and smooth it out as best I can and then it will be ready for molding.
I hope to get more sculpting done throughout the week when I get home from work!
67 Days until ECCC!
As always, any critique/ comments are greatly appreciated!
Attachments
- Member DIN
- S028
Love it! Clay modeling is so not easy to do, so seriously, good job. Good luck on the completion day. It's looking really good.
It's definitely not easy to sculpt, but I'm learning quickly! Thank you for your input!
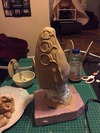
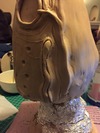
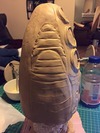
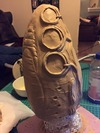
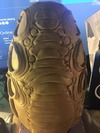
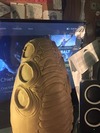
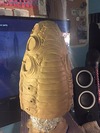
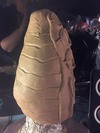
I'm about 90% done with the head sculpt! I stayed up till 2am working on it last night and I'm really liking how it's looking.
I started with reshaping the scales on the top of the head and adding scales towards the nose.
Then I started working on the left side. I had no progress on that side until last night. Now I only have a few scales left to add.
After finishing the left side, I started on the "belly scales" on the underside of the chin.
And here is just a shot of the whole thing when I called it a night.
When this sculpt is finished, I'm probably gunna go finish putting together the harness. Give my noobish sculpting abilities a break.
I will be molding this with plaster and canvas and I will be purchasing latex foam to cast it in soon!
I also found out that the one air sac that I made is wayyyyy too small, so I will be needing to resculpt that. >_>
Glad I went into the game to see how big the airsacs actually were!
An added sidenote, I also found out that the Engineer I'm making is bigger than the in-game model... By about 10%.
Go big or go home, right?
Attachments
Heck ya, go big or go home! The hunter that I am building keeps growing!
I saw a little trick on face off the other day, they were using a foam brush to smooth out tooling lines in the clay just before they molded it. I don't know if they were using a solvent or not, but I would think it would work better to have the brush wet while doing it. Just thought.
Keep it up!, every picture has been looking better and better.
Noobish? I think its coming along rather well!
- Member DIN
- S028
Heck ya, go big or go home! The hunter that I am building keeps growing!
I saw a little trick on face off the other day, they were using a foam brush to smooth out tooling lines in the clay just before they molded it. I don't know if they were using a solvent or not, but I would think it would work better to have the brush wet while doing it. Just thought.
Keep it up!, every picture has been looking better and better.
I am an absolute Face Off addict. I watch it on my DVR.
When I get this thing ready for molding, my plan was to get the sponge brush and some mineral spirits so use as a solvent on the oil-based clay.
Noobish? I think its coming along rather well!
I only say noobish because I am quite literally a noob at sculpting. I have never sculpted anything before! I'm glad you think I'm doing okay!
Your projects are always so awesome to follow, keep it up, I am looking forward to seeing the progress
Thank you! I can't wait to see the finished product, either!
I didn't make any progress last night. Apparently, I needed some sleep and I ended up going to bed super early last night. It's been a long week and staying up till early in the morning and then going to work a few hours later was not a good idea. Good thing it's Friday, right?
The scales will be finished up on the face tonight when I get home from work!
ok saber.... i wanna know.. where do you live? it would be nice to have you close by for help 
Wow! I may have to make a trip just to see it. It looks amazing, Can't wait
- Member DIN
- S028
ok saber.... i wanna know.. where do you live? it would be nice to have you close by for help
I live in the Portland, Oregon area.
Wow! I may have to make a trip just to see it. It looks amazing, Can't wait
Thank you!
- Member DIN
- S128
I love the little heart bubble!  Great work, glad to see updates!!
- Member DIN
- S028
I love the little heart bubble!Great work, glad to see updates!!
I love the little heart scales too.
This is looking really good. Sorry to hear about the hand.
Thank you! The burn is better now, I suspect I'll probably have a scar on this hand, but it's a given with the craft! I have lots of crafting scars on my hands from the last few years of building costumes.
I started making a mold for the airsac last night! I'm using Plaster of Paris and I'll be adding Plaster Wrap to reinforce the Plaster.
I also bought some playing cards and I'll probably start molding the Engineer's head in a two-part mold. I'm kinda nervous with molding the head, so wish me luck!
Attachments
- Status
- Not open for further replies.
Similar threads
- Replies
- 19
- Views
- 4,110

