Props M247 Foamboard

Status
Not open for further replies.
Looking good Dirtdives. Mine is sitting on the back burner till I get my armor repairs/part replacements out of the way.

Thanks Kusak3, Yours is coming out sweet as well. Definitely going to be able to put down some suppressing fire w/ these bad boys. Speaking of which, I have a quick update:


Test piece has been completed......in as much as I needed it that is. FB fabrication has begun and 2 pieces done:

Iron sight and the upper barrel:


Test pieces:
IMG-20160522-01283.jpg


Now the Foam board pieces:

IMG-20160522-01282.jpg

Rock solid, and the sight lines up w/ the top of the barrel piece perfectly. I dropped it a few times to test and no problems. I checked at my local hardware store for PVC tubing and their selection was pretty crummy so I scrounged what I could find in the house. The barrel is actually the inner tube of a glue stick
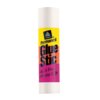
61TjcfHdprL._SL1500_.jpg The cap comes off and there is a 2nd tube holding the glue in place. Perfect circumference. A little foam matting for detail and there ya go. Very lucky to find this thing.

I did have to bevel all the inside edges in order to keep the correct dimensions but figuring out what to cut off and where to cut off from to keep it the correct size would have been more difficult.

More to come soon.

IMG-20160522-01283.jpg


IMG-20160522-01282.jpg


61TjcfHdprL._SL1500_.jpg
 
Last edited by a moderator:
Wow. What?! You made it out of pep and now you're transferring it to foam?! O_O
It looked stunning!
 
Thank Mara. I know it doesn't look like much now but once I have some more of the pieces.......Captain Obvious here.....of course it will look different and better.
 
I can't wait to see how it turns out. I was working on a custom Grenadier variant last year and wanted to build this gun, but i never finished. This is going to be one killer prop! Your pep version looks great.
 
Thanks Meatwad. The pep was done as fast as I could just so I could get the dimensions and sizing down along w/ any mistakes I make before true fabrication. I can't get that from a computer as I'm a very tactile builder. Now that the test pieces is done......Capt. Obvious stepping in to the room again......I can get the true build completed.
 
Last edited by a moderator:
Thanks Meatwad. The pep was done as fast as I could just so I could get the dimensions and sizing down along w/ any mistakes I make before true fabrication. I can't get that from a computer as I'm a very tactile builder. Now that the test pieces is done......Capt. Obvious stepping in to the room again......I can get the true build completed.

<absently drops a Pelican on Capt. Obvious> But anyhow still looking good in translation from pep to FB

I think the biggest thing I am afraid of on mine is the structural pieces for the frame. I dont feel that the foam is going to have enough strength to hold up to being handled. So going to laminate foam to plastic sheets that I have then cut. going to be a bit time consuming there
 
Last edited by a moderator:
I was wwonder about that for yours as well. Especially the rear structure w/ the 4 struts attaching the 2 levels for the handel and trigger. Not sure how you can translate that to EVA foam. It has too much give. The front end is "solid enough". Laminated foam? EVA foam? Never heard of that.
 
I was wwonder about that for yours as well. Especially the rear structure w/ the 4 struts attaching the 2 levels for the handel and trigger. Not sure how you can translate that to EVA foam. It has too much give. The front end is "solid enough". Laminated foam? EVA foam? Never heard of that.

Pretty straight forward. I take a piece of eva foam and a piece of poly styrene sheeting which is about 1/4 inch thick. Old signage from my place of employment. and then glue the two of them together and then do the final cut to correct dimension. And poof you have a piece of laminated foam.
 
Update:

Making slow but steady progress. Working w/ FB is a labor of love and patience. One wrong cut and you've ruined the piece and yes I have messed up several pieces along the way so far. But progress is progress. and here is where I'm up to

It was such a nice day out one day last week I decided to work outside:

IMG-20160527-01293.jpg

precision pieces w/ ID numbers so I can cut them in groups and not loose what goes where. I have to make sure that each piece is the correct size and the cut is as well. I've already run in to sizing issues which once build, can not be corrected easily. I'll show you what I mean in a moment.

IMG-20160605-01306.jpg

Here is what I have so far....the Iron sight, the upper barrel and the heat exchange. Each of these are assemble separately. However 1 mistaken measurement threw the connection of the barrel to the heat exchange off so that the barrel was not 100% straight. This was corrected by a small FB shim glued to one side at the connection point.

IMG-20160605-01307.jpg

Here you can see the gap created and the shims themselves. Once I have the vent holes cleaned up I'll be dropping a piece of thin craft foam over the whole top to round off top edge itself and that gap will be covered. Each piece is being individually beveled and I'm not talking about the whole template piece.....where ever there is a fold on a template....that piece is getting individually cut, beveled and reattached. It is a long process but well worth the effort. This is already showing signs of heftiness to it so its not going to be some fly-away piece in the end. and yes I did drop it a few times......no damage yet......have to stop doing that soon......going to be too heavy soon and it will break somewhere......
 
Thanks guys. Unfortunately......not really.....this is going on the back burner for the moment.....Since I finally came to a decision on my suit, I need to get that done first. I have 4 months till NYC Comicon.......and I still have to redo my son's chest piece and get his boots done......and repaint......love setting myself ridiculous goals and short deadlines.....
 
What better way to motivate yourself!


"I don't know what's weirder, that you're fighting a stuffed animal, or that you seem to be losing" - Suzie
 
What better way to motivate yourself!


"I don't know what's weirder, that you're fighting a stuffed animal, or that you seem to be losing" - Suzie

:wacko yyyyeeeaaahhhhhhh!!!!!!!
 
Awesome build. I am currently using foam board for a project. Nothing as complex as yours, just the swords and 3dmg from aot.
 
Thanks eric draven, appreciate it......Not sure if it's going to make it to NYC Comicon this year.......maybe the next......
 
Last edited by a moderator:
WOW.......it has been so long since I had an update for this build........BUT I'M BACK!!!!!!! and the building continues!!!!

OK so in addition to the upper barrel, heat exchange and iron sight which I found just sitting in the corner of the basement (forgot about this build, shame on me!!), lets add the upper and lower tripod mounting sections and the magazine.
IMG_0622.JPG IMG_0623.JPG IMG_0624.JPG

Since the last update, I managed to get a new tool for my workshop.....a bench top drill press......I know what you saying. "So what?"....well just add a drum sander attachment, and everything comes out super smooth and even. It makes a world of difference in regards to building w/ FB. No cut is ever the same even when building multiples of the same piece that get attached together. So smoothing out a multi level piece is essential for a nice piece.

Now I am having some issues in regards to the grips.....granted FB is pretty sturdy, I'm just unclear on what material to use and how to attache it to the framework........I should have a few more pieces assembled in a couple of days and I can get a better idea of what I'm doing about that.....Regardless, pieces are coming along nicely and I will have this ready for my next con....whenever that is...Not much going on until after the new year......I will have the most updated con list for everyone as soon as I can.

As always, comments and questions are welcome.
 
Ok next piece is done and attached......well I do have 2 other pieces as well but no where to attach to yet so they don't count.

Here is the "Chamber" attached to the back end of the main barrel:

IMG_0649.JPG


Alright....not much to see but still progress is progress. I was looking over all my pieces....I'm thinking that several of them would look better w/ some craft foam covering a lot of my mistakes and seams.....just an idea. Now I was also under the impression that I would have had to use something other than FB to create the cylindrical pieces....but I've been working on my Foam Board-Fu.....Yes I said it...FBF.....and I think I can make a passable one......time will tell. I'm going to need honest opinions once I have it built to see if I should continue in that direction or not.....lately my judgment has been woefully lacking.
 
Status
Not open for further replies.
Back
Top