1st Build Making a Spartan III, 3D Printed and Custom Under Suit

Update.
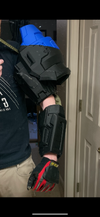
I haven't written as much as I wanted lately, but I did get to do some printing done and some basic strapping attached to the right arm.

Strapping
I took some spare webbing and looped it through the buckles, then used contact cement to glue the loop flat. I then took that loop and glued it to the inside of the upper-inside face of the bicep and forearm. The bicep female-buckle will connect to a narrower black webbing. That strap component will then attach to a wider webbing at the crest of my shoulder. That wider webbing will run down my arm to the forearm, hiding under all the other layers. Here's to praying that it doesn't chafe against my skin. The buckles I found were rounded center press, which should mitigate some potential binding.
image1.jpeg
image2.jpeg
image0 (4).jpeg


I also printed off the shoulder-bicep tabs. I took Moe's model and added to rungs inside. The narrower black webbing - which will connect the bicep to the larger harness system - will run through these pieces. This should keep that tab formed to my arm, while also hiding most of that webbing. In essence, there are two webbing lines (a wider hidden one that goes down to buckle at the forearm, and a shorter narrower one that buckles to the bicep) that will be sewed/glued together at a hidden point on my shoulder and finished with a buckle. The buckle of the combine line will attach to the wider harness. I hope I've over explained that enough. I can see it in my head, but I'm not sure I've articulate it.
image7.jpeg
image3.jpeg
t0aiiekl.png


Print and Mount
I printed the Nerdforgedesign security shoulder pad (as of 12-5-23, the file is no longer posted). Printed in PLA+ (black by Sunlu, blue by Elegoo) on a N4 Plus using Klipper at .28 layer height from a .4 nozzle. I did have a print failure earlier in the process. My solution was to immediately stop the print, then measure the z axis of how much printed. I went to orca slicer and performed a cut to the model to remove the portion already printed, then started a new print with the remainder. I then glued the two lower pieces back on. I attached one cockeyed, but sadly the super glue and accelerator bonded too tight. I left it as is, fearing damage if I wacked it any hard with a hammer. I will clean this up with putty and sanding later. The sucker is heavy for prop armor, so I'd probably bring the infill down to 8% (which I will do for the gungnir pad I am printing next).
image4.jpeg
image9.jpeg


The print was too snug for it to properly sit on the bicep. I did upscale both the Nerdforgedesign bicep and pad 102 &102.1 respectively. To attach the two, I then printed a block with a space for a stack of two 3/4" magnet to sit in. I temporarily glued a 3/4" to the bicep. To figure out where to put that one, I put a few dots of paint on the shoulder magnet in the pressed the two pieces together. The magnet held the weight for the most part, but I am going to add some more that will be recessed into the bicep for extra stability. I will also carve out a spot for the bicep magnet to sit in. Sadly, that will alter some of the game accurate details.
image5.jpeg


Seeing it all together made me feel very confident about the scaling and flexibility. I ran a temporary strap through the pieces and needed to bite down on it to hold it in place to get the selfie. I hot glued the hand armor on to a proxy glove just to see how it all looked together.
image8.png


Hopely I'll be in the mood to write again soon. For now, I'm going to print off the gungnir pad which will most likely need to be heavily modded so it mounts where I'd like (I'll explain when I post about it). Maybe I'll also get around to some sewing too. I want to finish both arm assemblies before moving to the boots. Still looking for some lifted shoes that will possibly give me an additional 2" of height.
 

Attachments

  • image8.png
    image8.png
    3 MB · Views: 90
Last edited:
Update.
Did not get to write as much as I wanted lately, but I did get to do some printing done and some basic strapping attached to the right arm.

I took some spare webbing and looped it through the buckles, then used contact cement to glue the loop flat. I then took that loop and glued it to the inside of the upper-inside face of the bicep and forearm. The bicep female-buckle will connect to a narrower black webbing that will attach to the wider webbing over the crest of my shoulder. That webbing line will go from shoulder to forearm, hiding under the layers. Here's to praying that it doesn't chafe against my skin. The buckles I found were some center press ones that are round, which should increase mobility.
View attachment 339269View attachment 339270View attachment 339271

I also printed off the shoulder-bicep tabs. I took Moe's model and added to rungs inside. The black webbing connecting the harness to the bicep will run through that piece. This should keep that tab formed to my arm while also hiding most of that webbing.
View attachment 339272View attachment 339273View attachment 339268

I printed the Nerdforgedesign security shoulders (as of writing this, the file is no longer posted it appears). Printed in PLA+ (black by Sunlu, blue by Elegoo) on a Neptune 4 Plus using Klipper at .28 layer height from a .4 nozzle. I did have a print failure earlier in the process. My solution was to immediately stop the print, then measure the z axis of how much printed. I went to orca slicer and preformed a cut to the model to remove the portion already printed, then started a new print with the remainder. I had to glue two lower pieces back on. One was cockeyed but sadly the super glue and accelerator bonded too tight, and I feared damaging it if I wacked it any hard with a hammer. I will clean this up with puddy and sanding later. The sucker is heavy for armor prop, so I'd probably bring the infill down to 8% (which I will do for the gungnir pad I am printing next).
View attachment 339274View attachment 339275

The print was too snug for it to properly sit on the bicep. I did upscale both to bicep and pad 102 &102.1 respectively. To attach the two, I then printed a block with a space for two 3/4" magnet to sit in. I temporarily glued a 3/4" to the bicep. To figure out where to put it, I put a few dots of paint on the shoulder magnets in the pressed the two together. The magnet held the weight for the most part, but I am going to add some more that will be recessed into the bicep for extra stability. I will also carve out a spot for the bicep magnet to sit in. Sadly, that will alter some of the game accurate details.
View attachment 339276

Seeing it all together made me feel very confident about the scaling and flexibility. I ran a test strap through and needed to bite down on it to hold it in place and get the selfie. I hot glued the hand armor on to some proxy gloves just to see how it is all looking together.
View attachment 339278

Hopely I'll be in the mood to write again soon. For now I'm going to print off the gungnir pad and most likely mod the snot out of it to get it to mount where I'd like (I'll explain when I post about it). Maybe get around to some sewing too. I want to finish both arms before moving to the boots.
your doing a great job on this armor, but the center release buckle o my build everytime i would catch it just right it would pop and the arm and bicep fell apart you might have better luck then me. other than that i think this is a great build my hats off to you so far.
 
your doing a great job on this armor, but the center release buckle o my build everytime i would catch it just right it would pop and the arm and bicep fell apart you might have better luck then me. other than that i think this is a great build my hats off to you so far.
Thanks. I'll watch for those buckles. So far, they seem stable and hopefully the padding will keep enough separation. Fingers crossed it stay's that way.
 
Some Illustrations
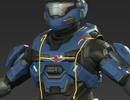
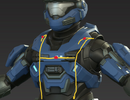
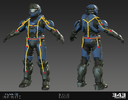
I thought I'd throw up some illustrations of the harness system and the general layout of electronics. I marked up the lovely work of Kyle's Mark Vb in the process. I'm colorblind so I don't know what color which component is, so think of these as a fun puzzle to solve (I'm working with what I've got). Connections are red, I think.

Harness
There are three components: Webbing, buckles, and a belt. The chest rig will have buckles over the shoulders connecting to the back and one in the center of the chest. The armor rig itself will be in two halves connected by magnets or velcro.
126260m8.png
Capture 1.JPG


Electronics

There are five-ish components: Wiring, lights, fans, connectors (two pin and magnets) and power/control (battery packs, power buttons, and a variable control nob). On the wiring I tried to add some arrows to explain the flow of power. Assume the helmet is ODST with side mounted lights.
7i59bqy6.png
 

Attachments

  • 4ivoa8sn.png
    4ivoa8sn.png
    259.3 KB · Views: 80
  • 4ivoa8sn.png
    4ivoa8sn.png
    258.2 KB · Views: 80
  • 126260m8.png
    126260m8.png
    1.5 MB · Views: 118
Man you're writing this story faster than I can read it! I only got half way through part 2 before part 3 is out! I've never been a big reader but I will say that your story has been quite entertaining so far!

That's one MASSIVE shoulder! I love it
 
Man you're writing this story faster than I can read it! I only got half way through part 2 before part 3 is out! I've never been a big reader but I will say that your story has been quite entertaining so far!

That's one MASSIVE shoulder! I love it
Hoping to take advantage of the holidays to really crank out words, plastic, and foam. I'm glad you are enjoying the story, feedback and/or lore corrections are welcome.
 
Update.
I haven't written as much as I wanted lately, but I did get to do some printing done and some basic strapping attached to the right arm.

Strapping
I took some spare webbing and looped it through the buckles, then used contact cement to glue the loop flat. I then took that loop and glued it to the inside of the upper-inside face of the bicep and forearm. The bicep female-buckle will connect to a narrower black webbing. That strap component will then attach to a wider webbing at the crest of my shoulder. That wider webbing will run down my arm to the forearm, hiding under all the other layers. Here's to praying that it doesn't chafe against my skin. The buckles I found were rounded center press, which should mitigate some potential binding.
View attachment 339269View attachment 339270View attachment 339271

I also printed off the shoulder-bicep tabs. I took Moe's model and added to rungs inside. The narrower black webbing - which will connect the bicep to the larger harness system - will run through these pieces. This should keep that tab formed to my arm, while also hiding most of that webbing. In essence, there are two webbing lines (a wider hidden one that goes down to buckle at the forearm, and a shorter narrower one that buckles to the bicep) that will be sewed/glued together at a hidden point on my shoulder and finished with a buckle. The buckle of the combine line will attach to the wider harness. I hope I've over explained that enough. I can see it in my head, but I'm not sure I've articulate it.
View attachment 339272View attachment 339273View attachment 339268

Print and Mount
I printed the Nerdforgedesign security shoulder pad (as of 12-5-23, the file is no longer posted). Printed in PLA+ (black by Sunlu, blue by Elegoo) on a N4 Plus using Klipper at .28 layer height from a .4 nozzle. I did have a print failure earlier in the process. My solution was to immediately stop the print, then measure the z axis of how much printed. I went to orca slicer and performed a cut to the model to remove the portion already printed, then started a new print with the remainder. I then glued the two lower pieces back on. I attached one cockeyed, but sadly the super glue and accelerator bonded too tight. I left it as is, fearing damage if I wacked it any hard with a hammer. I will clean this up with putty and sanding later. The sucker is heavy for prop armor, so I'd probably bring the infill down to 8% (which I will do for the gungnir pad I am printing next).
View attachment 339274View attachment 339275

The print was too snug for it to properly sit on the bicep. I did upscale both the Nerdforgedesign bicep and pad 102 &102.1 respectively. To attach the two, I then printed a block with a space for a stack of two 3/4" magnet to sit in. I temporarily glued a 3/4" to the bicep. To figure out where to put that one, I put a few dots of paint on the shoulder magnet in the pressed the two pieces together. The magnet held the weight for the most part, but I am going to add some more that will be recessed into the bicep for extra stability. I will also carve out a spot for the bicep magnet to sit in. Sadly, that will alter some of the game accurate details.
View attachment 339276

Seeing it all together made me feel very confident about the scaling and flexibility. I ran a temporary strap through the pieces and needed to bite down on it to hold it in place to get the selfie. I hot glued the hand armor on to a proxy glove just to see how it all looked together.
View attachment 339278

Hopely I'll be in the mood to write again soon. For now, I'm going to print off the gungnir pad which will most likely need to be heavily modded so it mounts where I'd like (I'll explain when I post about it). Maybe I'll also get around to some sewing too. I want to finish both arm assemblies before moving to the boots. Still looking for some lifted shoes that will possibly give me an additional 2" of height.
yeah i love the shoulder i am building a239 emile for my son. i will be watching your build. looks great so far
 
yeah i love the shoulder i am building a239 emile for my son. i will be watching your build. looks great so far
Hey, that will be pretty cool! If you are going the 3d printed route, just heads up, Nerdforgedesign/CGTrader took down the Mark Vb Security shoulder model I'm using. Not sure if any other modeler is offering those STLs. Galactic Armory has a nice Emile helmet file.
Hell of a 3d printer, pretty smooth lines, I'll watch ya progress
I'm really liking the N4+ so far. I do wish Orca slicer had a profile for it though. Right now I am using the N4Pro profile just with a bigger bed measurements. Oh, I should add to the post the time it took to print. I'll need to double check before I edit, but I think it was ~13 hours. I just printed the Gungnir pad, and that took around the same time. All that to say, as of right now, totally worth $350.
 
Attached here is Chapter 4 of The First Time Falling, Tales of the UNSC's Valkyries.

Before Eoin was a Spartan, he was just an 11 year old kid standing in the back of a Pelican staring at a lowered ramp and the unknown darkness beyond. A familiar face or two appear, and my incredible wife's OC Spartan says hello. (To my lore enthusiast friends, a similar event happens in Ghosts of Onyx. However, I choose to say this Pelican full of older Spartan potentials is off doing its own thing.)

Please enjoy, and feedback is always welcome. (Also, I should get some art commissioned to post with these little releases.)
 

Attachments

  • Tales of the UNSC Valkyries Chapter 4.pdf
    214.9 KB · Views: 139
Lots of small updates on the progress I've made this past week or so. Printed out the Gungnir shoulder pad, boot armor, and one shin. Prototyped out some boot padding and support. Worked on finalizing the planned color scheme. Picked up some fabric for the under suit. Also did some writing, which you can check out above, Chapter 4 of Tales of the UNSC's Valkyries.

Gungnir Shoulder Pad
Printed off Nerdforgedesign's Gungnir Shoulder. I printed at 102.3% scale with Elegoo's PLA+ on a N4 Plus using Klipper at .28 layer height from a .4 nozzle. Print time was about 11 hours I want to say. As modeled, the pad actually sits lower than the in-game assets. I'll be breaking out the rotary tool to carve out the back of the pad print so I can mount it higher up.

image2.jpeg
6iovfr8y.png


Boots and Shin
I started by searching for some cheaper platform shoes that could give me another inch or two of height, I found some Dirty Laundry Monet (no idea why it's named that) on sale for $27 USD. They are a women's 10, so a bit snug on my toes, so I'll be cutting off section of the front. Possibly inviting a new shoe, the toeless platform boot (who am I kidding, I'm sure some fashion company has kicked these out before).

k4xyob19.png


Printed off Titlewave's Boot covers with the same setting as before, though I did scale the height up to 102% to fit the platforms. Print time for each was around 22 hours. I then started using some packaging foam (again I urge you, if you buy a printer keep the foam!) and 3mm EVA Foam to templet out some padding to help bulk out my tiny ankles. I'll be wrapping the final foam cut outs in fabric, then permanently attaching them to the platform boot prints. I went back and forth on how to give the whole boot a good structure that could hold up to walking around. I decided to make a base plate for the toe and heel section which is currently attached to the plastic armor. I'll putty, sand, and prime the plastic as one piece. Then when it is time for full assembly, I'll put a blob of epoxy on the inside for the platform's soul and toe to squish into and hopefully lock together.

image0.jpeg
image1.jpeg
image6.jpeg
image9.jpeg


image10.jpeg
image8.jpeg


Printed off Titlewave's shin, same setting as before. This time the scale was 95% in the x&y and 100% in the z. Need to print in two pieces which totaled about 24 hours on the bed. I'm a bit worried it's too wide.

image4.jpeg
image5.jpeg


Colors
Using that incredible photo editing software we all love called Paint, I did some basic laying out of where I want to put color. I'll be passing the pattern of the Tempest Lilac armor coating from Halo Infinite. It's for Mark VII armor but I think it should translate over easy enough. For the main purple I picked up some Rust-oleum Gloss Grape, which I'll hit with matt varnish to cut back the shine, example below. For the white, I'll just find a basic white primer, and for the orange I'll dip into my miniature painting supplies and make a blind close to Montana Gold's Blast Orange.

image3.jpeg
mark vb for coloring.png
Helmet Rust Grape crope.jpg


Fabrics
I have a supply of four way Strech black leather (though it's more like jegging pants leather) which will accompany my newly purchased Black Optical Faux Leather and some White Stretch Scuba Hexagon (which I will need to dye black). Luckily both fabrics were on a near 50% sale. Again, I used that super user friendly and fast software called Paint and mapped out where I want the fabric. I originally was going to use a pixel print but switched to the hexagon pattern halfway through the mapping. And there was no way in hell I was doing that all over. I'll use a combo of EVA foam glued to the fabric to get some of the under suits shape, like elbow pads and the back of the knees.
kyle-hefley-markv-b-armorcore.jpg
bm57orrh.png


That is my update for now. Hopefully next week I can just go full speed for a week or two. This is definitely an interesting build because lots of steps kinda need to happen simultaneously. This project has been blessing, keeping my hands busy while my mind has been processing some life stuff.
 
This is looking great, love the shoe choice! I had also been looking for something with a small platform, and those are pretty affordable. The calves and boot look GREAT detail-wise, they're going to look perfect once finished.
 
To keep the next post from being long enough it takes up a whole page, I'll break up the post-holiday update. I didn't do anything major, just a little progress on lots of projects. Like finishing off the construction of the boots!

Boots
Last time on Cosplay Kai: Underworld Costume Tournament, our hero had just finished glueing cardboard to the bottom of his armor pieces. However, the strain of walking around was causing his unexpected strategy to bust apart. Will his last-minute gamble pay off, or will the Con Floor-San leave him a shambling mess of plastic and foam?

Before I tackled the bottom of the boots, I needed to finish off the cuffs and do some shoe surgery. To make my toes more comfortable, I cut off the front of the boot. Then to help my feet slide in and out of the sluggly designed shoe meant for a lady's foot smaller than mine, I cut a slit in some of the stretch webbing. I only did this on one for now to see if it really is helping all the much. I attached some 3mm EVA foam strips to the front and back of the boot to act as a better interface for the cuff.
image7.jpeg


For the tongue of the cuff - not sure what to call it - I cut out two new clean pieces of 3mm EVA foam. I took my Black Optical Faux Leather and cut the same shape with seam allowance. Instead of sewing, I used contact cement to glue the fabric to the foam, then cut slits in the seam allowance all the way around so I could fold it around the curved edge. For kicks and an overall cleaner look, I cut one more shape for each tongue, this time a bit smaller, then glued it to the back of the foam to cover up the wrinkly edge.
image2.jpeg
image5.jpeg
image6.jpeg


For the bulk of the cuff, I wrapped the tops and sides of newly cut out packaging foam in Four-way Stretch Black Leather. Again, I used contact cement versus the sewing machine for three reasons. 1) Sewing stretchy material is pain, 2) it's an even bigger pain when your machine doesn't work right, and 3) it was faster to just glue than deal with problems 1 & 2. I used more contact cement to attach the tongue to the cuff, then used hot glued to attach the piece to the EVA foam. The cuff will only be glued to the boot, not the armor. Hopefully this will allow for some mobility that won't cause rips or tears in the fabric.
image10.jpeg
image8.jpeg
image9.jpeg


This is when the order of operations had to be not as slapshot as usual for me. To get these suckers painted, I still needed to sand the plastic, bondo, and cardboard, and then actually apply spray paint. With the boot installed that would be tough to work around. This is why I had to complete the inner boot completely first.

I added bondo glaze putty to the edge of the cardboard to help blind it in. Since the prints had some rough spots, I started sanding with 100 grit, then switched to 220. A good wash to remove dust followed by a priming with Rust-Oleum Flat White. Another round of putty applied, followed by 220 grit sandpaper. Since it was the Christmas Holiday and I didn't want to freeze, I did this part in the garage, thus coating my car in Red Death Dust. Always wear a respirator while sanding!!! Another wash and prime done, I started spraying on Rust-Oleum Gloss Grape. I've heard that keeping your spray paints in the same brand family, helps everything stay smooth and decrease chance of orange peeling. Did about 4 coats of color all around, then did 3 clear coats of Rust-Oleum Clear Matte. The matte varnish will help protect the paint - if you let it actually cure, foreshadowing - and make it easier for brushed acrylic paints to attach.

To finish things off, I put a huge globe of Gorilla Glue Contruction Adhesive in the heel and toe of the armor - which I also used to help strengthen the cardboard to plastic connection - then squeezed the inner boot through the ankle. Because this glue is more like silicone caulking, the long cure time let me adjust the placement of the parts. I also picked this adhesive, hoping it would squish around the tread of the inner boot - giving it a better grip - and also retain some flexibility. I put a weight on the boot to make sure nothing moved... but an hour later a ghost knocked it over. Luckily no damage done.
image0 (1).jpeg
image1.jpeg
image0.jpeg


Finally, I needed to add some tread. That painted cardboard was slippery. Also, I could add just a few more millimeters of height - every bit counts. I put down two layers of painter's tape, then using reference images here on the forum, I sketched out a template. Luckily the boots are congruent shapes. I transferred the cut-out tape template to a rubber desk mat I found at a thrift store. Rubber pieces cut, I used the construction adhesive again to attach them to the cardboard sole - other glues would have been brittle and these are going to take some punishment. To clean up the goop I used q-tips and hand sanitizer, because I didn't have an isopropyl alcohol on hand.
image0 (2).jpeg
image1 (1).jpeg
image2 (1).jpeg


And that is the base form of the boot done! Fireworks. Cheers. Rock Music.

Best part is, I can slip these suckers on an off while wearing my leg armor BY MYSELF! American Flag. Eagle. More Fireworks. (With a bit of straining and effort. And the rest of the armor wasn't even properly strapped and padded, yet. But hey, still doable.) Also, the toe and heel sections are separated so the bottom can flex. Nice for walking and posing.

Plenty of detail painting left to do, and I'm going to need to add weathering over some scraps my shins dug out of the paint job - I should have been more patient. But for now, I can set them aside. Pretty dang happy with myself, and definitely a confidence boost to keep going.

More posts from the Christmas Crafting Cornucopia and some Tales of the UNSC's Valkyries to come soon.
 
Christmas Craft Time Part 2!

Gungnir Shoulder
Nerdforgedesigns model indexed a little lower than I personally wanted - see this post. So, I needed to do some plastic surgery. I measure and marked out the area I needed to remove. Then I took a rotary tool to cut through the print's walls. After a few extra cuts, I used plyers to start ripping things apart. The main thing was clearing out enough printed infill so I could make a flat surface. Satisfied with the new shape, I inserted some plastic card to make a new surface then finished off with some magnets.

image0 (3).jpeg
image1 (2).jpeg
image2 (2).jpeg
image0 (6).jpeg


I'm definitely liking where it is sitting now. I might go back and rip out some the plastic card and fill in some epoxy or putty instead/combo. Right now, the card flexes too much under the weight of the print.

Bonus Bicep Bit
I finally got around to cutting out some black nylon webbing to make the bicep harness straps. I strung them through the bicep tab things, which have little magnets to help keep them in place. Those a kinda working. I think I'll be revisiting those once I get the whole harnessed rigged and tested.
image1 (4).jpeg
 
Last edited:
Here is Chapter Five for the short story The First Time Falling.
April 4th, 2538, ONI's operation Blackcat has gone FUBAR. Now, Spartan A047 Eoin and his pararescue troopers must face the dangers hiding on the Covenant controlled world of Uvranelo to rescue the stranded ODSTs and the precious cargo ONI sent them to retrieve.
 

Attachments

  • Tales of the UNSC Valkyries Chapter 5.pdf
    218 KB · Views: 87
Wow those are the smoothest lines I've ever seen coming off a 3D printer! I used the parachute clips for my chest piece to connect the front to the back and they've worked great, no issues. Super easy to put on and take off myself without having to have a squire :lol:
 
Christmas Crafting Concert part 3!

Thighs
I printed at these at a nonuniform scale with Elegoo's Blue PLA+ on a N4 Plus using Klipper at .28 layer height from a .4 nozzle. I printed in three parts to cut down on the need for support material, which made for a total print time of around 24 hours per thigh.

Make the thigh gasket I opted for using EVA foam. The Titlewave files did come with a pepakura file for this part, but the only printer I had access to over Christmas was they kind that spits melted plastic. I first made a template of the first ring of gasket using paper taped to the inside of the armor to create the 3d curve. Then using Titlewave's photos for reference, I drew out the ring. Cut the paper to size with some overlap for the bottom, then cut from foam. I combined 5mm and 3mm thick foam because 10mm was close but too thick over all, especially once fabric is added. This definitely added a layer of complexity because the two layers of foam had different shapes. I repeated the process for each ring of the gasket.
image0 (4).jpeg
image3 (2).jpeg


The rings were temporarily held in place with spots of superglue. This did tear up the foam a bit, but all of this will be cover in fabric so I'm not worried about a few zits.

I tested the fit for mobility, and was satisfied. The foam helped fill out the armor but I'll still need to add some padding here and there to make sure it sits right. As of right now, I can do high knees and sit down.

To finish off the base form, I cut the notches into the foam. I then marked where straps will need to be passed through certain areas. As per my plan for harnessing this all up, the top ring of the gasket will actually be attached to a pair of shorts, while the bottom two will be permanently attached to armor after being wrapped in fabric.
image2 (4).jpeg
image4 (1).jpeg


I do walk like a cowboy with these bad boys on, but growing up working on a Texas ranch has prepared me for this. I'll need to really seal up the paint because the inner thighs are absolutely going to rub together too much if I'm not mindful.

Next step is to add all the strapping/mark it out and make room, then wrap everything in faux leather.
 
looking good! Very clean and great ideas for your layout. I just purchased the titlewave armor too so it’s awesome to see you building it as well.
I got the Neptune 4 max to print with. Are you using the stock Elegoo cura slicer and profile it came with? Definitely keeping an eye on your build. Keep it up!
I am using orca slicer. At the time of printing, it didn't have a profile for the N4+ so I tweaked the N4Pro profile. I believe it has a N4Max profile, but I have no experience with how it prints.

I will go ahead and share some personal critiques about the titlewave models.

The gauntlet is nicely divided, and the space for magnets is great, but sadly, it needs another set of magnets or clasps up near the wrist. The leverage force from moving my wrist pops it free even with quality 1/2" mags glued into the modelled spots. It's kind of the same with the chest, but the actual structure keeps it falling off... if not shaken around. Mine has dropped a few times while handling and the long narrow sections have snapped off :cry:. I do wish the shins had been designed similarly, but that has more to do with my own harness design than anything.

Also, if you are going to need to do any nonuniform scaling, like I have (lanky limbs are not a spartan make) you will need to manually "assemble" the models in a program like mesh mixer or orca slicer. The files are laid out ready for printing, not scaling.

Other than those two minor qualities of life issues, the files are great. Most importantly the designer is super chill and ready to work with you (if you haven't worked with them before).
 
Christmas Crafting Concert part 3!

Thighs
I printed at these at a nonuniform scale with Elegoo's Blue PLA+ on a N4 Plus using Klipper at .28 layer height from a .4 nozzle. I printed in three parts to cut down on the need for support material, which made for a total print time of around 24 hours per thigh.

Make the thigh gasket I opted for using EVA foam. The Titlewave files did come with a pepakura file for this part, but the only printer I had access to over Christmas was they kind that spits melted plastic. I first made a template of the first ring of gasket using paper taped to the inside of the armor to create the 3d curve. Then using Titlewave's photos for reference, I drew out the ring. Cut the paper to size with some overlap for the bottom, then cut from foam. I combined 5mm and 3mm thick foam because 10mm was close but too thick over all, especially once fabric is added. This definitely added a layer of complexity because the two layers of foam had different shapes. I repeated the process for each ring of the gasket.
View attachment 340257View attachment 340256

The rings were temporarily held in place with spots of superglue. This did tear up the foam a bit, but all of this will be cover in fabric so I'm not worried about a few zits.

I tested the fit for mobility, and was satisfied. The foam helped fill out the armor but I'll still need to add some padding here and there to make sure it sits right. As of right now, I can do high knees and sit down.

To finish off the base form, I cut the notches into the foam. I then marked where straps will need to be passed through certain areas. As per my plan for harnessing this all up, the top ring of the gasket will actually be attached to a pair of shorts, while the bottom two will be permanently attached to armor after being wrapped in fabric.
View attachment 340264View attachment 340265

I do walk like a cowboy with these bad boys on, but growing up working on a Texas ranch has prepared me for this. I'll need to really seal up the paint because the inner thighs are absolutely going to rub together too much if I'm not mindful.

Next step is to add all the strapping/mark it out and make room, then wrap everything in faux leather.
Those gaskets look real nice! Awesome work man, can't wait to see the full suit!
 
This thread is more than 7 months old.

Your message may be considered spam for the following reasons:

  1. This thread hasn't been active in some time. A new post in this thread might not contribute constructively to this discussion after so long.
If you wish to reply despite these issues, check the box below before replying.
Be aware that malicious compliance may result in more severe penalties.
Back
Top