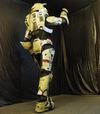
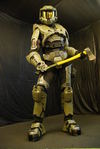
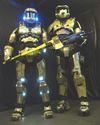
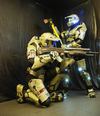
Mark VI high-def foam armor WIP

Status
Not open for further replies.
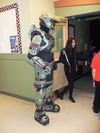
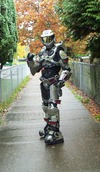
After our initial test fitting and photoshoot I've added velcro in key areas to keep everything snug. I've added ankle covers to the boots and made a breathable balaclava to replace the neckseal.
Picture81.jpg
Picture82.jpg
Picture83.jpg

I made it from the leftover shirt and used the sleeves for the undersuit shirt
Picture85.jpg

I also removed the straps from the backcatcher guard and added them to the pants
Picture84.jpg

My sewing skills are crude but effective, similar to my shotgun tactics.
The front of the torso tucks into the cod and slides up and down for sitting down or reaching up
Picture97.jpg
Picture104.jpg
Picture108.jpg

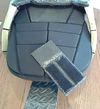
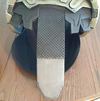
The back of the torso has the spine protector permanently mounted and a swivel with velcro to keep the assplate in place while moving. The swivel is a permanently mounted 1" hard plastic peg with a plastic washer that can freely spin and has a layered foam strip attached to the washer with a large square velcro pad on the end.
Picture102.jpg
Picture103.jpg
Picture105.jpg
Picture107.jpg

I added kneepads to keep the thighs up and to "bulk out" my legs
Picture86.jpg
Picture89.jpg
Picture88.jpg


TO BE CONTINUED...
 

Attachments

  • Picture81.jpg
    Picture81.jpg
    9.7 KB · Views: 215
  • Picture82.jpg
    Picture82.jpg
    8.3 KB · Views: 202
  • Picture83.jpg
    Picture83.jpg
    8.2 KB · Views: 199
  • Picture85.jpg
    Picture85.jpg
    5.7 KB · Views: 231
  • Picture102.jpg
    Picture102.jpg
    37.7 KB · Views: 219
  • Picture108.jpg
    Picture108.jpg
    54.7 KB · Views: 208
  • Picture104.jpg
    Picture104.jpg
    30.5 KB · Views: 214
  • Picture97.jpg
    Picture97.jpg
    41.5 KB · Views: 201
  • Picture89.jpg
    Picture89.jpg
    15.7 KB · Views: 217
  • Picture86.jpg
    Picture86.jpg
    12.5 KB · Views: 198
  • Picture107.jpg
    Picture107.jpg
    45.4 KB · Views: 200
  • Picture105.jpg
    Picture105.jpg
    49.3 KB · Views: 209
  • Picture103.jpg
    Picture103.jpg
    32.3 KB · Views: 207
  • Picture88.jpg
    Picture88.jpg
    4.3 KB · Views: 197
...Continued from previous post

I added velcro to the elbow pad to keep it tucked into the forearm while flexing or reaching cross body
Picture91.jpg
Picture92.jpg
Picture93.jpg

I added velcro to the forearm so it stays positioned on the wrist properly and does not spin. I also added velcro to the wrist padding to mount the handplate.
Picture94.jpg
Picture95.jpg
Picture96.jpg

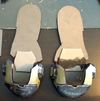
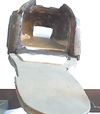
For the boots I started by removing the toecap and raising the inner boots up as high as the outer shell would allow. I added layers of soft foam to build up the heel - very nice to walk on. I also covered the toe of the boot in black fabric.
Picture71.jpg
Picture74.jpg

Next I cut out a shape for the sole and added the toecaps to them.
Picture77.jpg
Picture75.jpg
Picture76.jpg

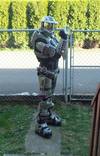
Then I attached the sole to the main boot and left the toecap free - the fabric covered boot slides nicely under the toecap when I walk or kneel.
Picture78.jpg

If Master Chief had flip-flops, they might look like this...
Picture79.jpg

Size 15! Too big for me :)
Picture80.jpg


Today I dressed up and went for a walk in the afternoon heat... the undersuit is very breathable, everything stays in place, time for an HD vid with Longshot-X's new cam...
 

Attachments

  • Picture92.jpg
    Picture92.jpg
    12.2 KB · Views: 208
  • Picture93.jpg
    Picture93.jpg
    11.8 KB · Views: 206
  • Picture94.jpg
    Picture94.jpg
    8.8 KB · Views: 205
  • Picture91.jpg
    Picture91.jpg
    13.5 KB · Views: 215
  • Picture95.jpg
    Picture95.jpg
    11.2 KB · Views: 205
  • Picture96.jpg
    Picture96.jpg
    13.4 KB · Views: 195
  • Picture71.jpg
    Picture71.jpg
    42 KB · Views: 218
  • Picture74.jpg
    Picture74.jpg
    53.3 KB · Views: 202
  • Picture77.jpg
    Picture77.jpg
    42.6 KB · Views: 227
  • Picture75.jpg
    Picture75.jpg
    29.2 KB · Views: 203
  • Picture79.jpg
    Picture79.jpg
    37.1 KB · Views: 202
  • Picture76.jpg
    Picture76.jpg
    30.4 KB · Views: 205
  • Picture78.jpg
    Picture78.jpg
    50.3 KB · Views: 209
Wow this build post is allot like the last fireworks I went to....there's allot of ooh's and aah's in it.

Awesome work, And great write up on how you went about you're modification of the different parts.
 
Wow this build post is allot like the last fireworks I went to....there's allot of ooh's and aah's in it.

Awesome work, And great write up on how you went about you're modification of the different parts.

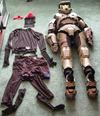
Thanks! I've been busy making more modifications, it is about 95% complete, everything I do now will be upgrades. Here is a pic of my undersuit and armor, side by side.
Halo-armor-undersuit.jpg

I changed the abdomen area, it is now more open. I added details to the boot spacers. I added padding, a fan switch and upgraded the lights in the helm (9 LED flashlight on each side). I added a searchlight to the left forearm. I added a sweat band to the balaclava.
I also made a tacpad addon that holds my cell phone.
Picture182.jpg

It has room to hook up the earbud and the buttons are functional.
Things on the upgrade list:
Tactical hardcase addon (functional)
Hazop helmet addon (with searchlight, webcam and mini-megaphone)
Add rubber treads to the boots
Add a compartment in the chest to hold a laptop (to run the speakers and webcam)
Add an impact blinker system to the torso (I have the components)
Add my "transformers" voice modulator looted from an optimus prime mask to the helmet
Add my "transformers" robot punch sound looted from a bumblebee toy to a handplate.
Add light panels (so far I have kept it simple and able to get wet)
Add the t-bag blinkers to the cod (I have the components)
Biofoam chest addon (functional, to hold my hot jala)
Breacher addons (once I get some more shotty shells)
Tactical fanny pack addon (functional)
Anything else I think of along the way

Needless to say I will have some more updates in the future.
 

Attachments

  • Halo-armor-undersuit.jpg
    Halo-armor-undersuit.jpg
    158.6 KB · Views: 211
  • Picture182.jpg
    Picture182.jpg
    63 KB · Views: 188
I figured that it would be more appropriate to post this in Gamemasters thread as all the photo's are of his suit.

A photo shoot with Spartan Intimidator
Celebrating Thanksgiving​


dsc_0113.jpg


Giving Thanks to this wonderful planet we live on.
dsc_0025.jpg


dsc_0028.jpg


dsc_0029.jpg


Giving thanks to the awesome photographer
dsc_0039.jpg


dsc_0046.jpg


Giving thanks to ALL life on this planet!
dsc_0058.jpg


All of the that hard work of giving thanks, makes Intimidator HUNGRY!
dsc_0069.jpg

Figuring out how to use the napkin
dsc_0073.jpg


It's kinda small.
dsc_0074.jpg


It will just have to do.
dsc_0078.jpg


What? Is this all I get?
dsc_0085.jpg


This is more like it!
dsc_0086.jpg


And this. And some of this. And more of this!
dsc_0089.jpg


Uh OH. Looks like too much turkey got to him.
All full and stuffed just like a turkey.
dsc_0103.jpg

Have a safe and happy Thanks Giving!​

dsc_0113.jpg


dsc_0025.jpg


dsc_0028.jpg


dsc_0029.jpg


dsc_0039.jpg


dsc_0046.jpg


dsc_0058.jpg


dsc_0069.jpg


dsc_0073.jpg


dsc_0074.jpg


dsc_0078.jpg


dsc_0085.jpg


dsc_0086.jpg


dsc_0089.jpg


dsc_0103.jpg
 
Last edited by a moderator:
Wow, you took some really uber pics. Thanks for sharing!
The boot modifications are nearly done, I only need to add the rubber sole now and I have the treads for it. Here is a picture:
masterchiefboots.jpg

They add quite a lift while still looking proportionate, with the helmet on I stand an impressive 6'8".
int01.jpg

Happy Thanksgivving to all!
 

Attachments

  • masterchiefboots.jpg
    masterchiefboots.jpg
    64.8 KB · Views: 200
  • int01.jpg
    int01.jpg
    78.2 KB · Views: 211
Thanks for the kudos! Since the last update I've changed the elbow area of the undersuit as I was not happy with the overall look of the plastic elbowcops. I plan on changing the knees as well. I also did some sanding, slight re-shaping in key areas and painted on more silver and gloss black in the black space areas. Here are some photos with the new upgrades and a couple with Spartan Longshot too.
Img00024507.jpg

Img00024510.jpg

Img00024516.jpg

The spirit of HALOween...
Img00024521.jpg

Img00024529.jpg

5 second pose
Img00024534.jpg


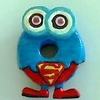
And to answer a previous question that I missed... the little blue thing that rides with me is a Super Oddie
super_oddie.jpg
also made with foam. For more on that try these links:
www.squidoo.com/oddie-moshling
www.squidoo.com/how-to-make-moshi-monsters
 

Attachments

  • Img00024507.jpg
    Img00024507.jpg
    73 KB · Views: 201
  • Img00024510.jpg
    Img00024510.jpg
    102.6 KB · Views: 203
  • Img00024516.jpg
    Img00024516.jpg
    82.9 KB · Views: 182
  • Img00024521.jpg
    Img00024521.jpg
    101.7 KB · Views: 194
  • Img00024529.jpg
    Img00024529.jpg
    65.1 KB · Views: 203
  • Img00024534.jpg
    Img00024534.jpg
    79.6 KB · Views: 198
  • super_oddie.jpg
    super_oddie.jpg
    5.5 KB · Views: 200
Can someone tell me why this is in the Noob forums? This guy is no noob

I am so. At least, when the armor was started I was a noob, and it still looks a little noobish to me, I could do better.

thorn696 said:
Looking sweet. You're photo shoots just Amaze me.

Thanks! We are often amazed too, need a napkin? Photo shoots are great as you get to look at your armor from various angles while wearing it and see what needs to be tweaked. Next tweak for this armor -> more silver on the shins, boots and helm.
 
Hey 405th, it's been awhile since I've updated this thread, I've done some more mods and been out and about to a few events. Here is a picture from our local x-mas parade in our local paper, I wasn't in the parade but I still got the 2nd largest photo on the page (cause that's how the Chief rolls)
Parade.jpg

I've put the sole and treads on my boots, redid the front chin area of my helm, added another fan in the top of the helm to vent steam buildup and added a voice modulator and speaker taken from an Optimus Prime toy mask. All said and done I stand 6'10" and tower over the majority of people while still looking mostly proportionate, I still need to do more tweaking (continual WIP) and will post some pictures soon. Considering the size of this armor you might be suprized to find a 6' tall skinny old man pop out of this armor (I can take it off in 5 minutes or less)
 

Attachments

  • Parade.jpg
    Parade.jpg
    86.7 KB · Views: 195
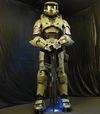
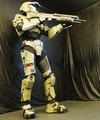
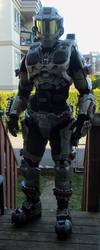
Spartan Intimidator 117 is still active and has received some upgrades, mainly in the comfort department as well as an upgrade in badassitude. For comfort I changed the battery array in the helmet and added some softer padding. I also added an abdomen belt and use it as a harness to keep the thigh armor in place. This works the best, much better than kneestraps or velcro to the pants. The other upgrades are obvious in the photos.

100_4774.jpg

100_4771.jpg

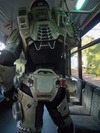
The bus is late!
100_4815.jpg

That would explain alot...
100_4843.jpg

Riding a bus
100_4816.jpg
The chest speakers are functional, they are quite loud in fact, and the 4 flashlights in the helm combine for 36 LEDs. If you want more photos you will have to bug Longshot-X, he has a roll I'm sure.
 

Attachments

  • 100_4774.jpg
    100_4774.jpg
    158.6 KB · Views: 199
  • 100_4771.jpg
    100_4771.jpg
    59.5 KB · Views: 192
  • 100_4815.jpg
    100_4815.jpg
    204.9 KB · Views: 197
  • 100_4843.jpg
    100_4843.jpg
    278.9 KB · Views: 195
  • 100_4816.jpg
    100_4816.jpg
    220.6 KB · Views: 189
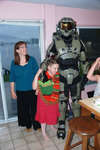
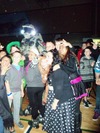
Well, it's been about a year and the old Spartan Intimidator pops out of his cyro tube for the day. He needed a new handplate and a few paint touch ups and he then went out to attend a middle school costume party and then back home to babysit. Here are a few pics:

At the door to the dance
100_6959.jpg

Inside the dark dance room the 36 LEDs in the helm lit the way
100_6971.jpg

The kids loved it
100_6977.jpg

On the walk home
100_6984.jpg

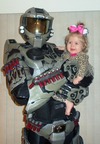
And a shot with the happy baby
100_6996.jpg

feeding the baby... whoa, Intimidator, a little less on the spoon!
100_7004.jpg
 

Attachments

  • 100_6977.jpg
    100_6977.jpg
    161.5 KB · Views: 190
  • 100_6971.jpg
    100_6971.jpg
    202.3 KB · Views: 174
  • 100_6959.jpg
    100_6959.jpg
    194.2 KB · Views: 173
  • 100_6984.jpg
    100_6984.jpg
    349.4 KB · Views: 177
  • 100_6996.jpg
    100_6996.jpg
    259.5 KB · Views: 173
  • 100_7004.jpg
    100_7004.jpg
    211.2 KB · Views: 178
Status
Not open for further replies.
Back
Top