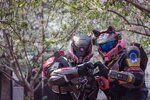
Mark VII Spartan Ver Megurine Luka

Rock Lobbster

RCO
405th Regiment Officer
Stream Team
Member DIN
S098
Now that Otafest 2023 is over I can finally reveal my newest suit, a custom Mark VII from Halo Infinite themed around the Vocaloid, Megurine Luka! Without further adieu, let’s get into it.

Current Suit Appearance & Inspiration
IMG_112_8201.jpeg.jpg
ezgif.com-webp-to-jpg.jpg


Planning:
Screenshot_20230524_192906_Discord.jpg

... There you have it!
While in a Discord call one evening the topic of making some fun & colorful spartan VIIs was mentioned, after opening up Crab’s Spartan Blender pack… an idea was born.
While using the character herself as a reference I went through and laid out the armor permutations and developed a color scheme. A colorshift black - red was used as a base, gold as a secondary, and a bright pink to help make it “pop” (more on this in the painting stage).

Here you can see my loadout without the additional accessories/modifications not in game.

Rightside.png
Asset 9@3x.png
Asset 10@3x.png
Leftside.png


Total Project Duration: 4 months

Foam construction (without cutting & templating) 35 hours

Sanding: 20 hours
Painting: 29 hours

Thread Index: (Clickable Links)

Initial plan, file creators, & modifications made

Foam Unfolds

Foam Construction

Print Assembly & sanding

Painting

LEDs & Electronics

Rigging & Belt Box Files

Accessories

Helmet
Mobility

Components Used & Cost Breakdown

Photo Gallery

Deployment Images

Fan Expo Canada
 

Attachments

  • DSC00190.jpg
    DSC00190.jpg
    159.8 KB · Views: 1,256
Last edited:
Initial Planning, File Credits, and Modifications
As mentioned above to start this project I opened up Jeffw773 Spartan Pack (Found here) and started customizing the base Mark VII to fit my needs! The pack was pre set up with textures & accessories which made the customization a breeze.
As none of the Halo Infinite coatings quite fit my needs I started working on a custom scheme. Once again, being able to visualize which pieces would be colored was a huge help for planning ( a huge shout out to the Halo Archive)

Files/Components
Helmet - Vek3d

Helmet attachments (Sabertooth & purrfect audio) - Skookum Props

Visor - Rogue Workshop

New Visor - Branfuhr Studios

Chestplate - Makyr

TAC/AHD TYPE 3ZY - Slenderdummy

Wrist tacpad - Skookum Props

Back “spine” piece - Łukasz Wesołowski

Love Plasma Pistol - Skookum Props

Aeson Shoulder, MR Knee, and MkVII abwrap - Game files unfolded by myself (Found here)

Rest of armor components - 405th Armory files


Modifications:
All modifications were done in 3D Builder. It's free 3d modelling/modifying software and is perfect for things like this.

Starting at the top, I modified the Skookum Prop helmet accessories to fit the Mark VII helmet. By combining the sabertooth headband and the purrfect audio ears I was able to make a pair of cat headphones! This allowed me to incorporate parts of both attachments into one item. The one side of headphones was also modified to fit my knockoff action camera so I could record some con footage! (More on that later)
Screenshot 2023-05-24 185533.png
Screenshot 2023-05-24 184845.png


Next up, I detached the chest sideplates and added holes for ventilation into the thrusters. Since I wanted to incorporate a speaker into this build to play some thematic Vocaloid music I boolean'd a hole in the chest for the speaker and created magnet slots to attach the AAP chestplate overtop.
Screenshot 2023-05-24 185445.png
Screenshot 2023-05-24 185454.png
Screenshot 2023-05-24 185506.png
 
Last edited:
Foam Construction & Tips
Forearms 3.5hr per
Biceps 3hr per
Shoulder: 2hr per
Codpiece 5hr over 2 days
Thighs 3.5hr total (2hr #1, 1.5hr #2)
Shins 2hr x2
Boots 1.5hr x2
Kneepads: 20 min for both
Abwrap 2hr
Total Foam build time (without template & foam cutting): 35 hours

As per my standard I started at the top, made my way to the bottom. All components were scaled in Armorsmith before being printed, cut out, and traced onto SKS foam. I cut the majority of my pieces using a bandsaw which drastically reduced the overall time spent foaming.

Having built the Mark V(b) suit out of foam I was happily surprised by how much more ergonomic the VII was. The unfolds by ODCA were absolutely beautiful and the pieces came together without any troubles… until I got to the shins. Yikes, shins have historically been annoying from the ODST and V(b) but man, the mark VII takes it up another level. Once I was able to piece together the first they came together a bit easier but I would definitely say that was the worst part of the suit.

Workbench
Don't forget, safety first!
20230125_191552.jpg
20230125_192235.jpg


Biceps completed!
Much easier to build compared to the Mk V(b)

20230125_214929.jpg
20230126_221548.jpg
20230126_221415.jpg


Gauntlets

The tubular shape of the MkVII gauntlets made for a very nice foambuild, just watch your scaling!

20230129_201956.jpg
20230129_201759.jpg
20230129_201807.jpg

20230130_210736.jpg
20230130_210941.jpg


UA Aeson Shoulders
Foamed the outer section of the shoulderpad, the middle section was then printed in resin for me by Fallen
20230207_210511.jpg
20230209_221423.jpg
20230207_210844.jpg


Codpiece/Belt
A custom belt box was designed to allow the belt to slide inside and then attach via parachute clips. This allows me to separate the entire front and back into halves for packing. I foamed each piece individually so I could see where they sat before attaching via elastic
20230302_221717.jpg
20230302_172613.jpg
20230302_221233.jpg


Thighs:
For efficiency purposes I only made 1 thigh completely detailed, the left thigh has the soft pouch which covers all the detailing.
The Mark VII may not have shield emitters but I kept those pieces hollow just incase I'd like to go back and add them in the future.

20230306_200348.jpg
20230306_203353.jpg
20230307_180334.jpg


Kneepads & Shoulder Cages
One of the easiest part of the foaming portion! Nothing much to say about these.

20230406_224803.jpg
20230411_181054.jpg


Shins
Did I mention I did not enjoy making these? Arguably the worst part of the Mark VII in my opinion. Ended up opting for a clamshell design due to my one leg having reduced ankle flexibility. For the final product I used aluminum flashing to reinforce the front of the shin to help retain its shape (not shown). Each piece is attached using four small pieces of velcro.

20230312_170609.jpg
20230312_200552.jpg
20230312_200535.jpg


Boots
Much more ergonomic. Very comfy to walk in! Hinged clips allows for fantastic mobility and teardown for storage.

20230405_212127.jpg
20230405_212257.jpg


Abwrap
The back is made of a urethane rubber cast, the front is 2mm foam skinned in a 4 way stretch pleather. I used Super 77 to attach the pleather to the foam and just made cuts as needed.
Be careful of how you attach the pleather, see how the thigh looks weird when flat but when bent into a natural shape it takes quite well.

20230418_202834.jpg
20230418_212513.jpg
20230421_185025.jpg
20230421_220354.jpg
20230421_220410.jpg


Tip Recap for Foamsmithing a Mk VII:

  • Biceps - inside plate mounted on elastic will make your life easier
  • Forearms - watch inside tube, I had to remove some material to ensure my hand could go through
  • Codpiece - creating each component separately and waiting to attach them all together during strapping helped a ton
  • Thighs - elastic attached inner thigh gasket & detachable inner thigh pieces makes life a lot easier,
  • Shins - Build the top curved pieces first, then the back middle, attach one to the other afterwards.
  • Boots - hinged middle allows for a ton of movement and easier walking
  • Kneepad - can attach to shin, mine are freefloating for packing
 
Last edited:
3D Print Assembly & Preparation

Since I only own 300x300mm printbeds I decided to outsource the chestpiece to a friend who printed it in PCTG (Different than PETG, more temperature & impact resistance)! I used Makyr's files at 100% and they fit like a glove.
20230419_172417.jpg
20230419_172645.jpg


The helmet was done on my own printers "I paid for the whole printer I'm going to use the whole printbed!"

20230308_081538.jpg


Assembly:
To assemble the chest I opted for using 2 part epoxy and my new favorite tool introduced by TurboCharizard, the plastic welder. By essentially melting a metal pin into the print it was a fantastic way to both add structural integrity & hold the pieces together while the epoxy set.

20230419_204901.jpg
20230419_193901.jpg


Next up I got out the itchies and applied 2 layers of fiberglass resin to the inside of the chestplate & helmet. This step is a near must to ensure your prints are strong and hold up to some abuse. Definitely my least favorite part of the process but (personally) is absolutely essential.

20230420_182434.jpg
20230420_182431.jpg


20230420_203258.jpg
20230420_203254.jpg


Sanding:
Every 3d printer user's favorite step.... sike
Started with 60 & 120 grit before applying 2 liberal coats of polyester resin to the outer parts to help smooth, fill, & prevent scratching.

Afterwards I used a palm sander, orbital sander, handsanding, and bondo filler putty to sand all parts up to 400grit.

20230422_155349.jpg
20230424_204911.jpg

20230425_210712.jpg
20230427_174911.jpg
20230427_212313.jpg
 
Last edited:
Painting
This was by far my most complex paintjob yet, the base color was achieved by mixing a black - red colorshift mica powder with acrylic medium and airbrushed the mix over the entire suit. It took about 5 coats on each part to get a consistent coloring. The secondary was DecoArt 24k Gold with an orange gold colorshift sprayed overtop to give a slight colorshift look depending on the lighting. Finally the pink was achieved by using a yellow base then spraying a mix of DecoArt Pink Tourmaline & Rose Quartz for a fade effect. Finally I used Createx Gloss Clear topcoat as my silver bullet paint to seal it all while retaining the shine.

red-black colorshift laid down
20230429_193801.jpg

Masked & applied a PlaidFX Armor metallic, ended up being far too dark for my taste so I decided to go back over with the Decoart 24k Gold

20230430_165002.jpg
20230429_194308.jpg


Excuse me sir, you can't park there
20230430_213236.jpg


PlaidFX on left, Decoart 24k Gold on right
20230502_183814.jpg


All parts coated in 3 layers of Decoart 24k Gold & a tint coat of orange & gold colorshift ontop.
20230502_203034.jpg


Finally it was time for my favorite part, spraying the pink

At first, yikes. The color I chose was far too pale for what I was going for, that was going to need to be fixed.
20230430_205737.jpg


One trip to Michaels later, I grabbed every metallic pink they had and went to work... and I absolutely fell in love with this metallic pink combo. Slowly began to apply a fade to the helmet & other pink parts by combining the DecoArt Pink Tourmaline & Rose Quartz.
20230501_122236.jpg
20230501_203421.jpg
20230501_214848.jpg
20230501_215341.jpg
20230501_221107.jpg
20230504_225752.jpg


Couldn't be happier on how well this came out. Used Tamiya & Vallejo gunmetals to add the final metallic colorings into each piece
20230502_171200.jpg
20230503_234703.jpg
20230504_210950.jpg
20230504_215123.jpg
20230503_235231.jpg
20230503_234902.jpg


Everything was finally fully painted & sealed with the gloss Createx top coat. The painting stage was over
20230504_225747.jpg
 
Last edited:
LEDs & Electronics
Well, its a Vocaloid crossover and where would we be without a ton of LEDs?

LEDS:
Starting off we have light up shoes, not the comfiest to wear but boy do they look cool.
20230507_182316.jpg


RGB light strips were wired to the shoulders via 4 pin connectors in the chest. These RGBs are wirelessly controlled and can be set to also flash according to the music. Wiring the 4 pin connectors was the biggest pain in my rear but definitely worth it in the end.
Early 2024 UPDATE: After frequent issues with the wiring getting tangled/messed up this system has now been replaced by wireless puck lights as seen Here

20230519_134419.jpg


Green LEDs in Sabertooth headphone, independently powered
EOY 2023 Update: This is now blue
20230511_225959.jpg


Electronic Components:
Action camera built into Sabertooth headphone
cmaera.jpg


Camera is also controlled via the tacpad on the wrist. This also contains a controller for the music for the speaker embedded in the chest.
20230512_222045.jpg


Hollowed section in chest for speaker to sit, speaker shown on unfinished piece (missing picture of finished piece)
20230524_171218.jpg
20230419_173608.jpg


Finally, my favorite quality of life upgrade. Fans in the chest
Remember those ventilation slots? I installed 2 fans on the top of the vents that pull air downwards with a blower in each thruster that pushes cool air onto my back. Because of the urethane rubber undersuit it gets rather hot rather fast in the chestpiece and this was absolutely fantastic for cooling me down.
Mid 2023 Update: An additional 4 fans were incorporated into the rear of the chestpiece
20230524_172118.jpg
20230524_172107.jpg
 
Last edited:
Rigging:
The main components were rigged using my strapping harness (Guide here)

Both shoulders are magnetized on using 2 15lb bar magnets
20230524_171301.jpg


Abwrap was attached to back of chest using parachute clips for removability and transport
20230514_174009.jpg


I used a running/workout chest rig combined with screwed & epoxied D rings to attach the back of the chest to me. The front pouch allows me to hold a battery pack, voice amp, and my wallet if needed. (ignore the mess of wires, still working on containing that)
20230524_172035.jpg
20230524_172045.jpg
20230514_160723.jpg


The front of the chest features swing out side pieces that are easily foldable for transport. The 60lb magnets were used to attach the front and back together in a “clamshell” configuration using epoxy putty. These are then secured using the arm gaskets as retaining clips to prevent the front from unwanted bumps & jostling.
20230524_171143.jpg

The belt uses a combination of elastic strapping and a workout belt to ensure a comfortable and flexible fit. The side boxes also allow for the armor to thread through and connect via parachute clip. I will have my custom model attached to this post for free non commercial usage
Edit: File temporarily taken down for revisions

20230524_171359.jpg


Finally, the gauntlets use excess helmet padding to keep them secure on my forearm and prevent from sliding. The tacpad is also magnetized to the left gauntlet and secured via ratcheting strap.

20230524_172003.jpg
 
Last edited:
Accessories
I wanted to try and help connect the Spartan and Vocaloid together by adding in a few thematic pieces.
You can see a set of idol batons and (Fake) microphone strapped to my left hip.
20230519_134312.jpg


Along with Luka's Skirt fashioned into a kama/tactical skirt along my waist.
20230519_134334.jpg


Attached to said skirt is also the cursed Halo plasma pistol with the heart logo painted to the theme of Luka's Tuna. This is magnetized to my thigh using the 1" neodymium cube magnets. It's an incredibly strong connection and can even go through the kama.
 
Last edited:
Helmet
20230513_145247.jpg

There's a lot going on up there so I wanted the helmet to have it's own separate post.

First off, under the hood there is a large wiring rig featuring 3 intake fans, 1 ducted outflow fan, and a charging cable for the wireless voice amp. This whole mess of wires all attaches to a portable power bank in the back of the head and is largely hidden behind the added padding.
20230509_230901.jpg
20230509_230910.jpg


You can see the wires more clearly in the pre-padded photos here. There are also 4 hardpoints (2 not shown) for the sabertooth & purrfect audio pieces to magnetically adhere to the helmet.
20230509_233657.jpg
20230509_233700.jpg
20230509_233659.jpg


Padded helmet without attachments. Initially made to make transportation easier this configuration also works quite well in the event that I would want to swap out the attachments.
Also shown here is the elastic attached backplate, this allows me to flip the plate and slide the helmet on and off with ease. there are also 2 magnets on the plate to help keep it in place when in use.
20230524_212742.jpg
20230524_212635.jpg
20230524_212656.jpg
20230524_212717.jpg
20230524_212725.jpg


It's quite heavy, weighing in at a little over 5lbs but is rather comfortable and stays cool with all the fans.

Mid 2023 Update: A new set of cat ears was printed and painted to better match the helmet scheme!
20230822_214834.jpg
 
Last edited:
Cost & Parts Breakdown
Coming in as my most expensive suit to date the total cost for this project was a whopping $1392.65 USD

Below you can see my everything I used to make this suit (minus some things I already had on hand) with links attached.
Full Part Breakdown
ItemQuantityCost perTotal
Molotow marker1$12.95$12.95
Squeeze bottle1$3.07$3.07
Cutting mat1$12.59$12.59
SKS Props HD Foam3$15.99$47.97
Tax1$4.60$4.60
PlaidFX Golden Hour3$5.76$17.28
SKS 6mm Foam3$15.99$47.97
Chamelion Pearl 1g2$14.50$29.00
3M Fiberglass cloth1$8.28$8.28
Gorilla hot glue sticks1$21.19$21.19
Wireless rotary tool1$23.29$23.29
Chest Speaker1$25.43$25.43
2 in 1 filler primer1$7.98$7.98
kwikseal caulk1$5.48$5.48
Black plastidip2$8.98$17.96
swivel buckles1$6.64$6.64
Fake Microphones1$11.99$11.99
Condor Molle Large utility pouch1$16.12$16.12
rogue workshop visor1$75.00$75.00
Golden Orange Colorshift3$9.55$28.65
Rose Bud Colorshift2$9.55$19.10
Megurine Luka costume1$41.47$41.47
Duplicolor vinyl & Fabric Paint1$14.62$14.62
PCTG Printed Chestplate1$60.00$60.00
Rubber Undersuit backplate1$180.16$180.16
Plastic Welding Gun1$21.99$21.99
Chest files1$50.00$50.00
RGB Lights1$8.46$8.46
Plastic belt hinges1$7.41$7.41
chest hinges1$22.25$22.25
Winsinn fans1$10.99$10.99
USB connectors1$8.99$8.99
Tax1$1.74$1.74
Double mag pouch2$16.89$33.78
Bluetooth media remote1$16.29$16.29
USB hub1$13.49$13.49
Blower cooling fan1$8.59$8.59
1" cube magnet1$24.99$24.99
Tax1$6.73$6.73
Decoart Paints1$26.27$26.27
Light up shoes1$35.77$35.77
wetsanding sandpaper1$8.47$8.47
mouse sandpaper1$16.95$16.95
bondo spot putty1$25.96$25.96
Action Camera1$59.35$59.35
60lb magnets1$20.13$20.13
clear shrinkwrap1$12.99$12.99
4 pin connectors1$14.96$14.96
tax1$1.63$1.63
helmet pads1$9.85$9.85
running belt1$9.52$9.52
utility chest bag1$19.04$19.04
d rings6$1.31$7.86
Bar magnets1$15.25$15.25
shoulder pads1$14.09$14.09
1" buckles1$11.65$11.65
1" elastic bands1$8.47$8.47
Gloves1$17.99$17.99
Sterilite Footlocker2$26.98$53.96
4 way stretch pleather2$13.99$27.98
 
Last edited:
You've made it this far! Thank you for reading this full build thread, as a lil treat here's some more pictures of the suit (This will be updated once I receive more photos from Otafest 2023.
Luka x Luka!
DSC_3225(1).jpg
20230519_132318.jpg


Casually sipping a bev through the Mk7 vents
20230520_155538.jpg
20230520_144307.jpg


I am no longer asking, put on the cat ears
20230520_143240.jpg
20230519_145556.jpg
20230526_152230.jpg


Something about the French Girl pose is giving me... Deja Vu
20230527_172409.jpg
20230527_180725.jpg


Thank you for tuning into the build and please ask any and all questions on things I may of missed!
 
Last edited:
DUDE THIS IS AMAZING!!!!! I LOVE THIS WHOLE BUILD!!!

Ok but how did you do that ab wrap? Is it just foam? How much mobility do you have in it?

I really like the lights you did, I hope to incorporate something like that into my suit! Do you have a link to the ones you bought? Im sure I will come back to this thread as I build my suit and need more question answered. XD

Great write up!
abwrap has been linked into the foam section, lights are included in the parts breakdown with a clickable link
 
Ah thank you very much! Those last two posts hadn't loaded in for me, guess I came a minute too soon! That's a very comprehensive list there! Well done documenting everything! I'm surprised you were able to make the abwrap so quickly! I've been working on mine for a good long while and it's a real pain getting the faux leather to look right. It's coming along, but slowly. Again, great job on your suit! You should be proud
 
Ah thank you very much! Those last two posts hadn't loaded in for me, guess I came a minute too soon! That's a very comprehensive list there! Well done documenting everything! I'm surprised you were able to make the abwrap so quickly! I've been working on mine for a good long while and it's a real pain getting the faux leather to look right. It's coming along, but slowly. Again, great job on your suit! You should be proud
Having the urethane rubber pack piece definitely made the abwrap a lot easier to contruct. On the other hand it also made it hotter and heavier so you win some and lose some lol. I still have full flexibility/mobility and can even pick stuff up off the floor and crouch!
 
I don't really know anything about vocaloids, but I love the colors! That's such a cool look! I also really love the use of the tacpad for the camera and speaker controls.
 
I don't really know anything about vocaloids, but I love the colors! That's such a cool look! I also really love the use of the tacpad for the camera and speaker controls.
Behold, nearly 2 hours of Megurine Luka mix just for you! (This is the equivalent of Schankerz linking me a My Name is Byf 4 hour Destiny lore video when I mentioned wanting to try Destiny 2)
 
This thread is more than 6 months old.

Your message may be considered spam for the following reasons:

  1. This thread hasn't been active in some time. A new post in this thread might not contribute constructively to this discussion after so long.
If you wish to reply despite these issues, check the box below before replying.
Be aware that malicious compliance may result in more severe penalties.
Back
Top