- Member DIN
- S011
Introduction
Hi all, long time no speak.
I have been a bit of a scrub lately and haven't posted anything on the 405th of my latest build, Fred 104, That's all about to change!
For those who don't know me I have made a couple of suits over the last ten years based on my multiplayer armor.
My first suit I made over 7 years ago from Pepakura and Resin/Auto body filler.This was way before EVA/3D printing were popular.
Was happy with the suit when I made it and learnt a lot about Pepakura and painting techniques from this suit.
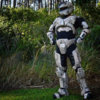
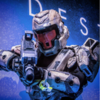
My second suit I made 3 years ago and is constructed from a mixture of EVA foam with a Pepakura and resin helmet.
I prefer to use Pepakura for the helmets as EVA helmets can look 'disfigured' in my opinion. (I have seen some amazing EVA helms, I just don't think I'm that good at foam)
The visor is a ghetto 'vacuum formed' acrylic sheet with a printed red one way vision on it.
I think this suit turned out okay, there is a lot of scrappy EVA work that I hid with a bit of weathering.
I'd like to clean up the foam work on new build.(first pic courtesy of SteamKittens)

In summary, I'd like to take what I have learnt from the last two builds and expand on that.
Please feel free to ask me any questions about my previous builds.
The plan of attack
This is the first main character I have attempted. Reason being is that I don't believe my skill set would have allowed me to build a convincing main character.
My theory is that with a main character everything has to be perfect as people will know something looks off. For example, no body knows how high the defender thrusters should be visually. But, I bet 80% of you could draw Master Chiefs thruster packs from memory!

This being said, colour, scaling, detail and form are crucial to pulling this off.
Construction
I will be using pepakura and EVA foam for the body and pepakura and resin for the helmet.
Basically I will be building each part of the armor in perakura first before dissecting them and transferring them onto EVA foam.
Doing things this way allows me to check the scaling of each piece and see how the general shape looks. Its a little long winded, but it does help me nail down the scale.
The helmet I will be using good old pep, resin and bondo. Keeping it OG.
I thought about using a 3d print. However none of the 3d printed centurion files I have seen seemed accurate to me. Besides, the H3 rogue and H4 defender helmets I had made previously came out really well, why quit while your ahead right?
Visor, not sure just yet! Most likely acrylic sheeting again.
Paint
I will be filling any gaps with quickseal then using PVA for sealing with acrylics paints on top. May even try a new secret technique during this process
I have opted for acrylics this time due to its flexibly, cost and satin finish.
To find Freds colour I have found an average colour across his body as an RGB value. I will then convert that RGB value into a PANTONE colour and take it into a paint shop to be mixed (A bit OTT I know but dam she'll be acurate)
If any one is interested I will make a video out lining my entire painting/weathering process, so please let me know if this is something you'd be interested in
Under-suit.
For the undersuit I will be using a morph suit with painted/eva detailing.
I have seen some truely breath taking work lately from people using this method.
The under-suit is something I have never attempted before and I think it finished off the whole suit.
Lets hope I don't mess this up!
Fitment
I will be sticking to industrial Velcro sewn to the undersuit to mount each piece of armor.
I like the adjustabilty of the Velcro as well as the price point. I potentially be adding EVA inside the morphsuit to add bulk and create raised mounting points.
This is untested at this stage so we will see how it goes.
I hope there is enough information here for everyone, If there is anything you'd like me to elaborate on please let me know and I'll be happy to do so.
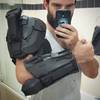
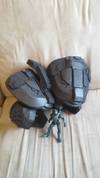
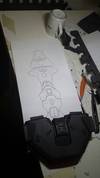
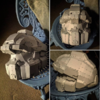
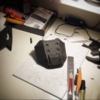
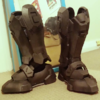
-----THIS SPACE IS RESERVED FOR BUILD PICTURES-----



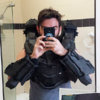
-------MORE TO COME--------
-----THIS SPACE IS RESERVED FOR COMPLETION PICTURES-----
-------STAY TUNED!--------
Hi all, long time no speak.
I have been a bit of a scrub lately and haven't posted anything on the 405th of my latest build, Fred 104, That's all about to change!
For those who don't know me I have made a couple of suits over the last ten years based on my multiplayer armor.
My first suit I made over 7 years ago from Pepakura and Resin/Auto body filler.This was way before EVA/3D printing were popular.
Was happy with the suit when I made it and learnt a lot about Pepakura and painting techniques from this suit.

My second suit I made 3 years ago and is constructed from a mixture of EVA foam with a Pepakura and resin helmet.
I prefer to use Pepakura for the helmets as EVA helmets can look 'disfigured' in my opinion. (I have seen some amazing EVA helms, I just don't think I'm that good at foam)
The visor is a ghetto 'vacuum formed' acrylic sheet with a printed red one way vision on it.
I think this suit turned out okay, there is a lot of scrappy EVA work that I hid with a bit of weathering.
I'd like to clean up the foam work on new build.(first pic courtesy of SteamKittens)


In summary, I'd like to take what I have learnt from the last two builds and expand on that.
Please feel free to ask me any questions about my previous builds.
The plan of attack
This is the first main character I have attempted. Reason being is that I don't believe my skill set would have allowed me to build a convincing main character.
My theory is that with a main character everything has to be perfect as people will know something looks off. For example, no body knows how high the defender thrusters should be visually. But, I bet 80% of you could draw Master Chiefs thruster packs from memory!

This being said, colour, scaling, detail and form are crucial to pulling this off.
Construction
I will be using pepakura and EVA foam for the body and pepakura and resin for the helmet.
Basically I will be building each part of the armor in perakura first before dissecting them and transferring them onto EVA foam.
Doing things this way allows me to check the scaling of each piece and see how the general shape looks. Its a little long winded, but it does help me nail down the scale.
The helmet I will be using good old pep, resin and bondo. Keeping it OG.
I thought about using a 3d print. However none of the 3d printed centurion files I have seen seemed accurate to me. Besides, the H3 rogue and H4 defender helmets I had made previously came out really well, why quit while your ahead right?
Visor, not sure just yet! Most likely acrylic sheeting again.
Paint
I will be filling any gaps with quickseal then using PVA for sealing with acrylics paints on top. May even try a new secret technique during this process
I have opted for acrylics this time due to its flexibly, cost and satin finish.
To find Freds colour I have found an average colour across his body as an RGB value. I will then convert that RGB value into a PANTONE colour and take it into a paint shop to be mixed (A bit OTT I know but dam she'll be acurate)
If any one is interested I will make a video out lining my entire painting/weathering process, so please let me know if this is something you'd be interested in
Under-suit.
For the undersuit I will be using a morph suit with painted/eva detailing.
I have seen some truely breath taking work lately from people using this method.
The under-suit is something I have never attempted before and I think it finished off the whole suit.
Lets hope I don't mess this up!
Fitment
I will be sticking to industrial Velcro sewn to the undersuit to mount each piece of armor.
I like the adjustabilty of the Velcro as well as the price point. I potentially be adding EVA inside the morphsuit to add bulk and create raised mounting points.
This is untested at this stage so we will see how it goes.
I hope there is enough information here for everyone, If there is anything you'd like me to elaborate on please let me know and I'll be happy to do so.
-----THIS SPACE IS RESERVED FOR BUILD PICTURES-----


-------MORE TO COME--------
-----THIS SPACE IS RESERVED FOR COMPLETION PICTURES-----
-------STAY TUNED!--------
Last edited:

