N8TEBB's Mk 7 Build!!!!!

Holy wires batman!

IMG_3561.JPG
Helmet Electronics labeled.jpg

IMG_3562.JPG
IMG_3563.JPG
IMG_3564.JPG

All this Barely fits on my head but I made it work! I still have to wear if for a while to see how comfortable it is and how long the battery lasts but I'm already loving the new setup! The fans really make a difference with the visor fogging up. I tried my hardest to breathe on it to fog it up and then turn on the fans and it clears up right away! Mic works great! And the hearing system works great too. I do hear the fans quite a bit, but they're not too loud. I think if I mounted them to foam instead of directly to the hard plastic they might be quieter... We'll decide later if I want to change the way they're mounted.
 
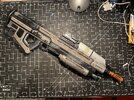
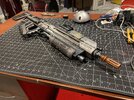
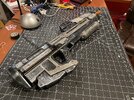
Im working on an AR that mounts to my back. It can be quite tricky to deal with a large weapon at a con if I ever need to use my hands, so hopefully a back-mounted gun will be helpful! Here’s a little demo vid:

 
Last edited:
FYI I had never got a chance to look at your build thread and let me say, your undersuit efforts makes me happy :love: Knowing you managed to do it with non-stretch fabric, you did a sick job seriously! I'm very hyped to get more pieces done for sure on my own suit, but this is a great inspiration^^ Also, really hope I'll get the chance to see your Spartan in person. Looks amazing man and know that I'm a very picky person with details >< !
 
So the transmitter worked fine, but the headphones ended up having a lot of noise. Initially I gave it 3.5V and it was noisy, but i reduced the voltage to 3V and it's crystal clear now. Funny, when I had it at 3.5V, the helmet hearing system turned in to a radio somehow, and I could hear a baseball game faintly. Note that there is no receiver in those headphones. I'd still like to know about those capacitors you mention JT
are you using the ZOHAN headphones? I'd love run those off the battery bank thats already in my helmet!
Also happy to see more magnetized AR bois! Its such a nice accessory to have and really helps free up your hands
 
The flexibility!!! Love me a back-mounted weapon. The AR looks super light, I'm assuming it's foam as well?
It was 3D printed. I finished painting it and took it to comic con this past weekend. It worked super well! Until I bumped it off my back half way through the day and it fell off, hit the ground, and shattered =(

Here is what it looked like before it broke
IMG_3625.jpegIMG_3626.jpegIMG_3627.jpegIMG_3661.jpeg

I will be making it again but out of foam this time

Also, Update on everything else! The new wiring works great! I had the fans on about 60% of the day. It was quite warm in the convention centre, so I actually got relief when I put the helmet on! FANS ARE A GAME CHANGER!!! HOW HAVE I COSPLAYED 4 YEARS WITHOUT THEM!?!? I didn't have any issues with the speaker system either. It was nice and loud with no feedback. I think the battery on the speaker was running low by the end of the day, but for those really long con days I'll put an extra battery pack in in there for it. The hearing system was very good but occasionally I would get noise when passing a wifi access point, and when I was outside on the streets I could faintly hear radio? (Yeah, I could literally hear an opera station while walking around.) CrimsonViper97 mentions in the tutorial for the hearing system that the wires don't have much insulation so this could be the problem. However, I didn't have this issue to this extent before when I powered it with a seperate battery. I have a feeling it may be because I'm powering fans with the same circuit. It's not so bad that I want to power the components with separate batteries, but if anyone knows how to get cleaner power let me know! My helmet battery was at 50% at the end of the day. Overall, the new electronics are a success!

I put a bit of Velcro on my sticker holder to mount it to my thigh. I didn't use a big enough piece so it came off a few times throughout the day, but it was easy enough to pick back up. I think I'm going to try to develop my sticker holder and incorporate it into a prop or something so I don't have to hand my hammer off to people to reach for my sticker dispenser. Hopefully I get all this sorted for C2E2 in April!
 
Last edited:
i love to see people building off of combineing and adding to each others work as we all move towards making better and more advanced cosplays
 
As promised here's some pictures that show my progress. I think if the shins and the thighs were slightly bigger, especially taller, I'd be in better shape. I still don't have the knee pads made so take that into consideration though.

What do you think?
Also, yesterday I worked on the boots! You can see them in the first and second pictures. I still have to make a cover to hide the logos but I think they came out quite nice! I'll make another post later about the boots.

Also, what are yall wearing for your under suits these days? Like, I still have to make some detailed pieces so it's not just black, but I will have to sew all that stuff to something. For the pictures I just stole the compression stuff from my chief suit, I still have to buy somth for this one.
Hey N8TEEB, I am also making a mkIIV armour and wanted to ask how you did the shins? I've made them to large and now to small and I'm wondering how you keep your shin parts in place as I can't seem to work it out, many thanks (love your project btw you singlehandedly got me into making a mkIIV suit!)
 
(love your project btw you singlehandedly got me into making a mkIIV suit!
Well thank you for saying so!

wanted to ask how you did the shins?
I have very long legs which means if I scaled the shins to be the full height they need to be, the width would be way too large. But If I scaled them to be the right width, the height would be too short. When I scaled them on the computer, I made them so they would be the right width around my legs. Here's a picture of what they looked like:
IMG_9753.JPG

You can see they they are much too short for me. To fix this, I cut the shins in half and added 5cm of foam to extend them. You can see a big difference:
IMG_9944.JPG

Here's a picture of me wearing one shin piece without the extra 5cm (blue arrow) and the other shin with the extra 5cm (red arrow)
IMG_9808 with annotations.JPG

For your convenience, here's a picture from pretty much every angle of the finished shin piece. You can tell where I made the cut and added the extra foam if you look for it.
IMG_5004.JPG
IMG_5005.JPG
IMG_5006.JPG
IMG_5007.JPG
IMG_5008.JPG
IMG_5009.JPG
IMG_5010.JPG
IMG_5011.JPG
IMG_5013.JPG
IMG_5012.JPG

Now that we have the issue of sizing out of the way, let's talk about how I keep them in place. For the most part, the shins just sit on top of the shoes. The only strap they have is one small parachute slip on the inside of the front-bottom that connects via an elastic strap to a clip on the inside of the shoe cover. This allows me to twist and move me feet, but always brings the shin back to be aligned with my boots. The strap is permanently attached to the boot cover, and clips in to the shin.
IMG_5014.JPG
IMG_5015.JPG
IMG_5016.JPG
Screenshot_537.png

Hope this helps! Let me know if you need any more angles of it.
 
Well thank you for saying so!


I have very long legs which means if I scaled the shins to be the full height they need to be, the width would be way too large. But If I scaled them to be the right width, the height would be too short. When I scaled them on the computer, I made them so they would be the right width around my legs. Here's a picture of what they looked like:

You can see they they are much too short for me. To fix this, I cut the shins in half and added 5cm of foam to extend them. You can see a big difference:

Here's a picture of me wearing one shin piece without the extra 5cm (blue arrow) and the other shin with the extra 5cm (red arrow)

For your convenience, here's a picture from pretty much every angle of the finished shin piece. You can tell where I made the cut and added the extra foam if you look for it.

Now that we have the issue of sizing out of the way, let's talk about how I keep them in place. For the most part, the shins just sit on top of the shoes. The only strap they have is one small parachute slip on the inside of the front-bottom that connects via an elastic strap to a clip on the inside of the shoe cover. This allows me to twist and move me feet, but always brings the shin back to be aligned with my boots. The strap is permanently attached to the boot cover, and clips in to the shin.

Hope this helps! Let me know if you need any more angles of it.
I cannot thank you enough!! I'll keep you posted for when I get them working what you've provided is so so helpful thank you so much!
 
It's wild how recognisable even the individual pieces of foam are to me, having built this same armor 2 years ago. You did amazing! I love how high-tech you made this and especially the stomach cover is amazing! I am still trying to find a good way of doing that that doesn't lose me the ventilation of just having a shirt there.
I'm looking to improve my shoe armor, could you show in a bit more detail how yours attach to the shoe? I got mine with elastics atm, allowing for me to take them on and off the shoe but its getting a bit floppy. Here's what I did
 
You did amazing! I love how high-tech you made this and especially the stomach cover is amazing! I am still trying to find a good way of doing that that doesn't lose me the ventilation of just having a shirt there.
Thank you!! It is a bit warm, but it's honestly not the worst thing ever. It's very bearable, even it it's a degree or two warmer
could you show in a bit more detail how yours attach to the shoe?
I basically did the same thing as you.
 

Your message may be considered spam for the following reasons:

If you wish to reply despite these issues, check the box below before replying.
Be aware that malicious compliance may result in more severe penalties.
Back
Top