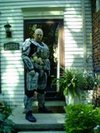
Noble Spartan(mod's/add-on's begin)

Status
Not open for further replies.
Hey thorn696! With the Viewer (Designer might be slightly different) you can find the modifier for the edge ID font size in the settings window (follow below).

(Setting) > (Other Settings) > (General Settings) tab

I actually have a quick question for you if you have a moment. I recently picked up some smoothcast toward my attempt at molding/casting but was brainstorming the use of the plastic to harden pepakura pieces. Once the sloshed plastic is cured on the inside of a paper piece would you be able to remove the paper from the plastic (if not, maybe a sealant layer between the paper and plastic might help to release the two). My intent is to get rid of the paper before shaping the piece. With your familiarity with the material (evidenced by this great build of yours) I would appreciate your opinion.

All is looking well with your build. I feel the helmet is really going to cap off the armor (pun). Godspeed.


Thanks for the intell. As for you're concept I found that a light coat of smooth cast on the out side of paper held everything together then all other work was done on the inside of the paper.

Now for the bad part, every time I sanded and/or ground down below the paper lev Is when I ended up with that oily secretion problem. I was able to find a work around for this and fix my build but I'm not sure how well this would work with you're molding concept.

All that said I think (I was never able to confirm this) That I did two things wrong. One was that 321 has a 10 min work time max, but a 30 min. cure time. Ordering another type of smooth cast would fix that for you. The next Part is going past the the Skin which in this case was at the paper lev. SO yes you would need a a sealant/mold release for that to work.

Now I ask you this Why would you want to us pep as a Temp mold? Yes that question sound harsh but I had to ask it before I could give my opinion. I myself would leave the paper on. Why. Because for each part were I sanded down to the paper lev came out very smooth. Yes sir the paper adsorbed the smooth cast perfectly and made the perfect skin for my project, everything else was added to that skin.

Ok. All that said. If I was to do this all over again what would I do differently? Well using the same style materiel's I would 1 coat smooth cast on the inside and out for the perfect shell and Then I would use Bondo Glass mixed up into a rondo on the inside. That mixture give both strength and ease of use...( It is still as heavy as Reg. Rondo)

I only used the smooth cast because of the low toxic and/or low smell, and it was winter in MI.

Well I hope this gives you enuff info to come up with a good concept. Just start small Smooth Cast cost allot.

Oh!! By the way nice Pun. The new size of 270 (and hay I can read this one)is printed and sitting on my desk.:D


Your armor is beyond inspiring. I just seen your photobucket link and wow...
Just wow.

Amazing. I bow to thee.

Why thank you PSberetta. for the support.

Every comment helps either as encouragement or as a means of knowing I need to change something.


Edit: I just wanted to add something here. I feel the need to explain What Smooth Cast 321 is to those other readers whom have never worked with this type resin. Smooth Cast 321 is a Casting resin....What dose this mean to the layman well This product is designed to be poured into a mold and cast. When used properly it will turn out a perfect to near perfect part every time. How ever it is NOT designed to be Worked, Tooled, or overly sanded. This resin needs to skin in order to come out right. Skin...what is that? Well the best way for me to describe that would say look at a loaf of bread. notice how you have the nice hard, smooth crust on the outside. That would be the skin and the soft sponge part would be like.... Well the inside. Even though Smooth Cast is not soft per say it is sponge like. This is why working/tooling it causes problems. And as to the horror of any one whom has used a casting resin and not had it skin right, that is when you get that really bad looking surface. So remember to mix it well and agitate you're mold when pouring a casting resin to remove all the air bubbles and get a nice smooth skin.

Now with that in mind if you are looking to work/tool a resin, Smooth-On products dose have other resins. And then their is Fiberglass resin, Bondo, Rondo,and some Epoxy resins all will work/tool nicely for detail work and ARE designed as finish product. Finish products can be used by them self or with other products to create almost any thing, But they for the most part a high density product. ( Weigh allot.)

I hope this help those of you whom are looking at all the different ways and/or resins out there to make you're armor the best that you can. Till the next update....build on.
 
Lacking motivation today so I've been looking thru the forms for bit, And I have to say there allot of great new builds going on out there. And of course I visited some of the great builds of old. It's amazing how many there are out there. Then there's Marshon and LongShot-X's ... What can I say if that don't get you motivated nothing will. So here I am starting the bulk cut on the Mark V(B) helm and with any luck I'll get some pic's up by Next weekend. Till then Have a great summer day. :cool

Here is a few pic's for the paint so far.

th_IMAG0570.jpgth_IMAG0569.jpgth_IMAG0568.jpgth_IMAG0567.jpgth_IMAG0565.jpgth_IMAG0564.jpgth_IMAG0563.jpgth_IMAG0561.jpg

I will try to get some pic's done outside in natural light to get a true color look at the parts. Sorry cheap 12MegPix camera. I'm missing my old 35mm canon sure shot about now.
 

Attachments

  • th_IMAG0570.jpg
    th_IMAG0570.jpg
    7.3 KB · Views: 188
  • th_IMAG0569.jpg
    th_IMAG0569.jpg
    7.3 KB · Views: 185
  • th_IMAG0568.jpg
    th_IMAG0568.jpg
    7 KB · Views: 176
  • th_IMAG0567.jpg
    th_IMAG0567.jpg
    7.7 KB · Views: 190
  • th_IMAG0565.jpg
    th_IMAG0565.jpg
    6.8 KB · Views: 182
  • th_IMAG0561.jpg
    th_IMAG0561.jpg
    6.8 KB · Views: 179
  • th_IMAG0563.jpg
    th_IMAG0563.jpg
    6.8 KB · Views: 202
  • th_IMAG0564.jpg
    th_IMAG0564.jpg
    5.9 KB · Views: 200
And you said my shoulders looked good?! Awesome paint man, I can't wait to see everything all painted!


Thanks for the comment. Its getting there nicely, I'm liking how dark the new paint is making it look. It dose look a little different on my end tho, My camera just doesn't do it justice. I will post more paint pic's next week. And I'll do a little more pep on the MV(B) Helm.

In the pictures in the above post.

So you like that War torn look do ya.....Me too. so here we go.

Ok so what it is you're seeing is coats of black wash applied. This is to get the base shadows and a smoke damaged look going.

And this is what comes next.

For the next coat of paint I will be adding the Brown/yellow washes to age the parts. after that will be the fine line detailing and decals. Then weathering (mud, dirt, ect.)Then the white dry brushing to add shading. Final paint will be 3-4 coats of flat clear coat to seal it


And as always, Please feel free to leave any and all input, comments, criticisms, or suggestions. For they are most welcomed and appreciated. (they also keep me from triple posting) Thanks for watching my build.

Edit: this post was edited to answer the questions in IM on my paint style/choices.
I'm using Sponges. chisel tip, round tip, flat tip brushes. my finger and rags to rub paint on/off to get this type look.
 
Last edited by a moderator:
Paint as of today. Added desert sand to the parts to mellow out the colors and/or tone down the parts.

th_IMAG0578.jpgth_IMAG0577.jpgth_IMAG0590.jpgth_IMAG0589.jpgth_IMAG0588.jpgth_IMAG0587.jpgth_IMAG0585.jpgth_IMAG0583.jpgth_IMAG0591.jpgth_IMAG0580.jpgth_IMAG0592.jpgth_IMAG0593.jpg

And as always, Please feel free to leave any and all input, comments, criticisms, or suggestions. For they are most welcomed and appreciated. (they also keep me from triple posting) Thanks for watching my build.
 

Attachments

  • th_IMAG0578.jpg
    th_IMAG0578.jpg
    7 KB · Views: 185
  • th_IMAG0588.jpg
    th_IMAG0588.jpg
    4.9 KB · Views: 199
  • th_IMAG0590.jpg
    th_IMAG0590.jpg
    4.8 KB · Views: 205
  • th_IMAG0589.jpg
    th_IMAG0589.jpg
    5.2 KB · Views: 175
  • th_IMAG0577.jpg
    th_IMAG0577.jpg
    7.1 KB · Views: 177
  • th_IMAG0585.jpg
    th_IMAG0585.jpg
    4.7 KB · Views: 184
  • th_IMAG0583.jpg
    th_IMAG0583.jpg
    4.3 KB · Views: 172
  • th_IMAG0591.jpg
    th_IMAG0591.jpg
    5 KB · Views: 191
  • th_IMAG0580.jpg
    th_IMAG0580.jpg
    5.1 KB · Views: 186
  • th_IMAG0587.jpg
    th_IMAG0587.jpg
    4.2 KB · Views: 196
  • th_IMAG0592.jpg
    th_IMAG0592.jpg
    4.4 KB · Views: 203
  • th_IMAG0593.jpg
    th_IMAG0593.jpg
    5.3 KB · Views: 188
Well its Time for the next update, It wont let me add any more pic's to my last post so here go 3 in a row. I might have to look into getting this build moved just to keep from having 4 post in a row. Any MOD's out there what do you think Can we get this build moved out of the Noob section, I think I've shown that I'll finish it. ;) Thanks.
Chest painted, shoulders strapped, Thighs strapped, And reworked the foam on the thighs.

th_IMAG0600.jpgth_IMAG0598.jpgth_IMAG0599.jpgth_IMAG0594.jpgth_IMAG0601.jpgth_IMAG0602.jpgth_IMAG0606.jpg

I also threw in the Sponge stage of the back just so you could see the dark base coat I'm using.
And as I get closer to that dead line, The more I believe that I should have a good product to show off.

And as always, Please feel free to leave any and all input, comments, criticisms, or suggestions. For they are most welcomed and appreciated. (they also keep me from triple posting) Thanks for watching my build.
 

Attachments

  • th_IMAG0600.jpg
    th_IMAG0600.jpg
    5.1 KB · Views: 199
  • th_IMAG0598.jpg
    th_IMAG0598.jpg
    5.4 KB · Views: 179
  • th_IMAG0599.jpg
    th_IMAG0599.jpg
    5.5 KB · Views: 189
  • th_IMAG0594.jpg
    th_IMAG0594.jpg
    6.9 KB · Views: 199
  • th_IMAG0601.jpg
    th_IMAG0601.jpg
    5.1 KB · Views: 173
  • th_IMAG0602.jpg
    th_IMAG0602.jpg
    4.8 KB · Views: 185
  • th_IMAG0606.jpg
    th_IMAG0606.jpg
    5.8 KB · Views: 199
i love your paint job by the way....why is the lighting so.....green??? someone vomit on your camera??? and do you print your own decals or what?
 
I really like your paint. It has that gritty, I work for my money kinda feel to it. Kudos and well done sir. I'm in the bondo stage of my Mk VI. I just discovered that my brother has a pneumatic sander... And I rejoiced. Anyway, thanks for sharing your build with us. It's inspirational.
 
Nice progress on your Spartan! Loving the paint and detailing.
I agree... this should be moved out of the noob section.
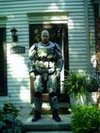
Keep up the excellent work. I can't wait to see all this on you for some WIN!

Cheers!
 
The build looks great Thorn. Everything is coming together really well. Paint, detailing, add-ons, there really is a lot of excellent work here. I agree with moving it out of the noob section. Keep it up
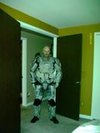
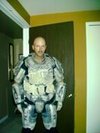
 
Great job man, you have made alot of progress and the paint job looks great, your getting close to completion and now your at the fun part, also I agree with the others you need to get out of the noob section, I just it
 
You are making some good progress! Keep it up, get it done.................git-er-done. XD haha You don't have that much left to do it seems. Painting seems to be the easy part and it looks like you are done with most of the building. Just keep on pushin'. You can do it! :D

Do you think you might be attending the Detroit Fanfare or Youmacon? We are hoping to go to the DFF since Bruce Campbell will be there. Thie MAIN reason my husband even wants to go. XD haha
 
i love your paint job by the way....why is the lighting so.....green??? someone vomit on your camera??? and do you print your own decals or what?

Sorry about the green overcast it the combo of cheap 12Mp Vivitar (ViviCamT328) camera and 150wat (yellow overcast)light in my home office I will try and get better pic's later.

As for my Decals Yes I print my own on card stock, Then I use a blade to cut them out witch in turn makes a great stencil. Thanks Its been a long time since I did a multi terrain camie paint job, I'm glade you liked it.

I really like your paint. It has that gritty, I work for my money kinda feel to it. Kudos and well done sir. I'm in the bondo stage of my Mk VI. I just discovered that my brother has a pneumatic sander... And I rejoiced. Anyway, thanks for sharing your build with us. It's inspirational.

Thank you, I'm going for that " that's all you got" look I'll be adding detail lines and mud after I give it one coat of clear coat. As for the sander, Yes you will love having that puppy around. Mine died so I hand sanded everything so far. I'll have to get another before starting helmet.

Nice progress on your Spartan! Loving the paint and detailing.
I agree... this should be moved out of the noob section.

Keep up the excellent work. I can't wait to see all this on you for some WIN!

Cheers!

Thank you LongShot-X, Coming from you that means allot. I find myself looking at you're build and seeing how much fun you seem to have with it whenever I need motivation. Thanks again.

The build looks great Thorn. Everything is coming together really well. Paint, detailing, add-ons, there really is a lot of excellent work here. I agree with moving it out of the noob section. Keep it up

Thank you, I've still got a ways to go but people like you whom keep popping out great updates every other day help keep my pace going.

Great job man, you have made alot of progress and the paint job looks great, your getting close to completion and now your at the fun part, also I agree with the others you need to get out of the noob section, I just it

Oh joy....the Helmet and boots.......hehe thanks man.

You are making some good progress! Keep it up, get it done.................git-er-done. XD haha You don't have that much left to do it seems. Painting seems to be the easy part and it looks like you are done with most of the building. Just keep on pushin'. You can do it! :D

Do you think you might be attending the Detroit Fanfare or Youmacon? We are hoping to go to the DFF since Bruce Campbell will be there. Thie MAIN reason my husband even wants to go. XD haha

Thanks, Yes I will be at Youmacon. I might stop at Detroit Fanfare just to look, but My build wont be done by then so no costume. And Yes I love the painting part, it's what makes this project worth all the time and work.

P.S. Bruce Campbell is a great guy to meet, you'll love it if you get a chance to talk to him.

Next weeks update will be working on the thighs and adding some shadowing to the pouches, And of course more cutting on the Helmet

And as always, Please feel free to leave any and all input, comments, criticisms, or suggestions. For they are most welcomed and appreciated. (they also keep me from triple posting.) ;) Thanks for watching my build.
 
Hey Thorn, I haven't checked out your build in a long time while away, but I love the progress I see now! Excellent work, looking forward to the finished product, which doesn't seem to be too far off now. :)
 
Hey Thorn, I haven't checked out your build in a long time while away, but I love the progress I see now! Excellent work, looking forward to the finished product, which doesn't seem to be too far off now. :)

Thanks Spitfire, I'm just trying to match you're greatness. I'm just sitting down to work on the paint for the thighs and pouches, might even get some more cutting done on the helmet this weekend.

Someone ask me for a tip on painting so here's one for doing large amounts and/or parts. If you find you're self mixing paints to come up with a color it helps to use squeeze bottles to mix it in, that way you have enuff to do multiple parts of the same color. It'll save you the time and guess work of trying to match you're color each time you start a new part.
 
I love the work you've done! its good to see another fellow fan of the "been to hell and back" kind of armor.

Keep up the great work!
 
I love the work you've done! its good to see another fellow fan of the "been to hell and back" kind of armor.

Keep up the great work!

Thanks. I only have a few more coats of paint to go to pull it off. That said here is a few more pic's of this weekends painting. I'll post a pic of that at a later date.

Now with this last test fit I have also found out that there is no way that I can get into this solo, Just like a Spartan I need someone to help suit-up.


th_IMAG0617.jpgth_IMAG0619.jpgth_IMAG0620.jpgth_IMAG0618.jpgth_IMAG0616.jpgth_IMAG0623.jpgth_IMAG0624.jpgth_IMAG0629.jpgth_IMAG0628.jpgth_IMAG0626.jpgth_IMAG0625.jpg

Added a few more pic's of the build. Also Had to rework the knee caps two foamie's were not strong enuff, so I added the thicker Yoga pad to it. Worked allot better. Will post pic's of new knee pads at a later date.

And as always, Please feel free to leave any and all input, comments, criticisms, or suggestions. For they are most welcomed and appreciated. (they also keep me from triple posting.) Thanks for watching my build.
 

Attachments

  • th_IMAG0619.jpg
    th_IMAG0619.jpg
    6.1 KB · Views: 151
  • th_IMAG0620.jpg
    th_IMAG0620.jpg
    6.6 KB · Views: 178
  • th_IMAG0617.jpg
    th_IMAG0617.jpg
    5.8 KB · Views: 153
  • th_IMAG0624.jpg
    th_IMAG0624.jpg
    5.6 KB · Views: 173
  • th_IMAG0623.jpg
    th_IMAG0623.jpg
    4.7 KB · Views: 158
  • th_IMAG0616.jpg
    th_IMAG0616.jpg
    6.4 KB · Views: 177
  • th_IMAG0618.jpg
    th_IMAG0618.jpg
    6.1 KB · Views: 161
  • th_IMAG0629.jpg
    th_IMAG0629.jpg
    8 KB · Views: 170
  • th_IMAG0628.jpg
    th_IMAG0628.jpg
    7.9 KB · Views: 152
  • th_IMAG0626.jpg
    th_IMAG0626.jpg
    4.9 KB · Views: 167
  • th_IMAG0625.jpg
    th_IMAG0625.jpg
    5.9 KB · Views: 161
I was able to put my armour on by myself last night, though it was very awkward taking it off. I know I won't be able to buckle any straps by myself once those are installed. But hey, like you said, just like a real spartan.

It's looking really good man. It's gonna look great painted.
 
Wow, can't believe I haven't seen your thread! This is some great work Thorn, looking forward to seeing it complete, it's so close!
 
Status
Not open for further replies.
Back
Top